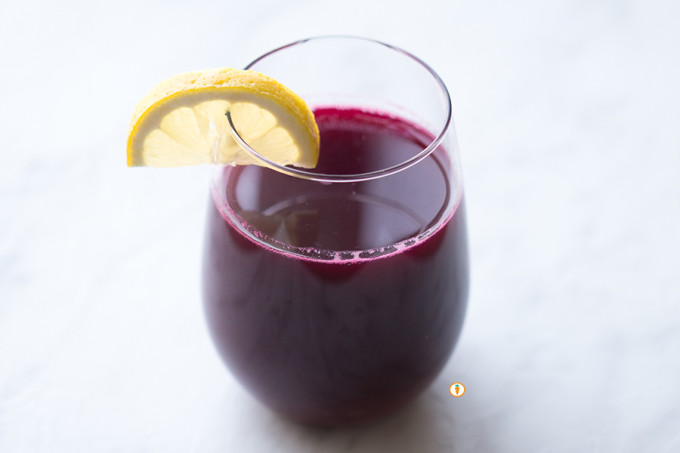
Refreshing Beet, Cucumber and Apple juice

p.s. recipe for this super awesome juice is coming your way (and you don't need a juicer)

p.s. recipe for this super awesome juice is coming your way (and you don’t need a juicer)

I have had a ton of recent produce donations from generous friends sharing their garden harvest. One time, I was fortunate enough to receive far too many beets than I even knew what to do with. I decided to get a little crafty one hot summer day. I was craving a cool and refreshing drink so I took to my fridge and experimented with making a juice in my Vitamix blender.

I tried this two ways. First I blended all the ingredients together but it was a wee bit pulpy for my liking. The grittiness of the beverage wasn’t something I was going after. You may like it though, plus all that fibre is totally good for your health. The second time I placed the blended concoction through a nut milk bag and BOOM. I nailed it. The result is a cooling and slightly sweet beverage–perfect for a hot day and something different from the litres of water I tend to consume each day. Tip: if you don’t have a nut milk bag, I found using a sieve worked just as well!

Refreshing Beet, Cucumber and Apple juice
 
Prep time
Total time
 
Serves: approx 3 cups
Ingredients
  • 1 cup water
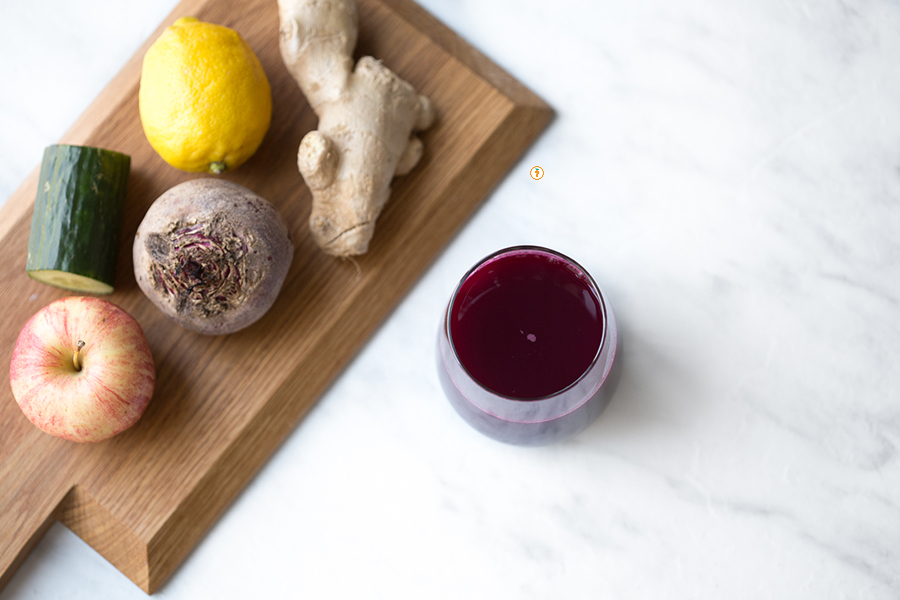
  • 1 beet, washed, peeled and chopped into 1" pieces
  • 4" piece cucumber, chopped into 1" pieces
  • 1 small apple, chopped into 1" pieces
  • Juice of half a lemon
  • 1" knob of ginger
Instructions
  1. Place everything in a high-powered blender. Depending on your blender you may have to use a low setting and gradually increase to a higher setting. Or, use an ice crusher setting to break apart the beet.
  2. Blend until it is as smooth as possible.
  3. Optional: strain out as much or as little of the pulp as you wish using a nutmilk bag or a sieve.
  4. Cool and enjoy!

While juice isn’t something I reach for on a daily basis, I do recommend clients look for products not made from concentrate. Another tip to keep in mind is that the overarching recommendation is that infants, toddlers and children should not have more than 125 to 175 mL (4 to 6 oz) of juice per day. This recipe makes a total volume of approximately three cups so I find I’m usually sipping this over a few days.

Food photography done by the talented Ceone Dyck. To learn more about Ceone click here or follow her on Facebook.

Don’t forget to follow Carrots and Cake on Instagram to see tiny square snap shots of my life.

                 – With Love, Carrots and Cake,

Carrots and Cake Nita Sharda

Turmeric Milk aka Haldi Ka Dhood

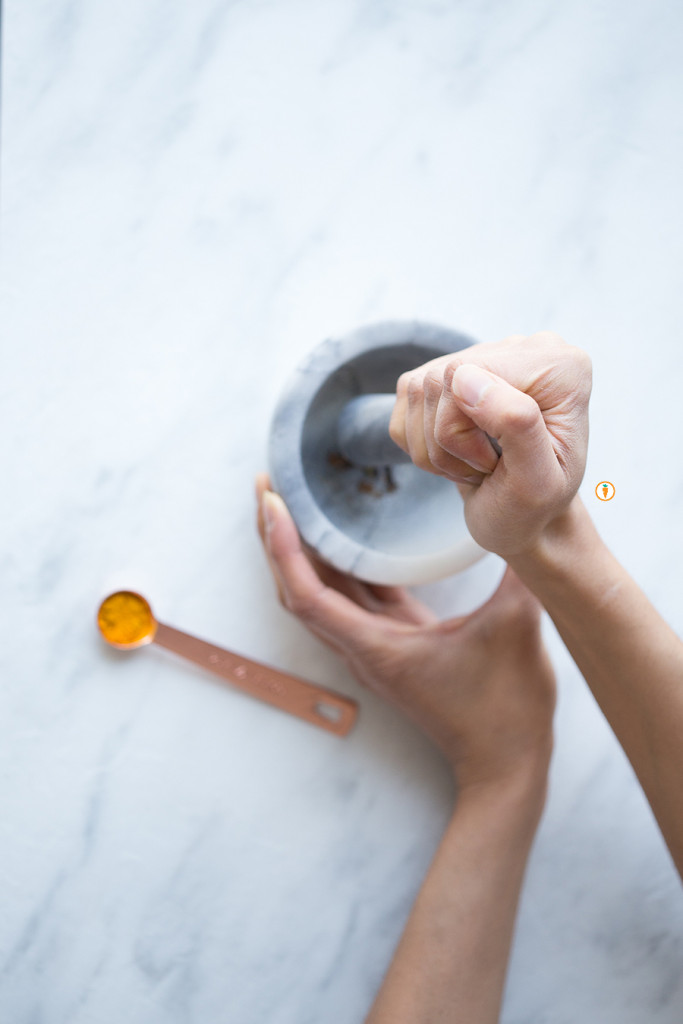
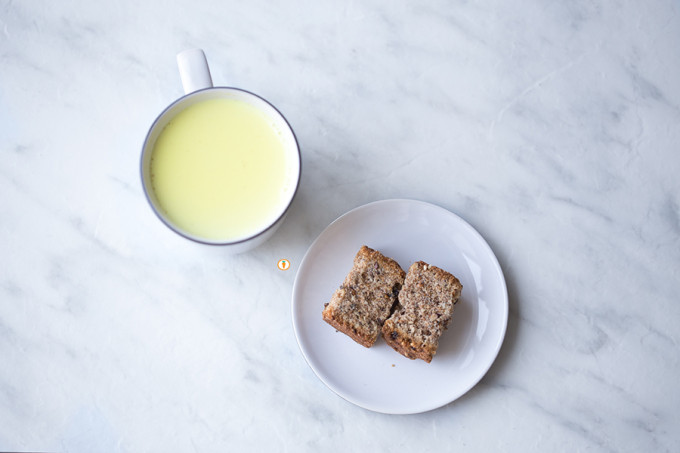
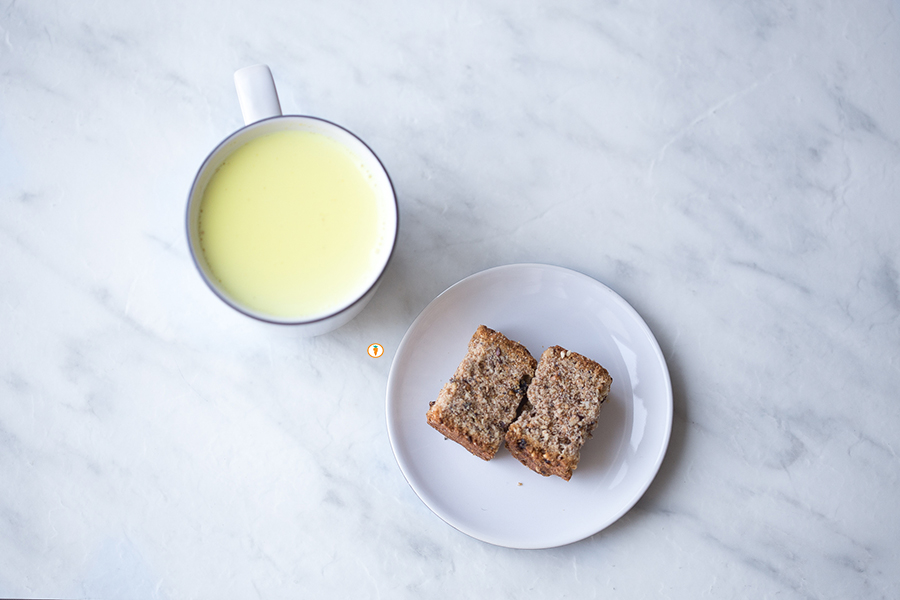
Tumeric Milk_birds eyeYeah, that’s right. Turmeric milk. It’s totally all the craze right now but ironically enough, this recipe for warm milk is close to home for many East Indians. Turmeric milk, also known as “golden milk” or in Hindi haldi ka dhood is incredibly nourishing. Ayruvedic experts believe it helps with the prevention of common coughs, colds and insomnia (or so my mom tells me). The star ingredient in this recipe is turmeric which we now KNOW is anti-inflammatory, chalk full of antioxidants and also has anti-bacterial properties to it.

But that’s not the only reason why you should try this recipe. Try it, because it’s delicious, easy and a feel-good kinda bevy.

It’s all things cozy and relaxing.

Tumeric Milk_handsHere’s my version of haldi ka dhood: 

Turmeric Milk aka Haldi Ka Dhood
 
Prep time
Total time
 
Serves: 1 cup 1 serving
Ingredients
  • 1¼ cup milk
  • ½ tsp turmeric (or as much as tolerated)
  • ⅛ tsp ground cinnamon
  • ⅛ tsp ground cloves
  • ⅛ tsp ground cardamom
  • Drizzle honey *optionals
Instructions
  1. Pour milk into a small pot and turn onto low heat. Stir in the turmeric powder, cinnamon, cloves and cardamom.
  2. Bring to gentle boil and allow to simmer for 3 - 4 minutes. Be sure to keep a watchful eye on the pot, you don't want to burn the milk.
  3. Pour into a cup and sweeten with honey.
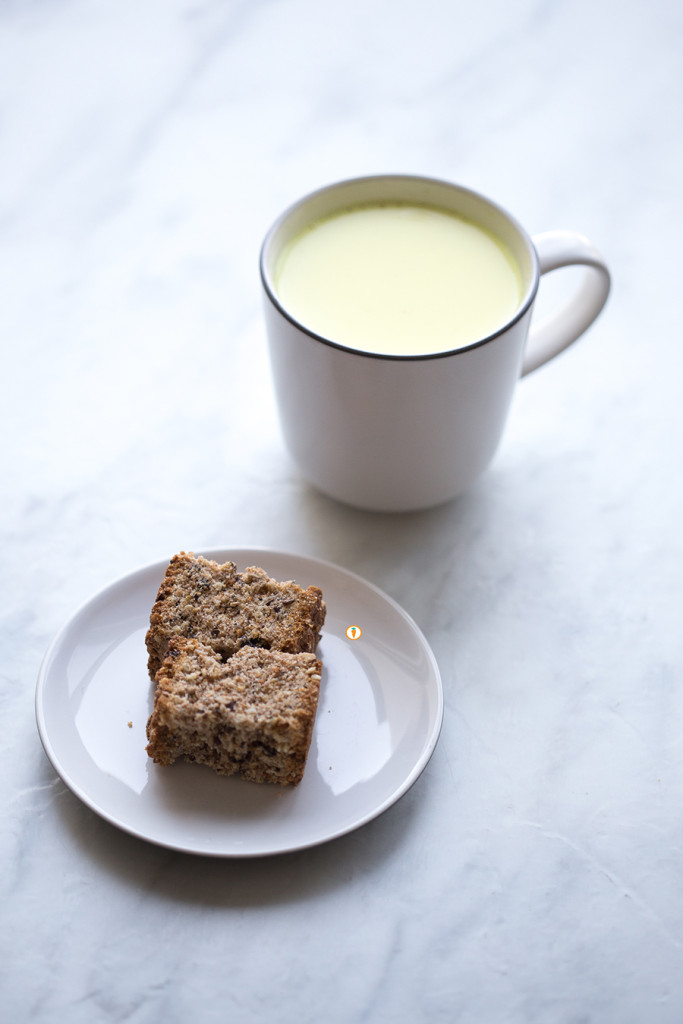
Tumeric Milk_cupFood photography done by the talented Ceone Dyck. To learn more about Ceone click here or follow her on Facebook.

Don’t forget to follow Carrots and Cake on Instagram to see tiny square snap shots of my life.

                 – With Love, Carrots and Cake,
Carrots and Cake Nita Sharda

Meal Planning 101

So you’ve filled your fridge full of fresh groceries on the weekend and you’re feeling ready to crush the week. Fast-forward a couple days, you get home starving from a long day, open up the fridge and wish the meals could materialize themselves. Alright take-out, you win this time.

We’ve all been there – in a perfect world, we’d be able to whip up a delicious meal from scratch every day. But you and I both know that in reality, ain’t nobody got time for that!

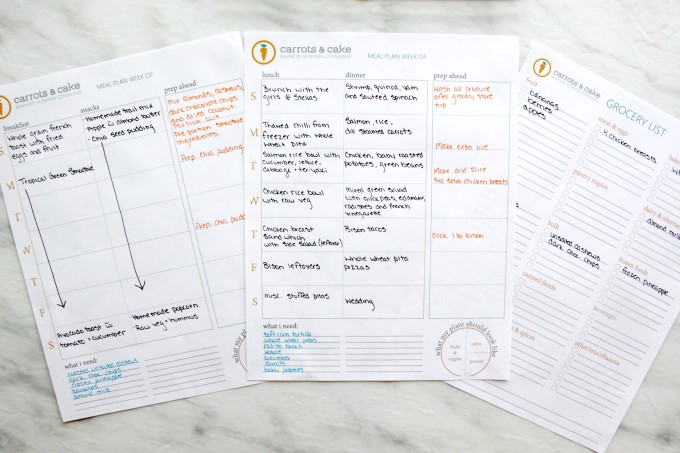
If you’re the type of person who rolls with the punches, that’s totally cool! But if you’re wondering how you can improve your daily eating habits, and the words MEAL PREP freak you out a bit, don’t worry – we’ve got your back! Meal planning does take some time, but it’s not as daunting as you think. Our free printable below is a great way to help you visualize and plan out your meals and tasks for the week.

Here are some tips to help you get going:

meal prep 5

Planning ahead makes CENTS

Save your hard earned dollars – look through flyers (print or online) for the best deals that week – then plan your meals around those ingredients. Some grocery stores now have apps that will show you their special offers for the week. Plan for one meatless meal a week (Check out this economical and tasty mac and cheese recipe.)

Stock Up

Keep your pantry and freezer stocked with basics that will allow you to whip up a quick meal when you’re in a time crunch. This can include whole-grain pasta, rice, lentils and beans, canned fish, and frozen fruit and vegetables.

Cook once, eat later

Make extra portions of the same ingredient that can transformed into something else later – for example, instead of cooking up one chicken breast for dinner, make a couple more and refrigerate for later in the week. It can easily be added to wraps or pasta. Cooked quinoa can be a side dish, tossed into a salad or stir fried. Making extra doesn’t necessarily add time to your prep, and it will save you time down the road.

The freezer is your friend

On that note, you can cook extra, but you don’t have to be eating leftovers all week. Freeze some extra portions, and you’ll thank yourself a couple months down the road when you’re tempted to call up your takeout spot. This hearty meat marinara freezes beautifully – just cook the pasta the day of! You can also portion a few meals individually for your own “microwave meals” to bring to work, or to heat up after a busy day.

Enlist Help

Don’t have much space in the freezer? Grab a friend and cook together! Sharing recipes help to keep things fresh. You can split the cost of groceries and the workload while enjoying each other’s company. This is also a great way to get the kids involved – have them help with washing and prepping produce, and measuring ingredients.

Let Your Appliances Do The Work

You don’t need to stand in front of the stove for hours. Take advantage of time-saving appliances such as a slow cooker, the oven, rice cooker or pressure cooker. Try baking chicken or fish instead of pan-frying – or try this slow cooker recipe for honey ginger chicken)!

Balance, balance, balance

Eat whatever you feel like – really. Don’t stress yourself out trying to plan an entire week’s worth of “clean eats” (What is that anyway? Food is food, people!). Just aim for each meal to consist of ½ veggies, ¼ whole grain or starchy vegetable, and ¼ protein. It’s all good.

Get organized

Figure out days that work best in your schedule for menu planning, grocery shopping, and meal prepping. Keep an ongoing list of recipes you’d like to try (hello pinterest!) and grocery list handy.

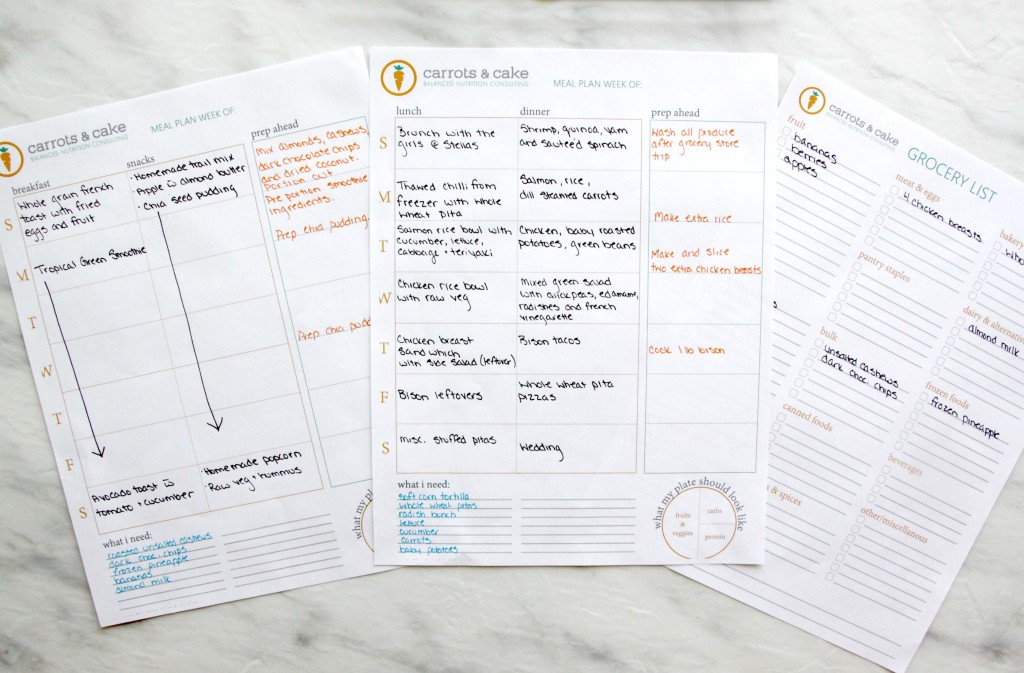
Alright, now that we’ve got the basics down pat – use this free printable to help you plan your meals and groceries for the week. Set aside a couple hours one day a week to prepare as much as you can ahead of time – chop up veggies for salads and cooked recipes once and divvy them up as needed. Soups and stews can be easily made ahead of time (and taste better the longer they sit!) You can also get breakfasts done for busy mornings – try these recipes for overnight oats or breakfast muffins.

meal prep

Happy meal planning!

Click here to download meal planning tools:

Photography done by Johanna Adriaansen.  To learn more about Johanna click here or follow her on Instagram.
Please note the content of this post was written by Christy Lai, BSc. Human Nutritional Sciences.

Don’t forget to follow Carrots and Cake on Instagram to see tiny square snap shots of my life.

                 – With Love, Carrots and Cake,

Carrots and Cake Nita Sharda

Breastfeeding is Hard

Nita Sharda, Carrots and CakeThere has been so much on my mind over the last several months that I’ve been wanting to share. Unlike other posts, this one tugs a little deeper into my heart, because well, things have changed. I have changed. I’m Jaidev’s mom now, and that my friends is a game changer, kay?

While I don’t quite know where to start, I’m going to start with this bold and matter-of-fact statement:

breastfeeding is f*cking hard.

Wow, that felt liberating.

During my months of carrying a gorgeous belly I heard countless stories from women who shared their birthing experience with me. And then when it came down to show-time, I brought it on. My birth was beautiful, I felt powerful, strong and none of it ever felt impossible. I also heard a lot of comments about sleepless nights, babies that cry non-stop and bodies that were left broken post-delivery. I heard it all (and appreciated it). But during those nine months that I carried Jaidev no one ever spoke to me about how challenging breastfeeding was going to be.

I’m a Registered Dietitian by profession but also a high-achiever by nature. I set out with the intention of breastfeeding my baby but I always remained open to the idea of having to offer my babe formula if necessary. Because sometimes, breastfeeding just doesn’t work the way the textbook says it will.

When Jaidev was born, he was immediately placed on my chest. His cries were like music to my ears. I remember slowly motioning him towards my breast and I expected him to magically open his mouth nice and wide, clench and start sucking. That did not happen. Instead my tiny and tired baby cried at my breast and it took him a long, long, long time to latch. After three days in the hospital and two visits from a lactation consultant we were sent home with bottles of formula, instructions to offer finger feeds with pumped milk and/or formula and a suggestion to purchase a nipple shield. We did all of that.

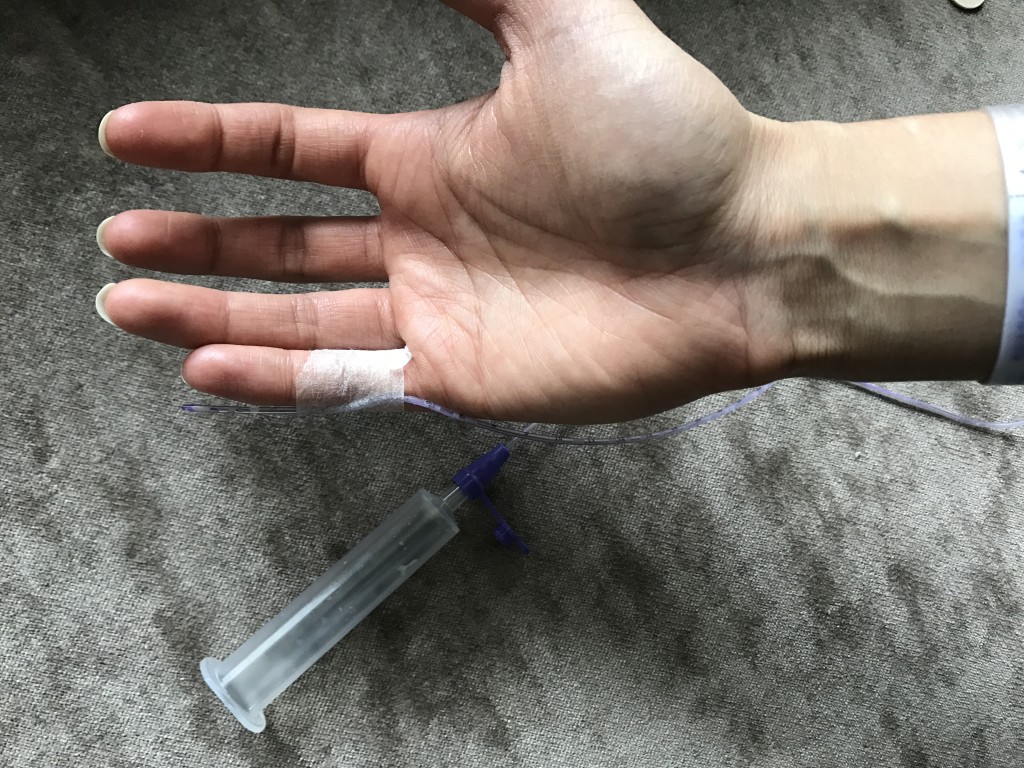
This is what's involved with finger feeding. I would pour pumped milk/formula in the syringe and then Jai would suck on my finger to retrieve his feeding. This taught Jaidev to "suck" but was a lot of work for mummy.

This is what’s involved with finger feeding. I would pour pumped milk/formula into the syringe and then Jai would suck on my finger to retrieve his feeding. This taught Jaidev to “suck” but was a lot of work for mummy.

I remember being at home – pumping breastmilk to stimulate production, finger feeding formula to encourage Jaidev to suck and then having him on my breast using a nipple shield to maintain skin-to-skin contact. That was a lot to focus on and as the days progressed I was starting to worry that breastfeeding wasn’t going to be in my deck of cards. Thankfully, a visit from our local Public Health Nurse helped to calm my nerves and rebuild the confidence I needed to trust my body. My next instruction was to stop finger feeding, give the pumping a break and focus on Jaidev sucking on my breast using the nipple shield. I kept all of that in mind.

The next several days were a mixture of magic and pain. Jaidev did so well using the nipple shield, I was so proud of my little guy. But then the cluster feeding started. NO ONE EVER TOLD ME ABOUT CLUSTER FEEDING. If post-birth recovery wasn’t already challenging, cluster feeding really f*cked shit up. Cluster feeding is when newborns space feedings closer together at certain times of the day. It’s also known as “bunch feeding”. After being 5 days old, Jaidev cluster fed every. single. night. for two to three hours. This lasted for almost three month and during those hours he wasn’t a very happy baby.

Initially, I was convinced my child was missing his biological hunger/fullness cues. Those hours of cluster feeding would typically take place late at night when the rest of the house was asleep. That time with Jaidev was really memorable and very special for us; it was just me and him but it was also extremely challenging. I was exhausted, my back was in pain, my pelvic muscles were healing, my nipples were raw and sleep was non-existent.

During the cluster feeds my baby would cry and cry at my breast for milk. I didn’t get it. How could he be so calm at my chest one minute and then so upset? Was this going to last forever? How was I going to survive? It felt like I was in a tunnel with no end in sight. I worried he was somehow starving (he wasn’t) and would offer ad lib formula through a bottle. The bottles of formula would help settle Jaidev but I also knew that if I was going to offer top up every night, I was going to risk not giving my breasts an opportunity to build a proper supply.

My goal was to exclusively breastfeed my child. I decided that in order to stay motivated I needed to see the end from the beginning; if I wanted breastfeeding to work for us then I needed to give it a fair shot before deciding to throw in the towel. I worked on small goals – trying to get through day by day. And then week by week. And now month by month.

I relied heavily on my tribe of women for support. My sister, friends and colleagues were all sideline cheerleaders encouraging me to do what felt right. There were women who completely formula fed, others who exclusively pumped, exclusively breastfed and some who did a mixture of it all – each of them reminded me to stay strong, confident and to check-in with my own emotional and mental wellbeing.

Fast forward five months: Jaidev and I have an amazing breastfeeding relationship. In my experience, we couldn’t have been successful at maintaining this relationship without the nipple shield. It was our saving grace. I worried Jaidev would always need the shield or that he wouldn’t reap the full benefits of breastfeeding with it, but I was wrong. Around the time he turned four months he was able to latch directly on my breast. I still remember that exact moment when he latched directly onto my nipple, my eyes welled up with tears, I whispered “we did it” and called my husband over to witness the magic. I was ecstatic that I wouldn’t have to rely on the nipple shield anymore.Nita Sharda

It’s interesting how life works. I spent weeks feeling almost burdened by breastfeeding and now I’m saddened by the thought of him weaning. Apart from being able to supply my child with antibodies, anti-allergens, growth factors and anti-viruses via breastfeeding, I’m going mostly miss the way he holds my hand, his smiles when he takes a break f or the way he looks so peaceful in my arms. I’ll be sad when this happens, but I’ll let Jaidev take the lead and follow along.

What’s the point here? I wanted to communicate the challenges of breastfeeding that often get over shadowed by the enormous work of delivery. I want to share my experience in hopes that perhaps someone out there can be better prepared or perhaps someone else can relate. It comes as no surprise, I’m an advocate for breastfeeding, but always remember this:

Breastfeeding does not trump a mothers mental health.

If you’re feeling challenged by breastfeeding, need a confidence boost or even some support – go get it. And if it’s not working, then that is okay. There are other options available to help you nourish your baby so that you can work on being the super mama that you are.


Don’t forget to follow Carrots and Cake on Instagram to see tiny square snap shots of my life.

                 – With Love, Carrots and Cake,

Carrots and Cake Nita Sharda

Heart Work and some Heart Talk

Well, hello. You’re probably wondering, where has that Nita been? Trust me, some days I ask myself the same question. The truth is, I’ve been working on a little do-it-yourself project these days that finally came to fruition on January 20, 2017. On this date, we happily welcomed our first babe into the world, Jaidev Abbi Sharda. With a pregnancy that had me feeling beyond exhausted and sick I decided it was time to focus my energy on caring for myself during those nine months. And now that Jai is here, self-care is still top of mind but this special time with my newborn will be short lived so I’ve imersed myself in all the things that motherhood brings including cuddles, staring at my baby, preparing nourishing food and sneaking in naps when I can. You know, the heart work.


Luckily, I’ve got my hands on a stellar and oober ambitious nutrition student, Johanna, who was willing to put together some information on heart health. AND, this post couldn’t be shared at a better time because as we all know, February is heart month. And shit, well, today was my last opportunity to sneak in a post before we bid farewell to this month! *insert nervous laughter*

Your heart is an important organ. It works steadfast to help you do the things you love and despite all we know about wellness, cardio vascular disease (CVD) is the number one cause of death globally1. That means that more people die from heart failure in some way shape or form than any other cause. Further, about 1.6 million Canadians are currently living with heart disease2. And it’s not just the old people. It’s middle aged smokers, over-weight teens and those of us who don’t make physical activity a priority. I bet you can think of someone in your family who has heart disease or has had a stroke.

CVD affects everyone.

Cardiovascular disease is any disease of the heart and sadly it has become an epidemic. You get it, things aren’t looking good. So let’s talk about prevention.

Food.

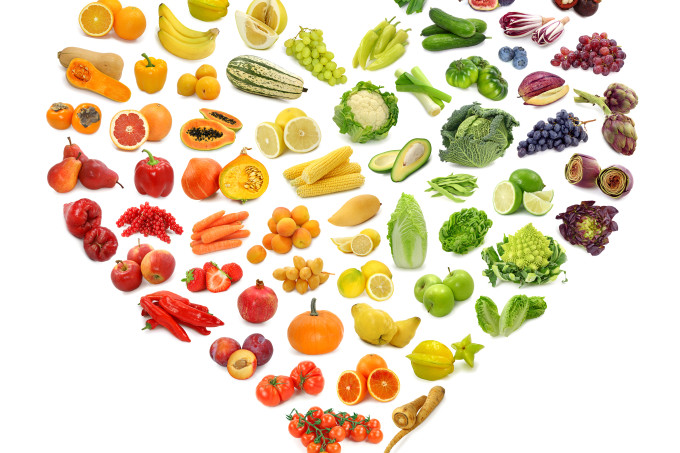
Skipping out on vegetables and fruits becomes a major risk factor for heart disease. Not only are we then missing out on all the beneficial nutrients and antioxidants within these foods but we are most likely replacing them with unhealthy alternatives. Which brings me to processed foods. While we learned in this post that some processed foods fit into a healthy diet ultra processed foods  do not, in fact their high fat, sugar and sodium content contributes to obesity and, in turn, heart disease.

Unfortunately there is sometimes a myth that fat and sodium are the main culprits of heart disease and sugar get written off. Realistically overconsumption of any of these can contribute to heart disease but lets talk about sugar, specifically free sugar. Free sugar is basically sugars that are added to foods. Ones that didn’t pre-exist. This is where fruits, grains, vegetables etc. get off the hook, phew! On the other hand, free sugars look like this “maple syrup, honey, brown sugar, sugar, agave, molasses, coconut sugar”, and it’s incredibly important to moderate our intake of these because they are loaded with calories that don’t offer much in the way of nutrition. So, without becoming a MyFitnessPal addict a good rule of thumb is that if any free sugars fall within the first 3 ingredients of a food you should probably reconsider.

Intersted in a few heart healthy recipes? Scope out these ideas:

Lifestyle.

On average we are spending 8-14 hours DAILY sedentary, not including sleeping. It’s absolutely crucial to be active during the day to encourage blood flow, strengthen joints and exert our lungs and heart. Thirty minutes of activity daily may mean parking in the furthest spot from work, taking the stairs over the elevator, a walk a lunch or a quick after dinner workout. Any and all of these examples provide many health benefits including reducing blood pressure, improved mental health and obviously a lower risk of, you guessed it, heart disease.

Omega-3s.

You’re probably sick of hearing of what you should stop doing at this point. Stop sitting around, stop eating processed foods. So what if we added something in instead? Consumption of Omega-3 fatty acids from fish has been associated with a lower risk of coronary heart disease3. Those Mediterranean folks have really healthy hearts! All that means is that is it important to get in those 2-3 servings of fish weekly!* Even if you live smack dab in the middle of the prairies like me. Also, try a high quality fish oil supplement. *Flashbacks of Mom spooning cod oil into my mouth* #bleh. I’ll take a capsule thank-you very much.

The high numbers of heart disease do not have to predict your health, even if your Grandpa, Great Uncle and childhood cat have been affected. Prevention is the most powerful thing when it comes to noncommunicable diseases such as CVD. Take care of your body and it will love you back for many many many years to come.

* (Pregnant women should consult a doctor to help determine which fish is best for them). 
Hu FB, Bronner L, Willett WC, et al. Fish and Omega-3 Fatty Acid Intake and Risk of Coronary Heart Disease in Women. JAMA. 2002;287(14):1815-1821. doi:10.1001/jama.287.14.1815.
Please note the content of this post was written by 4th year Human Nutritional Sciences student Johanna Adriaansen. Johanna also maintains her own website and is an aspiring Dietitian!

Don’t forget to follow Carrots and Cake on Instagram to see tiny square snap shots of my life.

                 – With Love, Carrots and Cake,

Carrots and Cake Nita Sharda

Snacks: What, Why and When

Nita Sharda

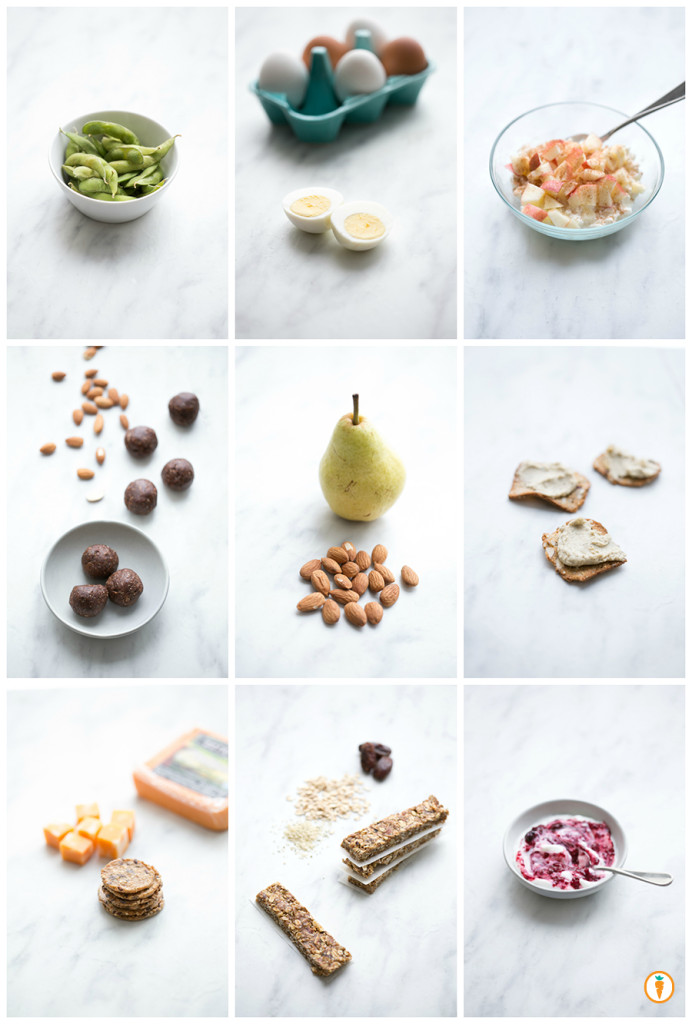
Snack ideas galore!

How (and what) we eat has changed. As a nation we are shifting from 3 meals a day to multiple small meals, or 3 meals and 3 snacks. Back in the day our grandmas didn’t have time to make more than three meals since they were all from scratch, and our grandpas didn’t have time to eat more than 3 meals because they worked sun-up to sun down.

Now, with working households, evolving research and a shift in the eating paradigm our days are certainly not what they once were. A day in the office might look like this; coffee, emails, yogurt, conference call, donut, coffee, emails, lunch, meetings, granola bar, dinner, TV, snacks, social media, bed. Repeat.

Sound familiar? Vaguely?

There is no problem with eating 6 smaller meals a day. In fact about 16% of Canadians are doing it1. Societal demands persuade us to work faster and longer. Time for meals has fallen to the wayside and we are all guilty of eating in the car or eating while scrolling through instagram. However, snacking may be adding calories that we would not have eaten had we stuck to 3 smaller meals. Many snacks nowadays also include a nutrient-lacking drink. A juice box, iced tea or a fancy latte etc. It doesn’t sound too harmful until we look at the 200+ extra calories we are (quickly) ingesting. Not to mention, when we dissect where these calories come from, they often aren’t nourishing. Pair one of these beverages with 200 calories of food and you have a 400 hundred calorie snack meal. Oops.

In order to stop this from happening we need to be mindful of consumption and ensure that we are getting all the nutrients we need from our combination of meals and snacks.

Here’s a bit more guidance:

One.

Just because it says snack or snack pack or snak pax or however the kids are spelling it these days doesn’t mean that it is healthy. Those granola bars and gummy packs are sugar laden regardless if they are made with “real fruit juice” or not. Solution? Homemade granola bars, and a small container of berries or grapes for a sweet bite with the added fibre of natural fruit.

Two.

Just like chocolate bars and ice cream, chips, muffins and cookies are treats. Now there’s nothing wrong with a homemade carrot muffin or a nutrient dense oatmeal cookie in you or your little one’s lunch. But recognize this is a “dessert” or a “treat”.

Fun fact – Tim Horton’s muffins have, on average, 100 more calories than their donuts. Yikes. Maybe we should start calling them cupcakes.

Three.

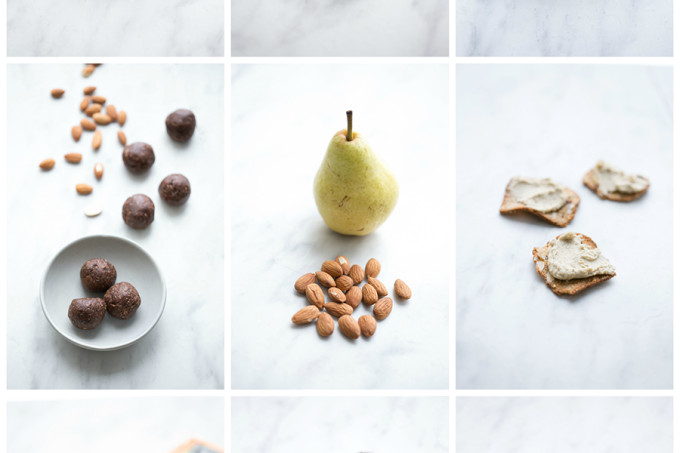
Include multiple food groups. Aim for 2-3 food groups per snack! It’s important to include a protein and carbohydrate. Benefits of this strategic pairing includes increased alertness, stable sugars and sustained energy. Some examples include cheese & grapes, or nuts with an apple, chicken & cherry tomatoes with a little balsamic vinegar, raw veggies with hummus, banana with almond butter, cottage cheese with black pepper and baby carrots, the list goes on!

Four.

You don’t neeeed to have snacks. As much fun as “eating-cause-I’m-bored” is…it definitely isn’t necessary. Listen to your body and eat when you experience real hunger cues. Start by drinking a cup of water, then if your body demands it, go ahead! Get nourished!

Remember, just like a meal is for nourishment, so are your snacks. You might need a little power in the mid afternoon to get you through the rest of your workday. So make it count. Give your body what it needs. A donut will result in a sugar crash, a handful of almonds and berries will give you human super powers to have the most productive 2-4pm you’ve had all week. Or something like that…

Now, in case you’re interested pictured above are the top 9 snacks I tend to rotate between (from left to right):

Food photography done by the talented Ceone Dyck. To learn more about Ceone click here or follow her on Facebook.
Please note the content of this post was written by 4th year Human Nutritional Sciences student Johanna Adriaansen. Johanna also maintains her own website and is an aspiring Dietitian!

Don’t forget to follow Carrots and Cake on Instagram to see tiny square snap shots of my life.

                 – With Love, Carrots and Cake,

Carrots and Cake Nita Sharda

Thai Quinoa Salad

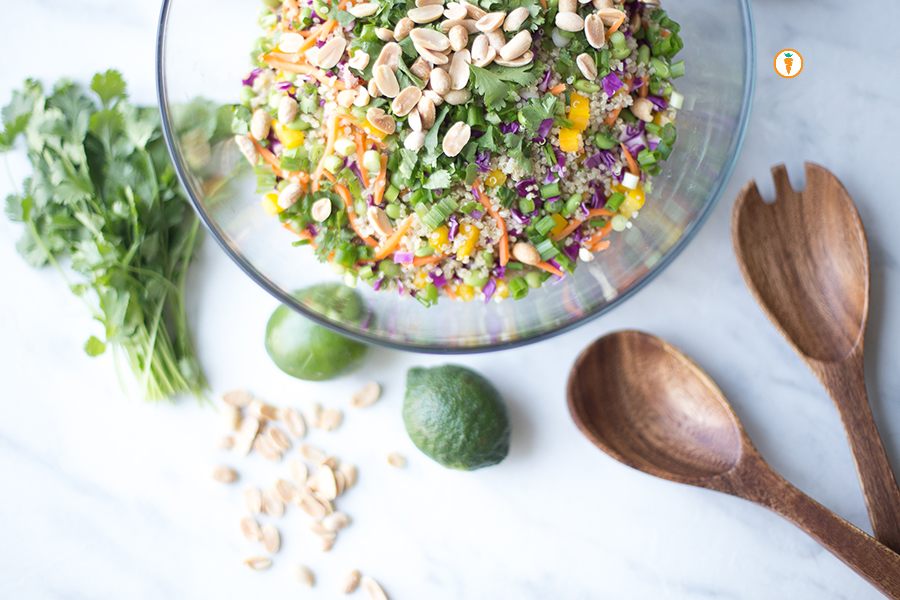
Nita Sharda, Carrots and CakeI love quinoa. But I’m really not a fan of it by itself. Are you? My preference is to enjoy it when it’s “mixed” into something like a pesto quinoa salad or as a pilaf with garlic mushrooms. Mmmmm. I’ve been making this version of a Thai quinoa salad for years now but never really took the time to standardize the recipe. With some encouragement from friends and family, I finally did it.

Here are my pre-requisites for a quinoa salad:

I want it to be hearty enough to be a meal, so I need a solid source of protein. Enter the edamame bean! A ½ cup serving of edamame beans is about 12 grams of protein.

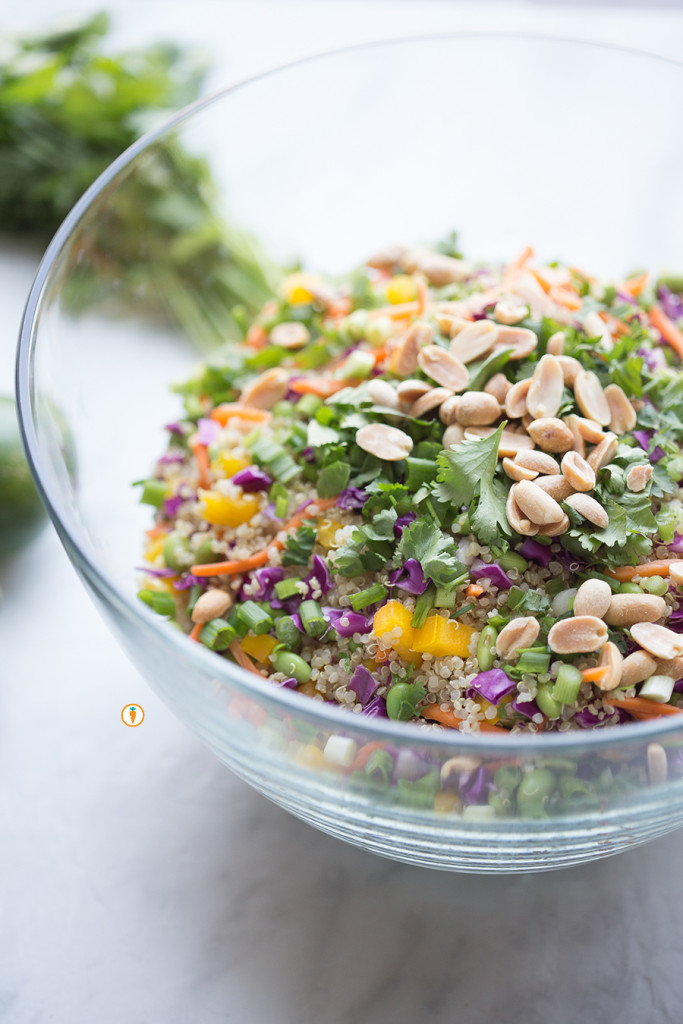
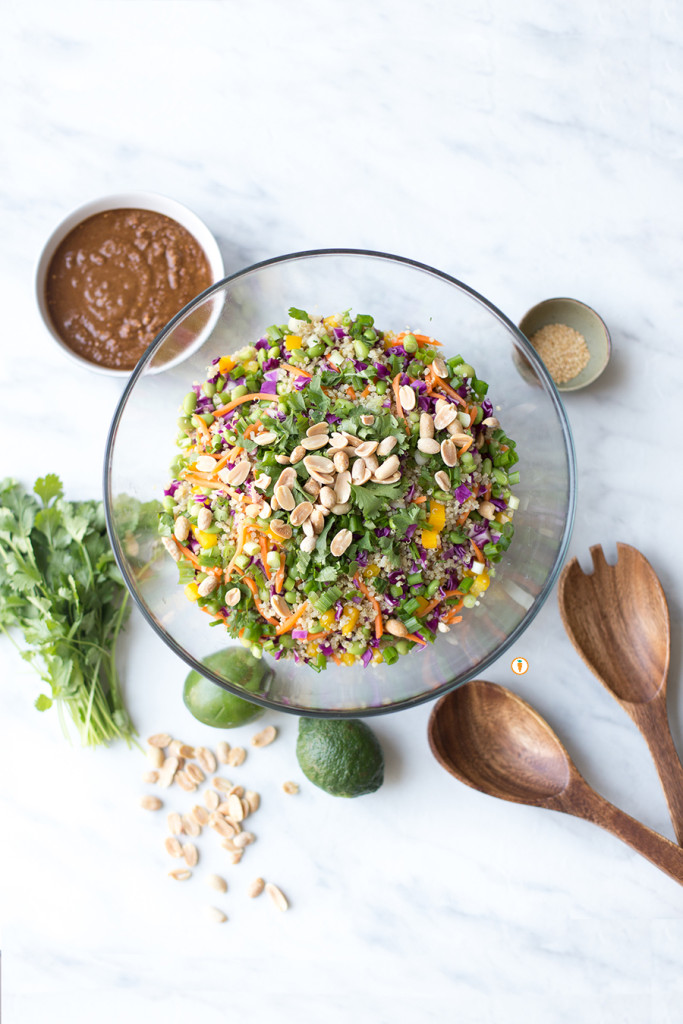
I want color. I eat with my eyes so against the quinoa I wanted to see some yellow, red, purple and green. A colorful meal also means I’m feeding my body variety of nutrients.

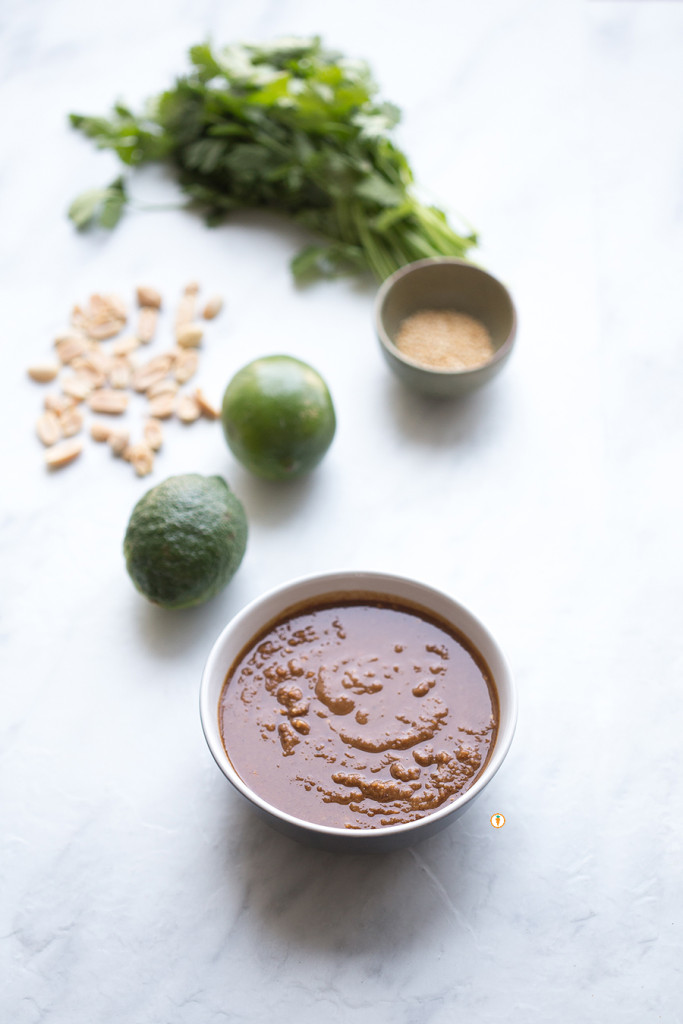
I want a good-for-you dressing. I’m not fearful of fat and my mantra has always been: it’s not the quantity of fat you eat, it’s the quality. The dressing for this recipe is largely based on peanut butter. Go for a natural PB that isn’t loaded with added fats, sugar or salt. The dressing also has lovely hints of ginger which is great for digestion and amping up the flavor of this salad.

I want it to still be good the next day. C’mon, we all know many salads don’t hold up more than 24 hours. Not this recipe! I prefer to keep the dressing on the side and pour on more as I need it. The quinoa salad itself stays perfectly fine for 3 – 4 days when kept refrigerated in an air-tight container.

This recipe is a hit, no matter where I go. My vegan and vegetarian friends and mama’s all LOVE it. It’s perfect for weekday lunches, as a side or for sharing at a potluck.

Nita Sharda, Carrots and CakeThai Quinoa Salad_vertical

Okay, okay, recipe below!

4.0 from 2 reviews
Thai Quinoa Salad
 
Prep time
Cook time
Total time
 
Ingredients
  • Salad:
  • 1 cup uncooked quinoa
  • 2 cups shredded red cabbage (we like to chop it pretty small)
  • 1 red, orange or yellow bell pepper, diced
  • 1 cup shredded carrots
  • 2 cups edamame beans *steam/cook ahead of time
  • ½ cup chopped cilantro
  • ½ cup cashews
  • 3 green onions, chopped
  • For the dressing:
  • ⅓ cup natural peanut butter
  • 1 tbsp freshly grated ginger
  • 3 tablespoons soy sauce
  • 1 tablespoon honey (use agave if vegan)
  • 3 tablespoons red wine vinegar
  • 2 teaspoons sesame oil
  • 2 tsp sesame seeds *optional
  • juice of one lime
Instructions
  1. Prepare quinoa: ensure you've thoroughly rinsed and strained it. Place quinoa in a small pot with 2 cups of water. Bring to a boil and reduce heat to low, cover and simmer until tender and the liquid has been absorbed. About 15 - 20 minutes. Fluff with a fork. Set aside and cool.
  2. To the quinoa add in cabbage, bell pepper, carrots and edamame beans. Fold this into the the quinoa.
  3. Prepare the dressing by mixing together all eight ingredients. I often use a handheld blender to do this job but you could totally use your muscles and a strong fork.
  4. Garnish with cashews, cilantro and green onion. Serve chilled (or eat it up right away).
Thai Quinoa Salad_birdseye
Food photography done by the talented Ceone Dyck. To learn more about Ceone click here or follow her on Facebook.

Don’t forget to follow Carrots and Cake on Instagram to see tiny square snap shots of my life.

                 – With Love, Carrots and Cake,

Carrots and Cake Nita Sharda

Easy Kale and Parsley Pesto

Nita sharda, carrots and cakeI love me some pesto. Do you? I only began experimenting with this sauce a few years ago and now it’s a pantry staple. Better yet, I’ve even ventured into making my own version of pesto. I was inspired to use kale in this recipe by my summer CSA. We’ve been getting an abundance of kale and I’ve been experimenting with unique ways to use up this nutrient-loaded green.
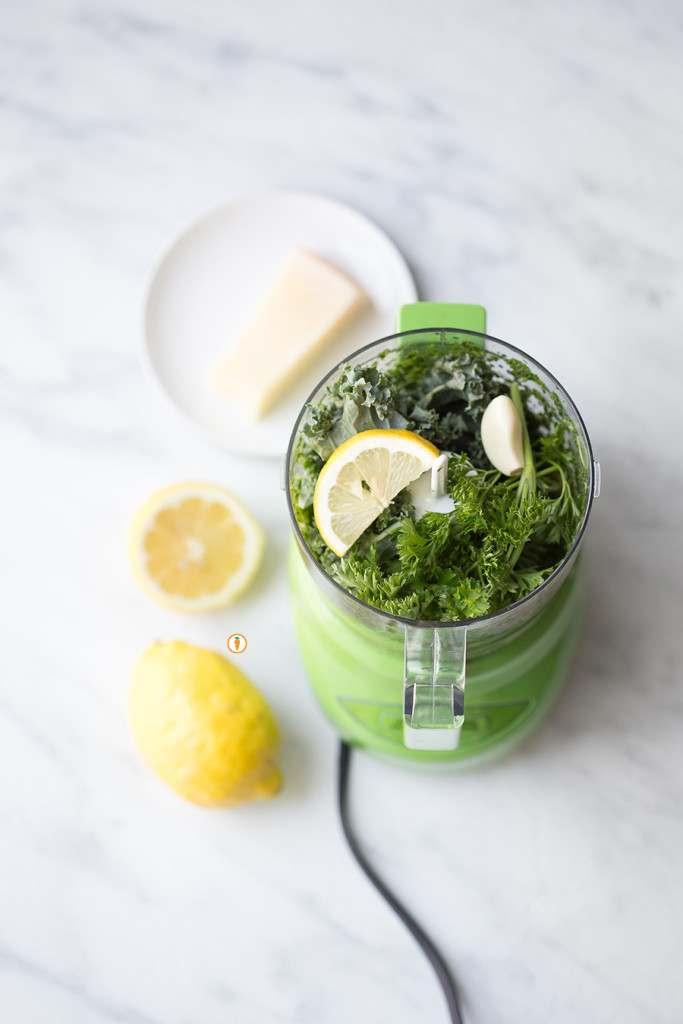
Most pesto recipes call for basil. I opted not to use basil primarily because in the fall/winter months it’s actually quite pricey (at least here in Winnipeg) and sometimes I find myself visiting 2 – 3 grocery stores only to not find any! So instead I use parsley. Problem solved.

There’s also a TON of ways you can use up pesto. Here’s a few suggestions to inspire you:

  • Use it as marinade for your white fish or chicken
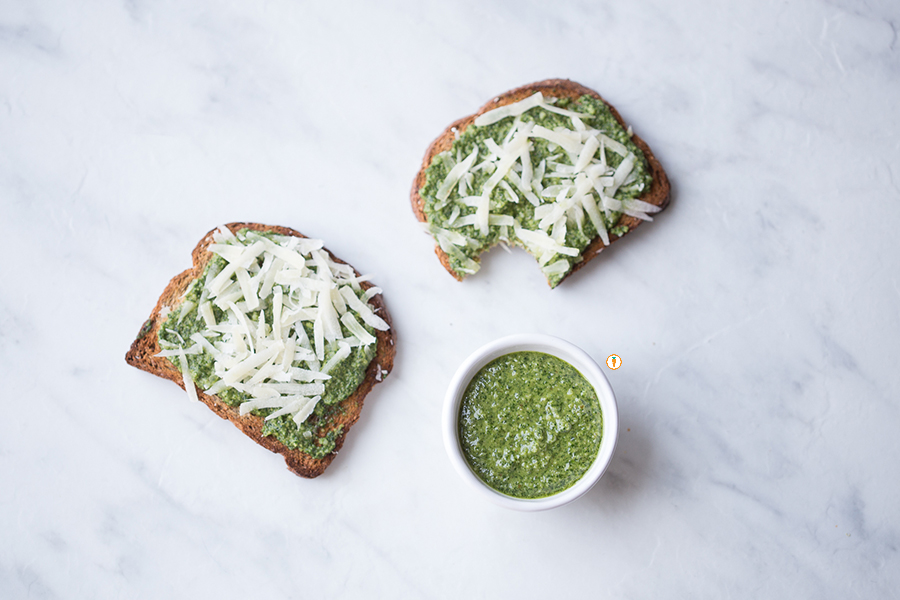
  • Place it on top of toast to change up your breakfast game, top with a poached egg
  • Toss it in pasta (hot or cold)
  • Make pesto spinach muffins
  • Use pesto instead of pizza sauce on your crust (my favvv)
  • Use pesto for this quinoa salad recipe
  • Flavor turkey meatballs with with pesto
  • Add small dollops to crostinis and top with cherry tomatoes for a fun appie
  • Make a gourmet grilled cheese sandwich with pesto and mozzarella
  • Marinade veggies like tomato, zucchini and muchrooms in pesto and grill
  • Or, eat it by the spoonful

There you have it! Ten ways you can enjoy this pesto! 

Why is this pesto a great choice?

  • It’s loaded with anti-inflammatory olive oil
  • Helps you meet your recommended intake for greens
  • Walnuts offer up omega-3, hello heart health!
  • There’s cheese in it
  • Mic drop, enough said!

Nita sharda, carrots and cakeNita sharda, carrots and cake

Okay, recipe below.

Easy Kale and Parsley Pesto
 
Prep time
Cook time
Total time
 
Ingredients
  • ¼ cup walnuts, toasted (or preferred nut)
  • 1½ cups torn kale, stem removed
  • ½ cup curly parsley, roughly chopped
  • ¼ cup cubed or grated parmesan
  • ½ cup olive oil
  • 1 clove garlic
  • juice of one lemon
Instructions
  1. To toast walnuts, warm a non-stick skillet over medium heat. Add walnuts and lightly toast for about 8 - 10 minutes or until fragrant. Be careful! You don't want them to burn.
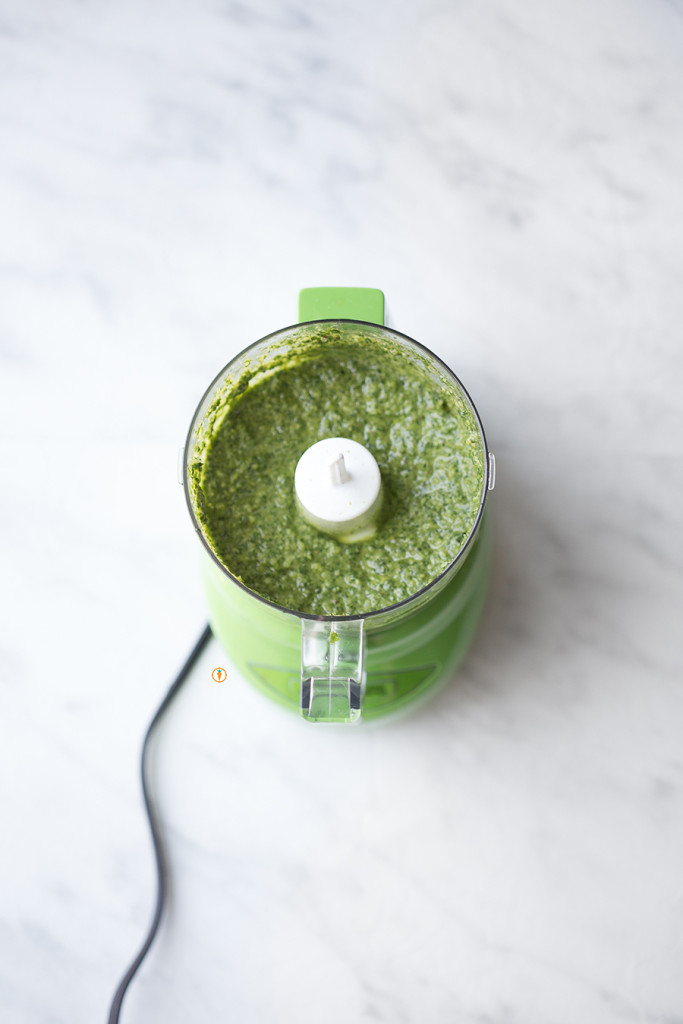
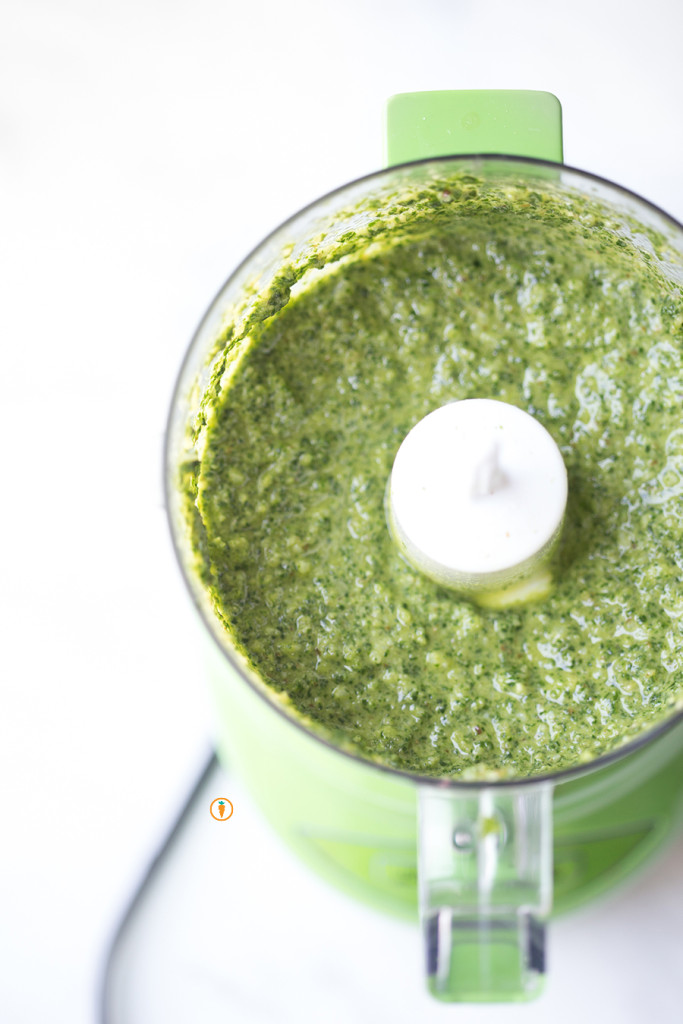
  2. In a small food processor of blender add walnuts and remaining ingredients. Blend well.
  3. Taste. Add salt, pepper or more lemon juice as needed. If you find your pesto too runny, you can add another ¼ cup of walnuts.
  4. Store in an air tight container in the fridge for up to one week or freeze!.

Pesto in processor_close upFood photography done by the talented Ceone Dyck. To learn more about Ceone click here or follow her on Facebook.

Don’t forget to follow Carrots and Cake on Instagram to see tiny square snap shots of my life.

                 – With Love, Carrots and Cake,

Carrots and Cake Nita Sharda


My CSA Box – Part I

Nita Sharda, Carrots and Cake

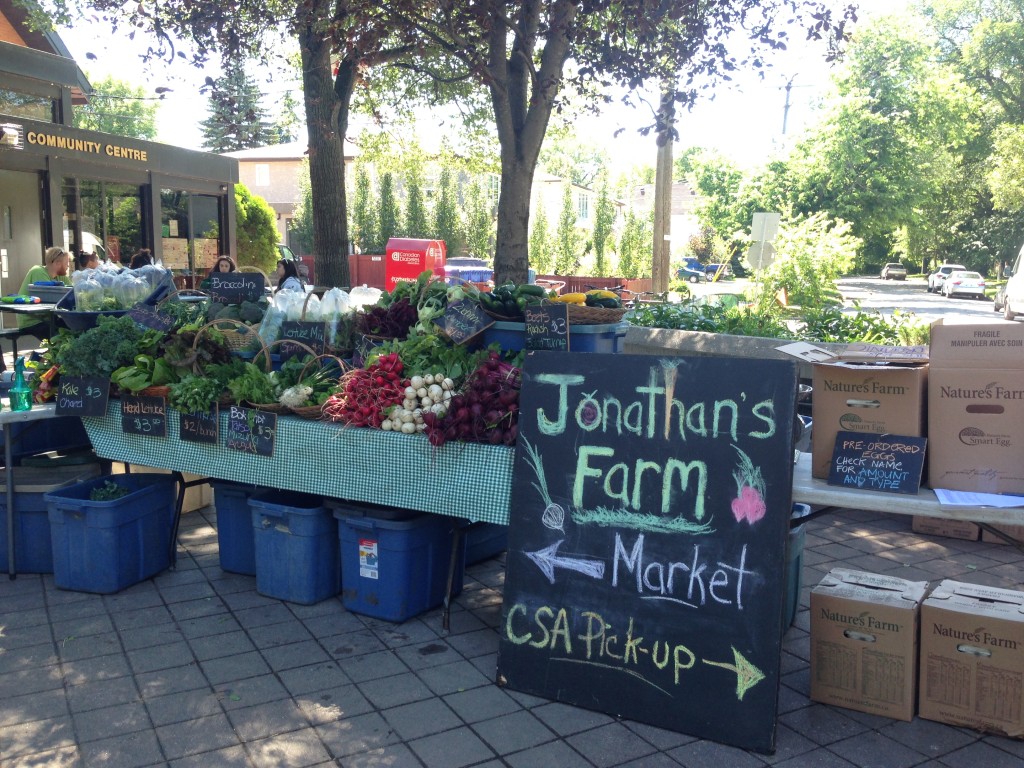
My weekly pick-up stop!

WORD OF THE DAY: lo·ca·vore

Ever heard of the word locavore? A dictionary will tell you that it’s used to describe a person interested in eating food that is locally produced and not moved long distances to market. One common – but not universal – definition of “local” food is food grown within 100 miles (160 km) of its point of purchase or consumption.

So what is CSA and what does it have to do with locavores?

CSA.. Hmm what does that stand for? Maybe you have an idea. It’s something about a farmer sending you a box of fresh veggies right? Oh maaaybe it stands for Canadian Shared Agriculture?! Close, but not quite. Turns out it stands for Community Supported Agriculture and it’s an internationally recognized concept! I’ve been quite curious about the whole scene for some time now but I am finally making a commitment and getting involved! Here’s my story on how it all went down:

Phase 1: Do the research

There is a ton of great information on CSAManitoba.org

CSA Manitoba recommends you ask a couple of key questions before you sign up. Here are a few that I wouldn’t have thought of myself;

  • Do you provide recipes for less common produce? Some provide a weekly newsletter and recipes to help you make use of those veggies you may not have come across before (like, kohlrabi!)!
  • Is the payment in full or split?
  • May I visit the farm during the season?

The website has a very good FAQ page for other questions as well. I browsed the entire website and after a solid look I came to some conclusions.

Pros of a CSA box:

  • It’s like a subscription to fruit and vegetables. That is sure to make you way healthier than Cosmo.
  • Meeting farmers! Farmer’s feed the world, I’m sure they make great friends.
  • The produce is usually picked the same day you receive it! This is a huge advantage as much of the produce we get in Canada travels far and wide. When fruits and vegetables have to travel from Florida, California or Mexico they are picked under-ripe so that by the time they reach our grocery stores they are perfectly ripe. Makes enough sense but that means that the produce is ripening in a dark cool crate instead of being in the sun, attached to plant where it can continue to receive nutrients.
  • Strengthening the local economy. After all, you decide with your dollar.
  • I’m also looking forward to being challenged by new produce, which I would most likely avoid in the store. Maybe I’ll get a fennel…or is it just fennel? What’s two fennel? Fennels? Feni?!

Cons of a CSA box:

  • I can’t see any yet, I’ll keep you posted once the goods start rolling in.

Phase 2: Chose a farm.

CSAManitoba.org is also your go-to for this step.

Out of the 23 farms listed who offer the CSA program I decided on Jonathan’s Farm. Not only did I choose them because the drop off point is very close to my home but also because they farm according to organic standards and aim for sustainable Earth friendly agriculture. Now, I’m not 100% adamant on organic all the time, because I doe have bills to pay. But if I can grab a big box of organic veggies bi-weekly then I am not complaining. Plus Jonathan is an incredibly personable name so I already know he is a good guy.

Here are a couple of things that happen on Jonathan’s farm which contribute to sustainability of the land;

  • Cover cropping; No, not like a green house where you cover up the crops, also not a crop blanket made by the crop’s grandma. Cover cropping is when the crops act as a blanket for the land. Which keeps the top soil from blowing away and wasting nutrients.
  • Nutrient monitoring; A soil test which determines the amount of minerals and nutrients in the soil and allows the farmer to determine how to best supplement their fields.
  • Crop rotation; Planting different crops on the same land each season. Different crops give and take different minerals from the soil. Changing from potatoes to wheat or barley to canola allows the earth to essentially be recycled over and over instead of depleted.

Okay, I think I’ve shared what I wanted for now. If this has peaked your interest, you can always visit Jonathan at the Wolsley Farmers’ Market on Tuesday’s from 3:30pm to 7:00pm at 980 Palmerston Ave. Stay tuned for a follow up post on my experience with my first CSA box this summer. Can’t wait!

Nita Sharda, Carrots and Cake

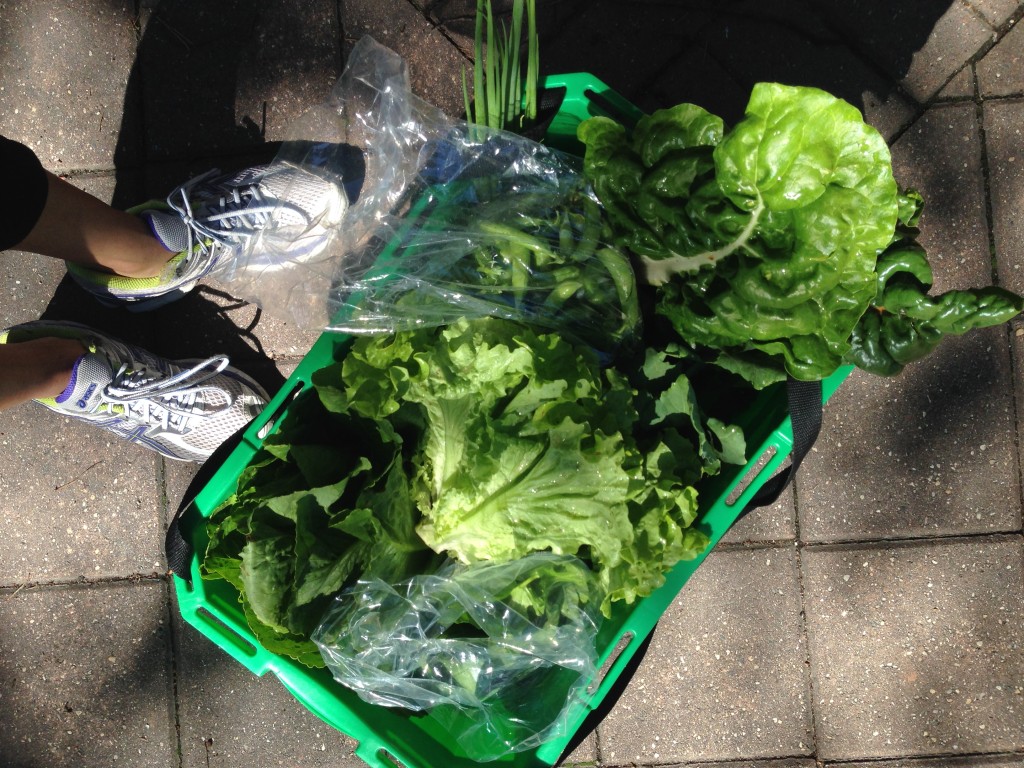
My loot from a few weeks ago: green leaf lettuce, romaine lettuce, peas, spinach, swiss chard, turnips, scallions, radishes, basil + more!

Please note the content of this post was written by 4th year Human Nutritional Sciences student Johanna Adriaansen. Johanna also maintains her own website and is an aspiring Dietitian!

Don’t forget to follow Carrots and Cake on Instagram to see tiny square snap shots of my life.

                 – With Love, Carrots and Cake,

Carrots and Cake Nita Sharda


Exercise Nutrition – The Basics

Nita Sharda, Carrots and Cake

Maybe I’m pretending to smile. Or maybe I’m not. :) Photo credit: Bree-Ann Merritt Photography
It’s that time of year: the sun is shining, birds are singing, winter jackets are swapped for tank-tops, and parks are filled with ambitious vitamin D deprived Manitobans intent on soaking up every single bit of fresh summer air they can. It’s the absolute best time for outdoor workouts, trips to the zoo, or a hike with friends! But before you grab your runners, rollerblades, or dumbbells, let’s talk about how you can fuel your body to get the most out of your physical activity.

What should I eat before my activity?

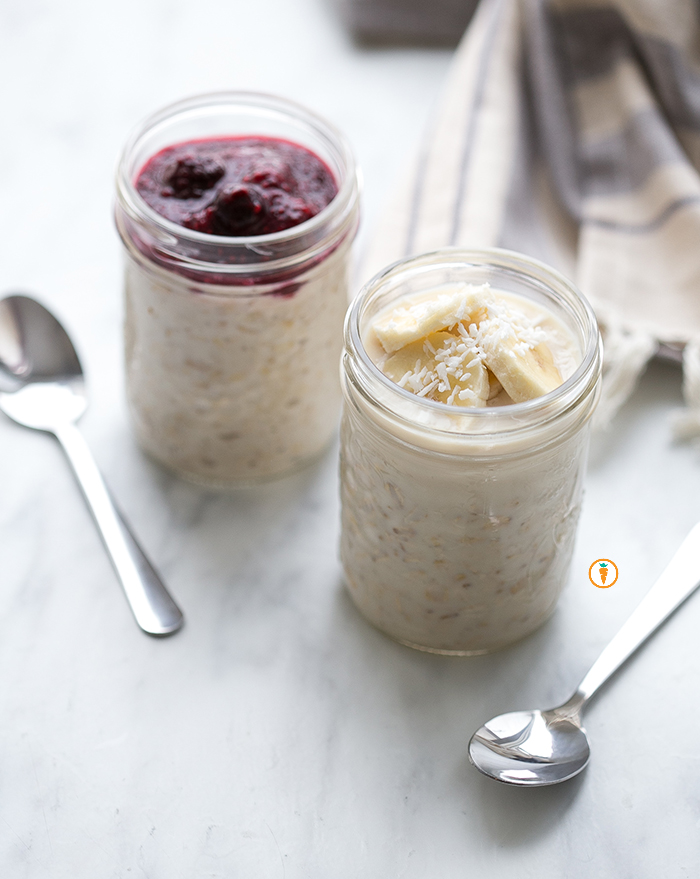
The best way to ensure that you’ll be properly fueled for your next sweat session is to eat balanced meals from all four food groups every 3 – 4 hours beginning with a protein and fiber-rich breakfast (like a delicious bowl of overnight oats…see photo below *drool*).Nita Sharda, Carrots and Cake

What you choose to eat should ideally be determined by the timing of your workout. For example, if you had a meal at 1:00pm and plan to work out at 3:00pm, there may not be a need for a snack. If there is a longer gap you could consider the following:

2-3 hours prior to exercising, eat something that is sort of like a small meal, aiming for three food groups, and going easy on the fibre and fat (both are known to slow down digestion):

  • Chicken breast, cucumbers with sweet potato
  • Bowl of cereal with a small handful of pumpkin seeds and skim milk
  • A large salad with legumes (chickpeas, beans, lentils) and quinoa

½  – 1 hour prior to exercising, focus primarily on carbohydrates – these foods are less likely to cause discomfort during your gym sesh and will give you some quick energy:

  • Yogurt
  • A medium banana
  • Unsweetened applesauce
  • Rice cakes

What should I eat after my activity?

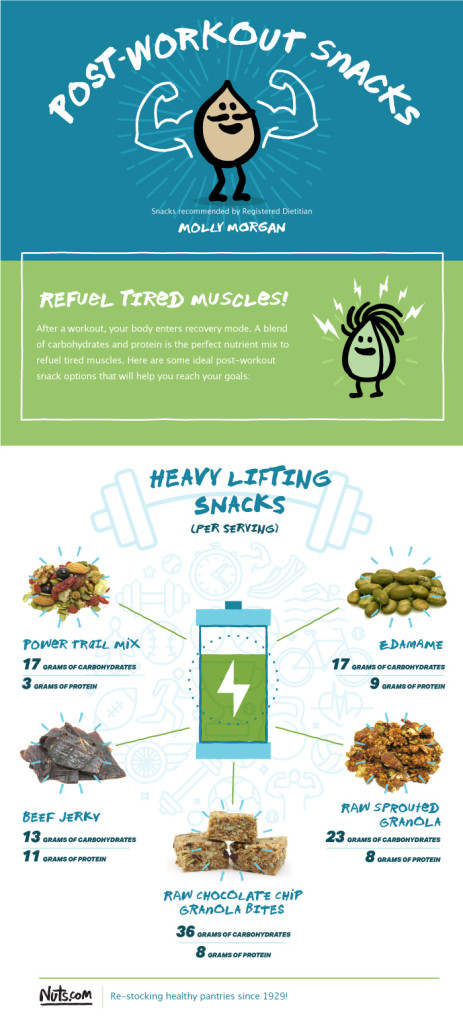
We offered you up some suggestions to improve your pre-workout eats. And now, we want to share tips and tricks to ensure your post-workout meal is on point. Why do we care? Because, it’s important to refuel tired muscles. Much like your pre-workout snack, a blend of protein (approximately 15 – 25 grams) and carbohydrates will be the perfect combination to aid in the recovery process along with a ton of water. Protein is essential in building and maintaining muscle and supporting muscle recovery after exercise.  Research tells us that ingesting protein shortly after intense exercise can help build muscle and repair muscle damage. And of course, water is important to replace what you may have lost via sweat and prevent dehydration.

Similar to your pre-workout nutrition, timing is just as important for post-workout meals. You’ve got about a one-hour window to replenish your body and offer it some fuel. For most folks who exercise in the evening, a balanced dinner after activity may be sufficient. But if you just need something to tie you over before your next meal consider munching on:

  • A handful of power trail mix (pumpkin seeds, almonds, walnuts, and dried blueberries and goji berries) with Greek yogurt
  • 1 – 2 slices of sprouted wheat toast with a natural nut butter and a glass of milk
  • A few energy date balls with a glass of milk
  • ¾ cup edamame beans with a light olive oil dressing
  • Egg salad filing on top of a pice of toast
  • 1 serving of whey isolate within a fruit smoothie

Like what you see on this list above? Learn more about pre- and post-workout nutrition here. And oh! There are some recipe suggestions too – you know I’m a suck for recipes!

nuts_post_workout_snacks_v04

If you want to brush up on what your personal exercise nutrition should or could look like, contact a Registered Dietitian. We’re the trusted source for nutrition information. If you have a specific training need, let me know and I can connect you to a reputable colleague who knows the ins and outs of exercise nutrition!

Food photography and blog post written/captured by a talented student volunteer, Ceone Dyck. Ceone is a graduate of Human Nutritional Sciences. To learn more about Ceone click here or follow her on Facebook.
Please note this is not a sponsored post. 

Don’t forget to follow Carrots and Cake on Instagram to see tiny square snap shots of my life.

                 – With Love, Carrots and Cake,

Carrots and Cake Nita Sharda