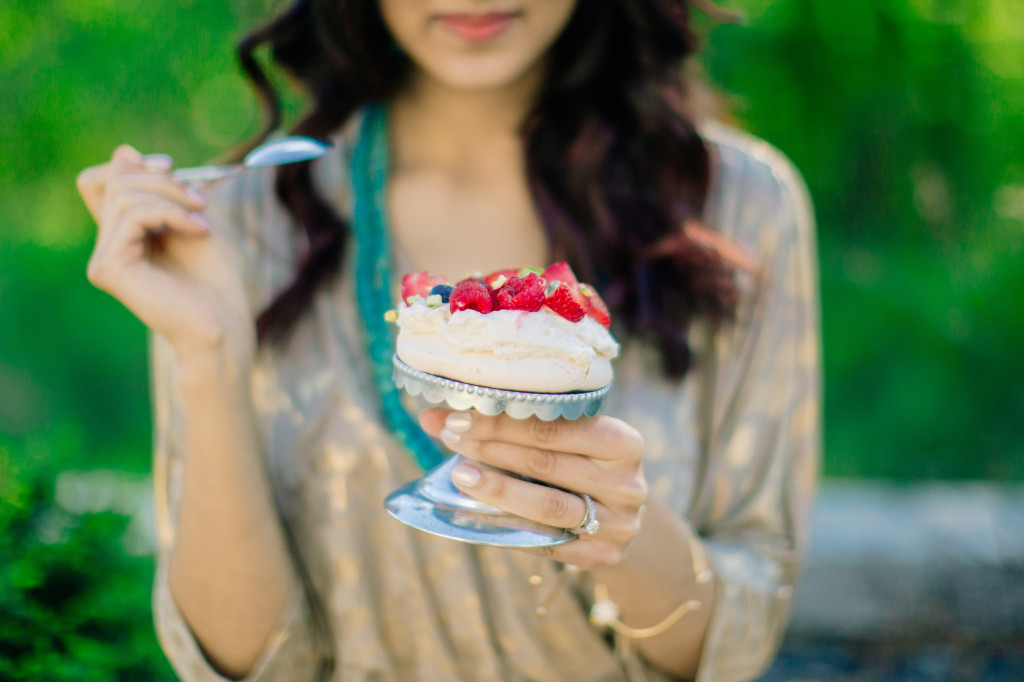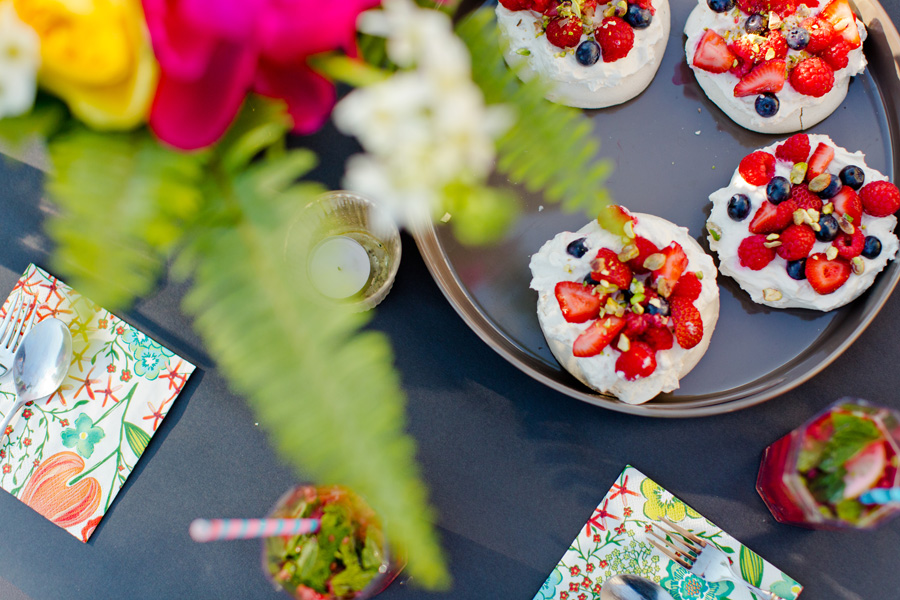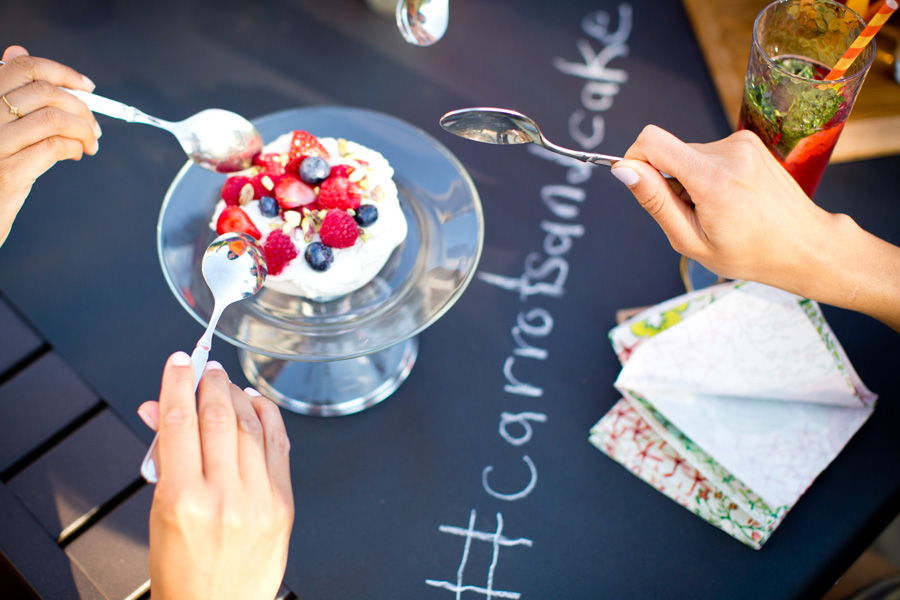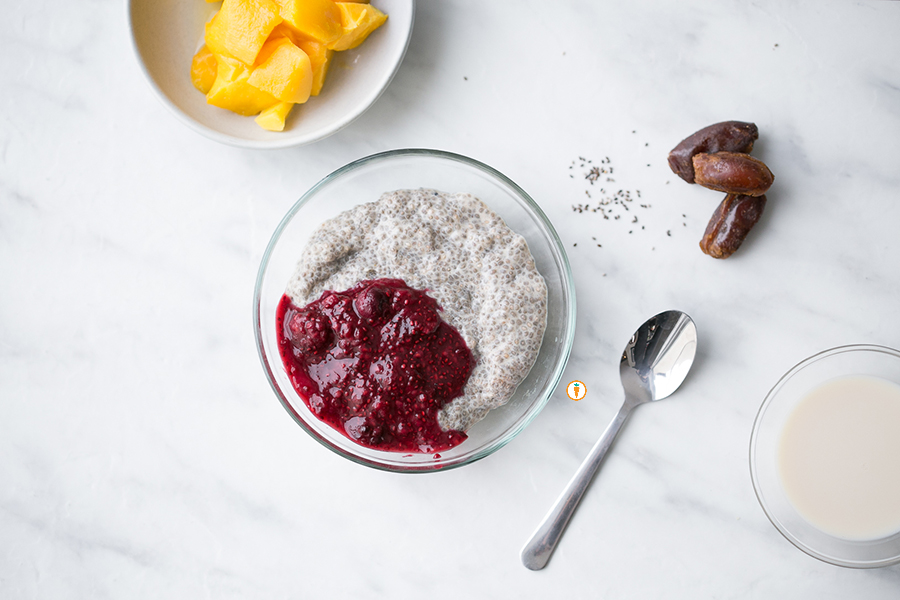
Chia Seed Pudding

Nita Sharda, Carrots and CakeOh, hello! Welcome back – I hope you enjoyed learning about whole grains on our last post. We’re going to take a break from nutrition education and share this uber simple recipe with ya’ll. You’ve previously seen me use and talk about the health benefits of chia seeds, like when I showcased my version of a 5 Ingridient Berry Sauce. When I heard my food friends talk about chia seed pudding, I was totally hooked and needed to give it a try.

Here’s what I love in particular about this recipe:

  • calls for only 5 ingridients
  • offers up 10 grams of fibre
  • source of calcium
  • source of protein
  • allows for customization
  • naturally gluten free
  • no cooking, just stirring

Nita Sharda, Carrots and CakeOkay, I think you’re sold.

5.0 from 1 reviews
Chia Seed Pudding
 
Prep time
Total time
 
Serves: 2 - 3
Ingredients
  • ⅓ cup chia seeds (black or white)
  • 1½ cups milk (dairy or dairy free)
  • 2 tbsp runny honey or maple syrup
  • 1 tsp vanilla extra
  • 1 tsp cinnamon
Instructions
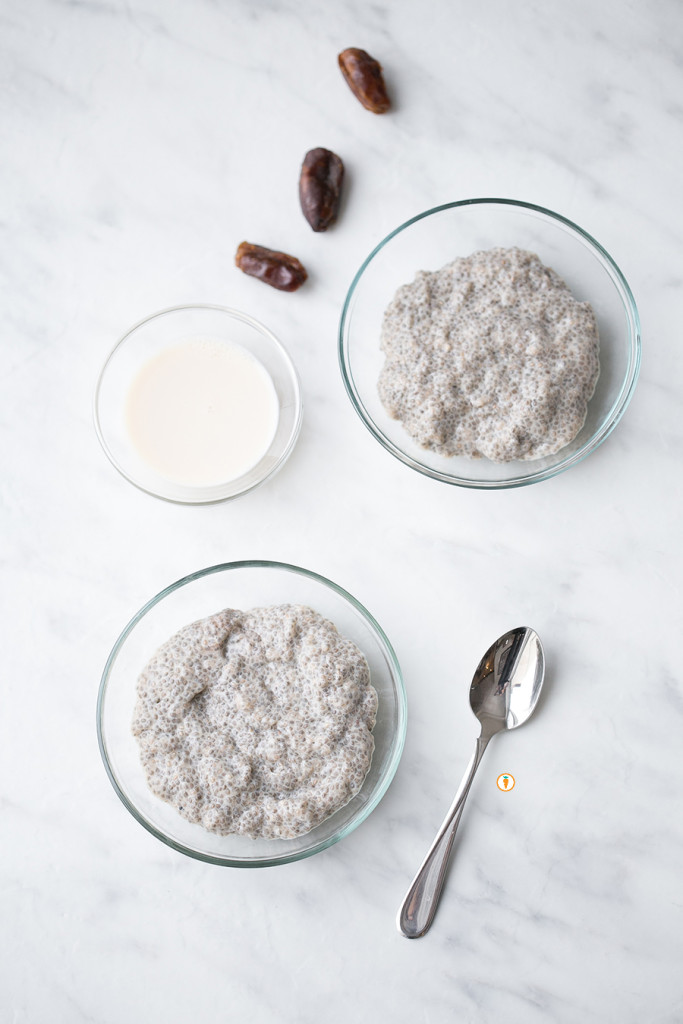
  1. Place all ingredients into a bowl. Mix very, very, very well and cover with saran wrap.
  2. Place bowl into the fridge for thirty minutes. Stir again.
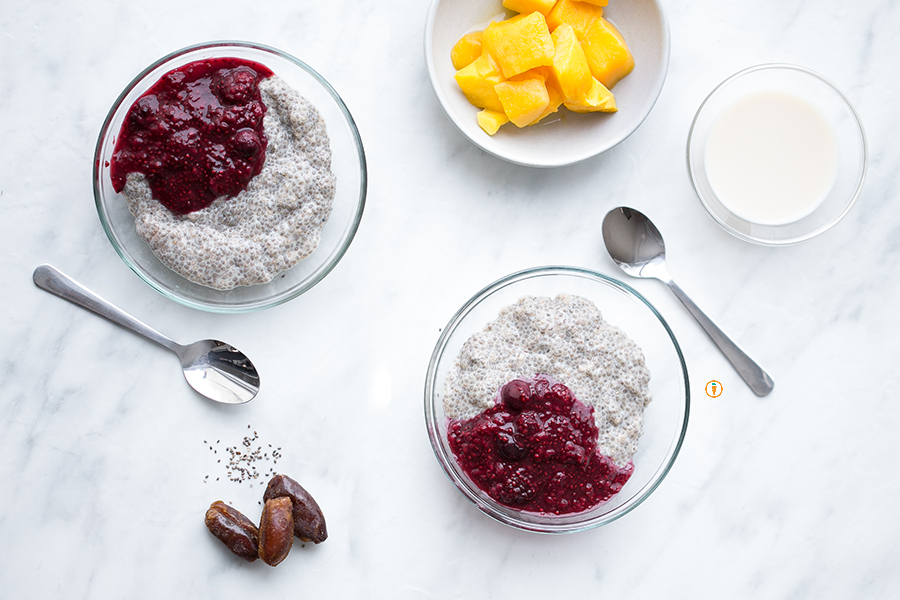
  3. Return back to the fridge for at least another 2 - 3 hours. The result is a thick pudding similar to rice pudding.
  4. Top with additional fruit if you wish. I love it with tart raspberries, mango or kiwi.
Nita Sharda, Carrots and Cake
Food photography done by the talented Ceone Dyck. To learn more about Ceone click here or follow her on Facebook.

Don’t forget to follow Carrots and Cake on Instagram to see tiny square snap shots of my life.

                 – With Love, Carrots and Cake,

Carrots and Cake Nita Sharda

Happy Birthday Carrots and Cake + Poppy Seed Biscuit

Nita Sharda, Carrots and CakeWoah. How did that happen? Today marks the second birthday for Carrots and Cake Balanced Nutrition Consulting. What was supposed to initially be a “lets try to see five clients per month” kinda gig has turned into visiting with at least twenty clients monthly, blogging, recipe development, writing for cool food producers and as of late, mentoring Nutritional Science students that are hoping to get their feet wet in the dietetic industry. By the way, all of this on top of a nearly full time job in an area of clinical practice I love.

A very sincere thank you to all of my friends, readers, clients and colleagues who continue to support me through my growth. When I gave birth to Carrots and Cake it was all very organic. I never felt like anything was being forced into place – there really was no financial goal, strategic plan or real incentive other than to connect with people, about food.

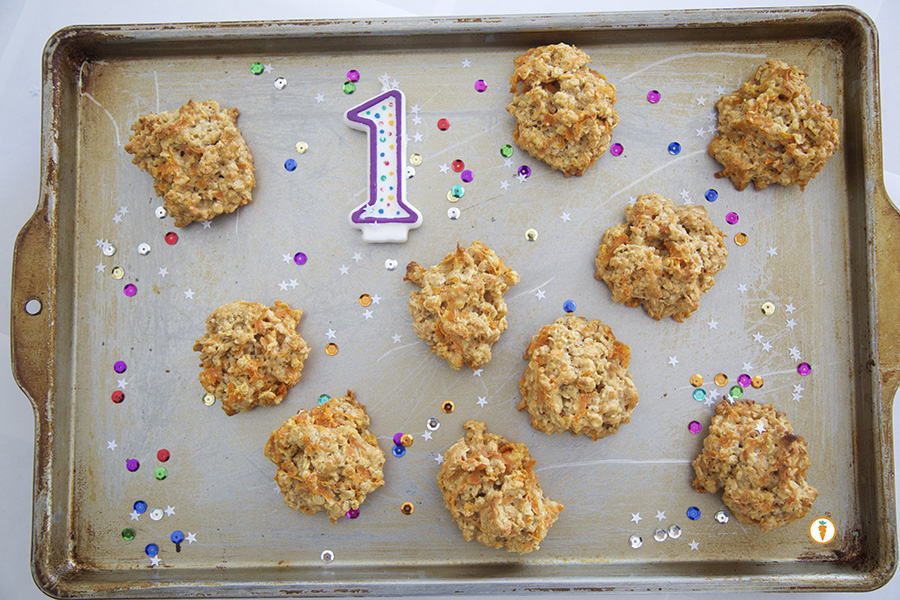
I remember last year when I celebrated Carrots and Cake’s first birthday I showcased this Carrot and Pineapple Loaf. And then, I celebrated some more with these yummy Carrot Oatmeal Cookies. The sweetest was coming into work and my colleague had prepared some of these goodies for me and our team to enjoy.

Needless to say, I am SO looking forward to what 2016 has in store for me.

Here’s what happened over the last twelve months:

  • I moved from a condo into our home (that has a great big island, yaaaaassss)
  • Got a Vitamix…that’s a big deal, right?
  • Joined a Women’s in Business group  made up of fine business women in Winnipeg
  • Completed several Women and Weights classes via good friend, RD extraordinaire and Personal Trainer, Chinwe – so basically, I’m way stronger than last year
  • I partnered with some awesome food industry folks like Bothwell Cheese which allows me an opportunity to write more often, something I love to do
  • I learned and helped my food loving friend, Getty Stewart can some tomatoes
  • Completed my second Manitoba Marathon Relay while the hubs added a second half marathon to his list
  • I went on an amazing #CanolaConnect Harvest Camp with the lovely folks of Canola, Eat Well
  • On the same note, I also had a chance to attend a Grow Canada conference c/o #CanolaConnect – picture this: being only meters away from Clara Hughes and former LGen Romeo Dallaire – MIND BLOWN
  • Went through a lot of professional struggles at work, but came out stronger than I ever thought I was
  • Took on two student volunteers to help with content creation, recipe development and photography
  • As of LAST NIGHT, my sister (many of you might know her as Myuz Artistry) gave birth to a sweet baby boy AND my other sister is expecting her first babe
  • On that note, I officially have baby fever

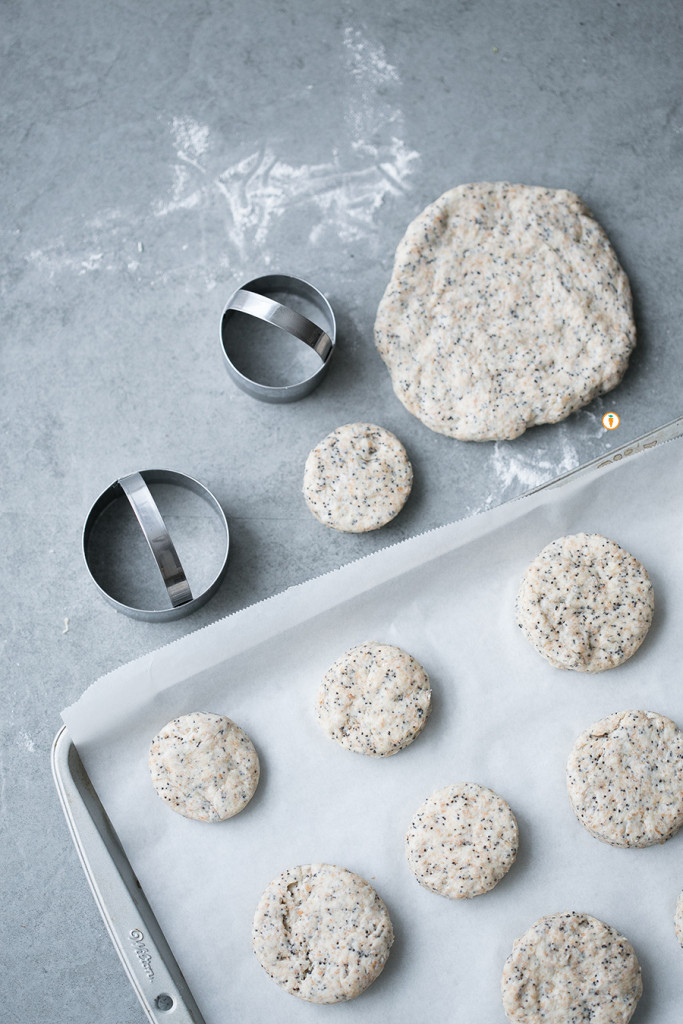
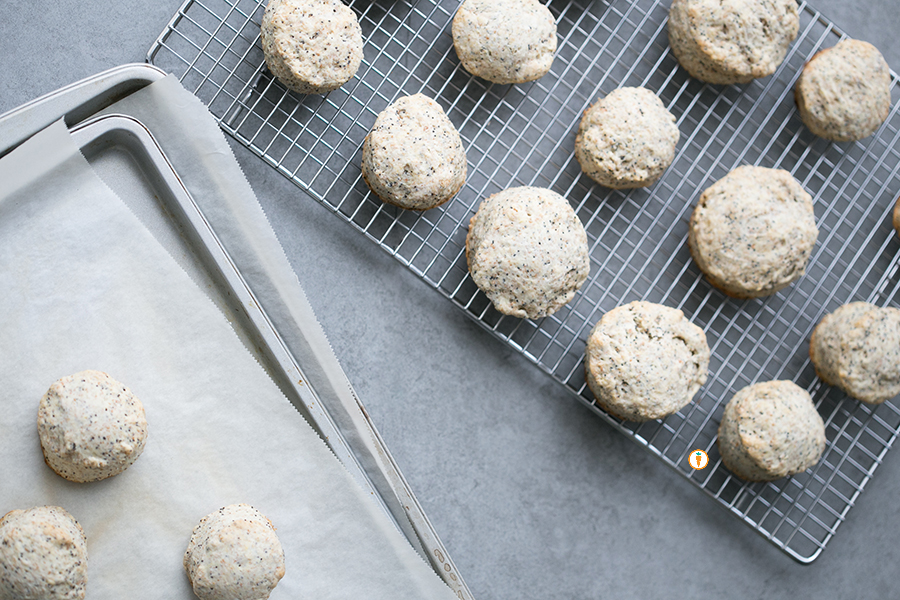
Okay, okay. I know why you’re ALL really here, it’s for this SUPER DUPER amazing recipe for Poppy Seed Biscuits. This recipe hails from somewhere…I just can’t remember where. It’s the kind I just wrote down with pencil and pen after trying them at a friends house years ago when I live in B.C.. The recipe stuck with me.

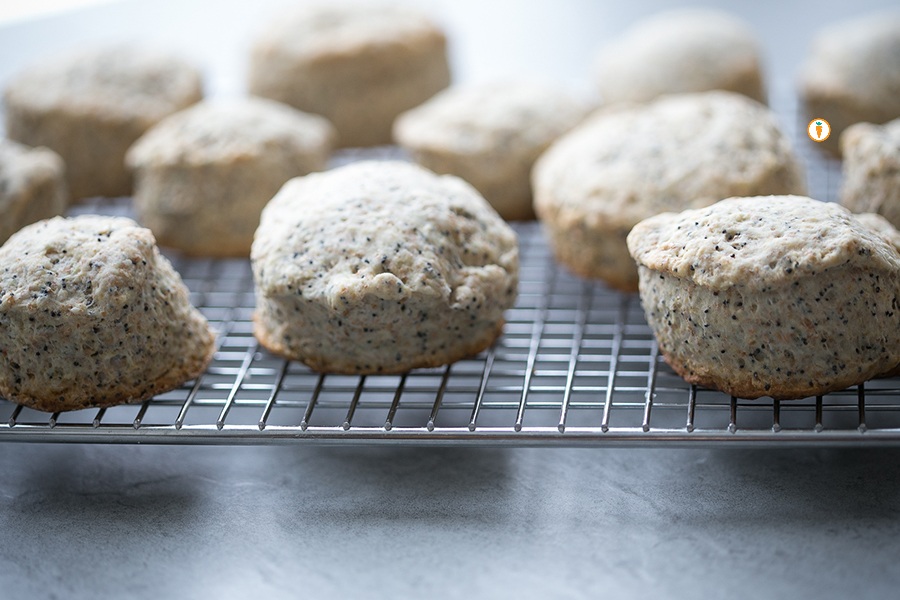
Nita Sharda, Carrots and CakeNita Sharda, Carrots and CakeNita Sharda, Carrots and CakeNita Sharda, Carrots and Cake

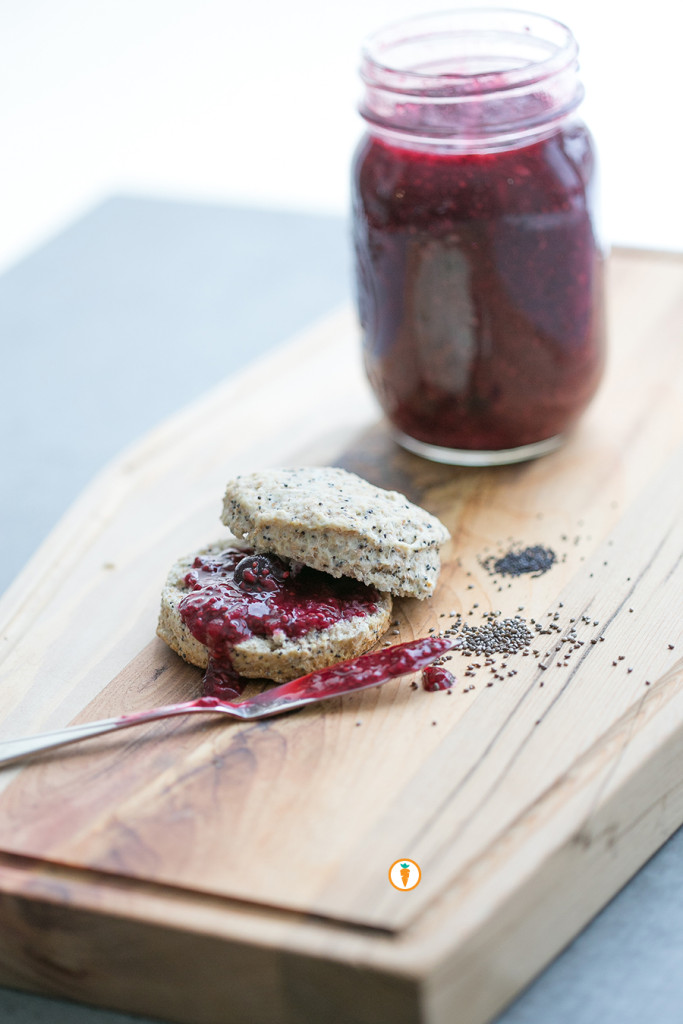
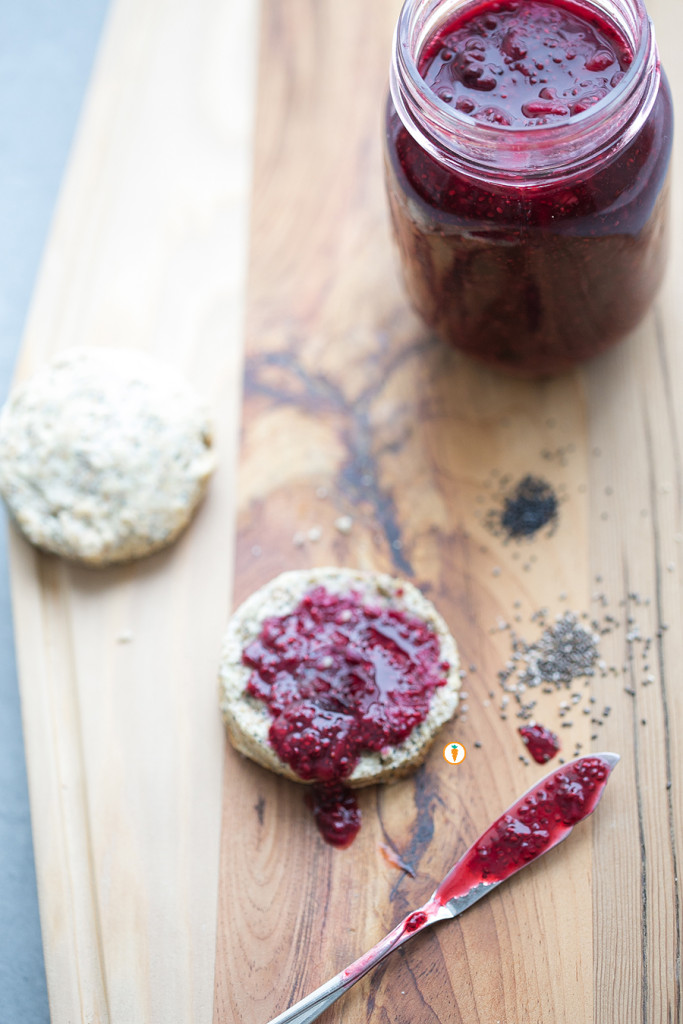
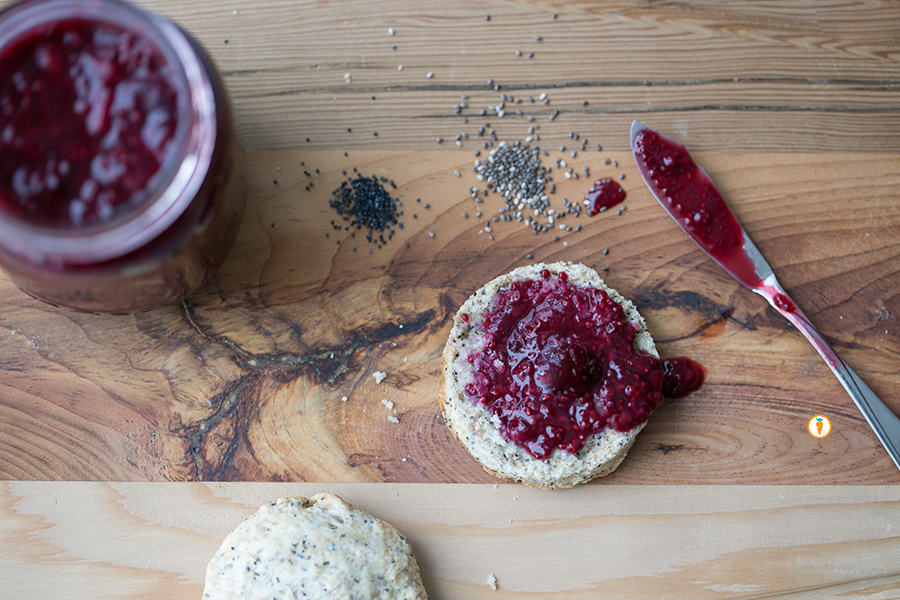
These biscuits are on the slightly sweet side, but still pair well with soup. I think they make a great snack for a girls afternoon or act as a lovely addition to a large green salad. You’ll see below, I paired it with my 5 Ingredient Berry Sauce which ended up being the perfect marriage.

Okay, recipe taymeee.

Poppy Seed Biscuits
 
Prep time
Cook time
Total time
 
Serves: 18 - 24
Ingredients
  • 1½ cups whole wheat flour
  • 1 cup all-purpose flour
  • ¼ cup white sugar
  • ¼ cup poppy seeds
  • 1 tbsp baking powder
  • ½ tsp baking soda
  • ½ tsp salt
  • ⅓ cup cold butter, cut into 1 inch chunks
  • 1 cup buttermilk
Instructions
  1. Line a large baking sheet (or two) with parchment paper and preheat oven to 425.
  2. In a large bowl stir together dry ingredients until well combined.
  3. Add in butter. Using a pastry blender or two forks cut the butter into the dry ingredients. Eventually, you'll have a texture that resemble coarse crumbs.
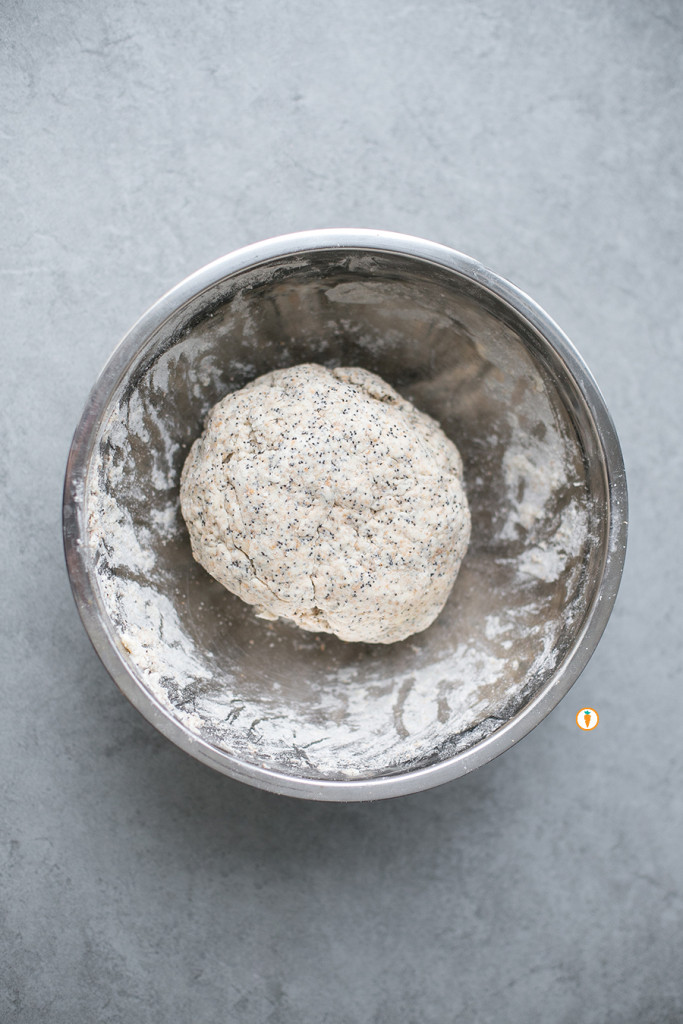
  4. Add buttermilk. Stir the mixture to moisten and create a sticky dough.
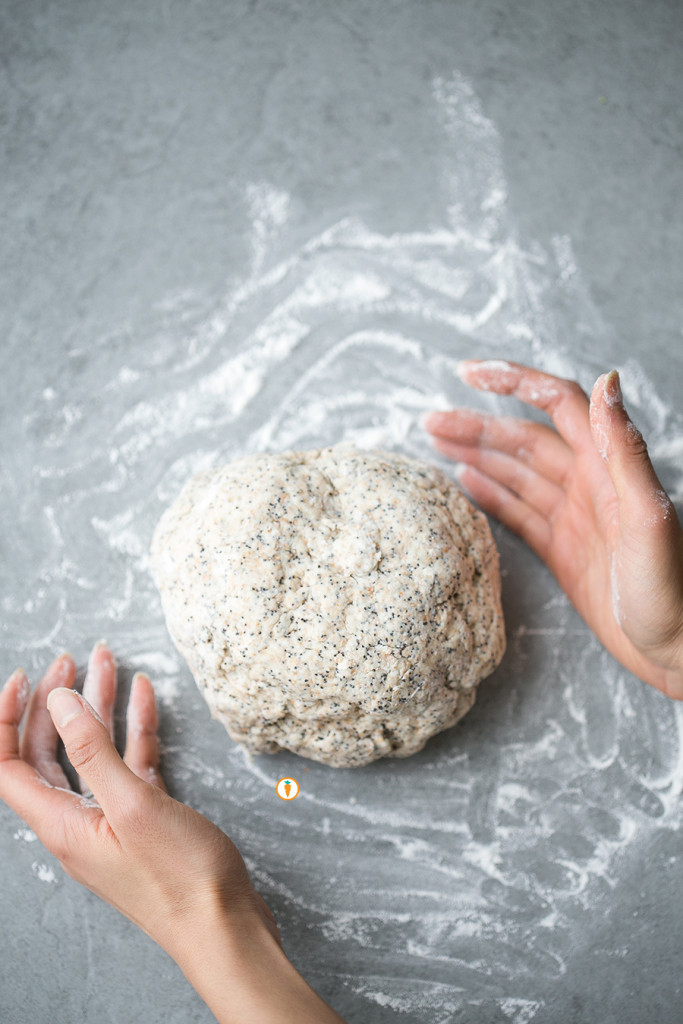
  5. Drop a handful of flour onto a clean surface and knead the dough about 10 times.
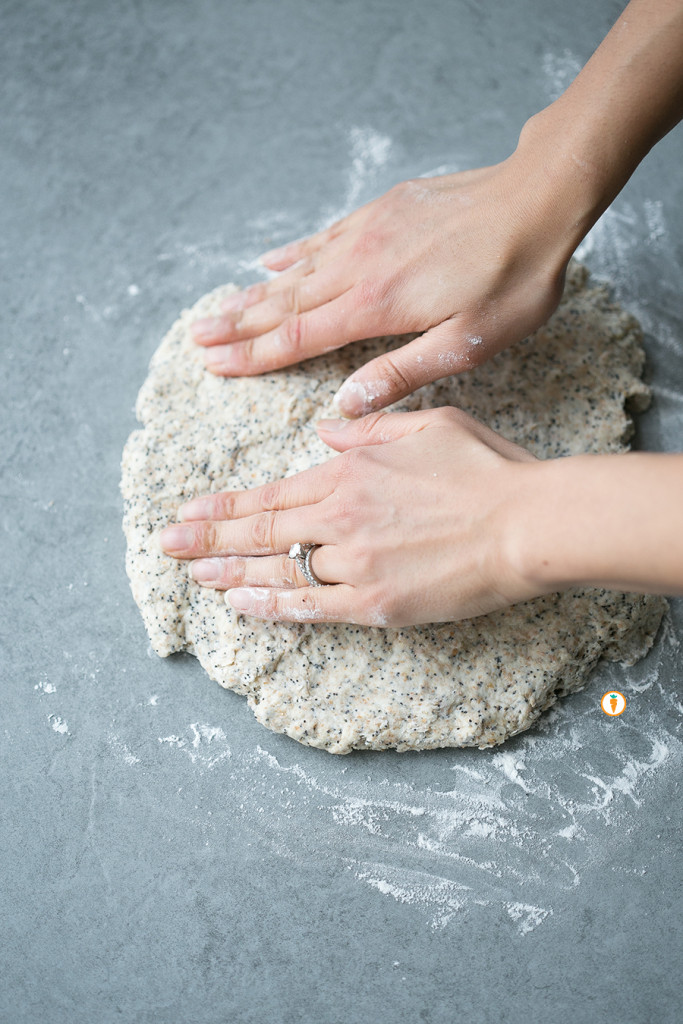
  6. Roll out the dough or using your hands pat it into a ½" thick round.
  7. Using a 2" biscuit cutter cut out as many rounds as you can. Place on a baking sheet. Gently form scraps into a ball, flatten and cut out more biscuit rounds. Repeat if needed.
  8. Bake biscuits for 12 - 15 minutes. Biscuits shouldn't be too brown! Remove from baking sheet and onto a cooling wrack.
  9. Best when served warm.

Biscuits lined upBiscuit_with jar of spreadBiscuit with Spread
Food photography done by the talented Ceone Dyck. To learn more about Ceone click here or follow her on Facebook.

Don’t forget to follow Carrots and Cake on Instagram to see tiny square snap shots of my life.

                 – With Love, Carrots and Cake,
Carrots and Cake Nita Sharda

5 Ingredient Berry Sauce

Nita Sharda, Carrots and CakeI remember the first time I made a berry sauce. It was for a brunch I was hosting and waffles were on the menu. It was some random recipe that Mr. Google found for me. It called for 1 cup of juice and 1 cup of sugar for only two cups of berries. Jesse whiz, that is A LOT of sugar. What’s a Dietitian/Food Nerd to do?
Develop her own recipe! 

I prepare this berry sauce quite regularly for our meal-prep line up. It’s extremely low maintenance and the recipe is pretty darn easy to memorize. There are so many uses for this sauce, here’s what I’ve tried so far:

  • Great in smoothies
  • Lovely on top of plain yogurt
  • Fabulous over pancakes or waffles
  • Yummy on warm or cold oats
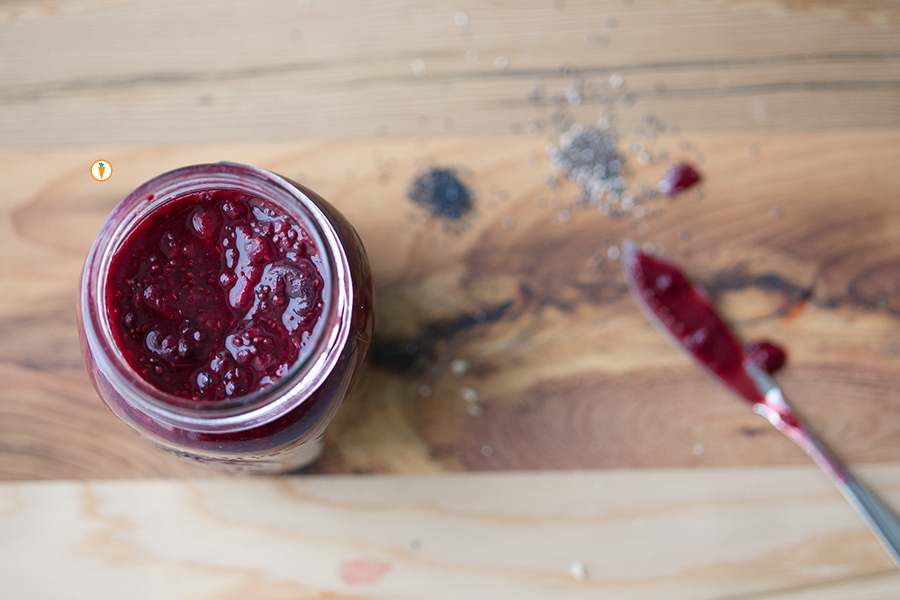
  • Genius as a jam on toast or biscuits

The recipe uses a super cool ingredient that might be new to you. It’s chia seeds! You can find these little guys at any bulk store and they can also be spotted in the “health food” aisle of many large-chain stores. Chia seeds harness a lot of nutrition, offering up some omega-3 power, fibre, calcium and a wee-bit of protein too. Chia seeds are crucial for this recipe as they suck up (literally) moisture from the concoction, leaving you with a nice saucy texture. I promise you’ll love it.

Recipe taymeee.Nita Sharda, Carrots and CakeNita Sharda, Carrots and Cake

5.0 from 1 reviews
5 Ingredient Berry Sauce
 
Prep time
Cook time
Total time
 
Ingredients
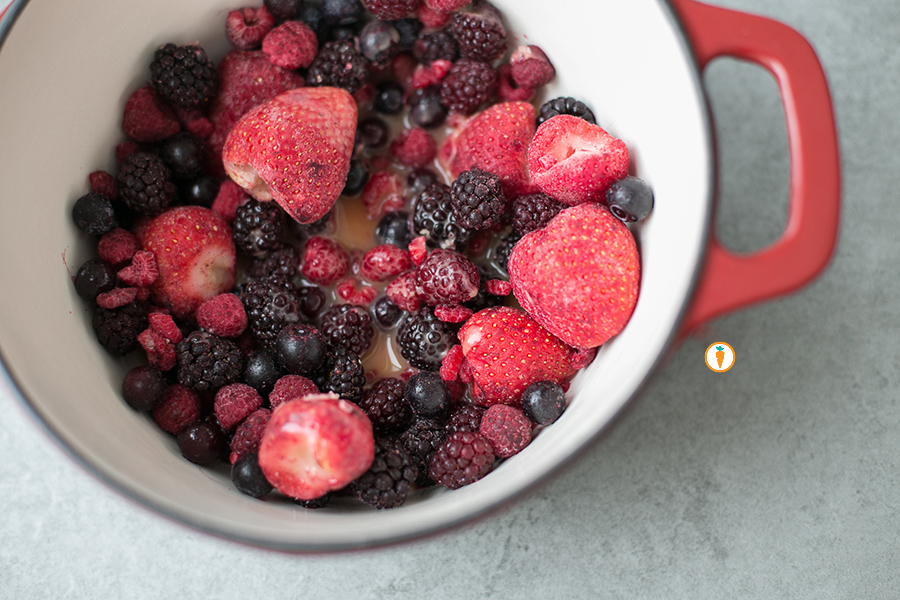
  • 3 cups frozen berries, mixed variety
  • ½ cup 100% orange juice or water
  • 2 tbsp maple sryup
  • 1 tsp vanilla
  • 2 tbsp chia seed
Instructions
  1. Place frozen berries into a medium sized pot. Add in orange juice or water.
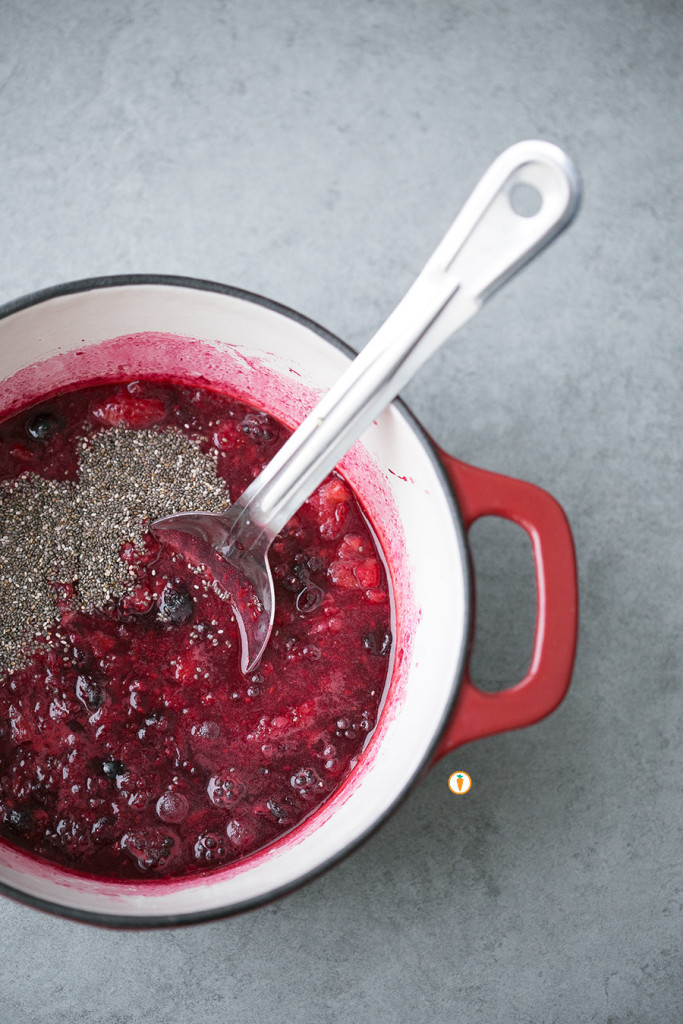
  2. Turn heat to medium and bring mixture to a gentle simmer. When this happens, using a potato masher muddle the berries to a desired consistency. I prefer to leave mine a little chunky, but to each their own!
  3. Next, add in maple syrup and vanilla. Stir to combine.
  4. Remove pot from heat and add in chia seeds.
  5. Stir and wait about 20 minutes. The mixture will begin to thicken.
  6. Store in a mason jar or tupperware for one week, refrigerated.

Nita Sharda, Carrots and Cake
Food photography done by the talented Ceone Dyck. To learn more about Ceone click here or follow her on Facebook.

Don’t forget to follow Carrots and Cake on Instagram to see tiny square snap shots of my life.

                 – With Love, Carrots and Cake,

Carrots and Cake Nita Sharda

Black Bean Brownies

Carrots and Cake, Nita Sharda

Seriously, yummy.

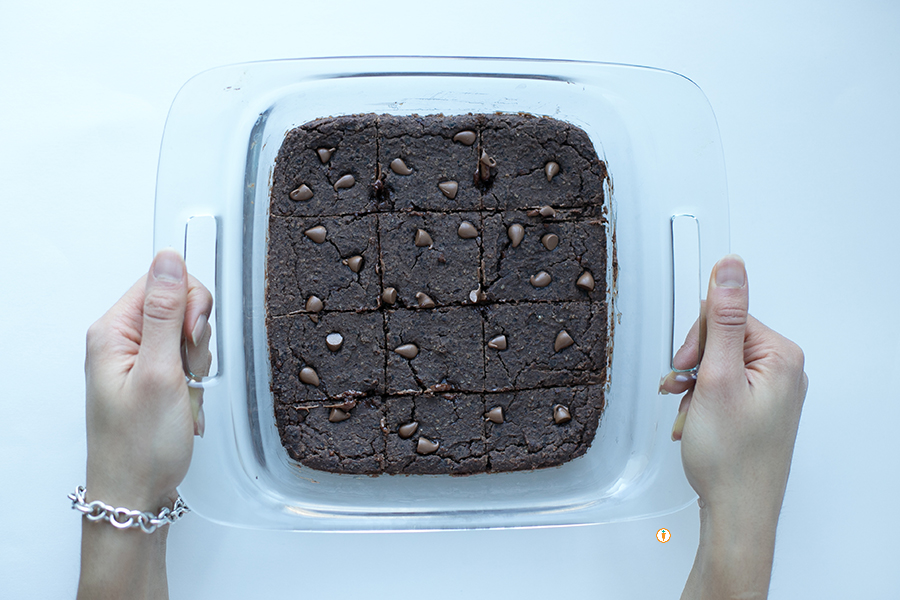
Earlier this week we talked to you about how excited we are that 2016 is the International Year of the Pulse. Hip hip hooray! In today’s recipe post we’re sharing an exciting brownie recipe that uses black beans. Yes, you read that right: BLACK BEANS. Please, don’t be scared – the results are amazing and dddddelish.

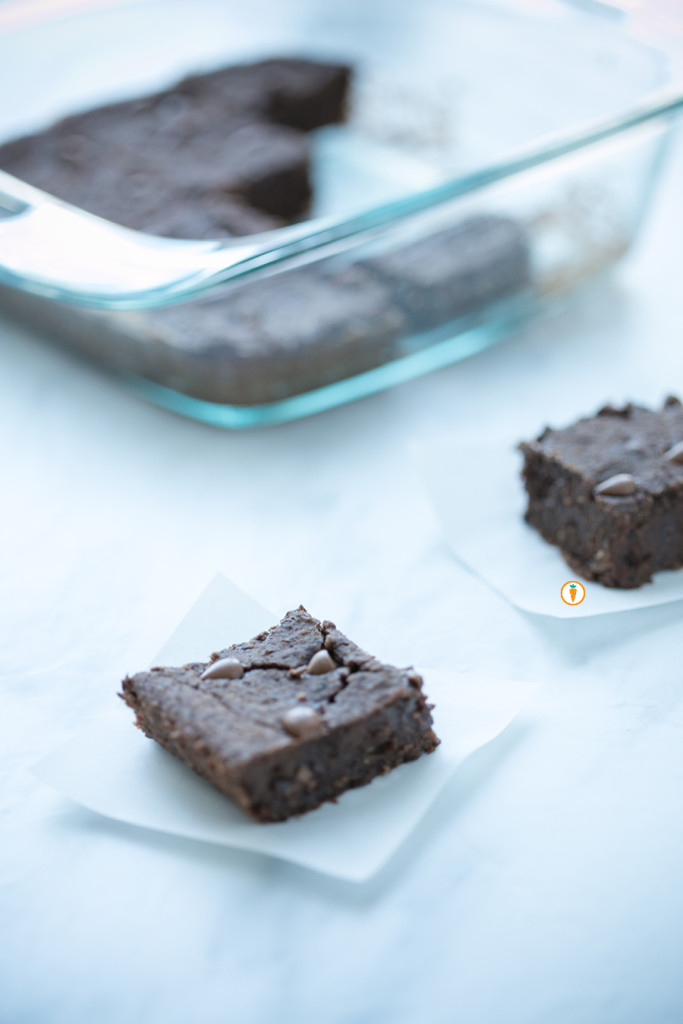
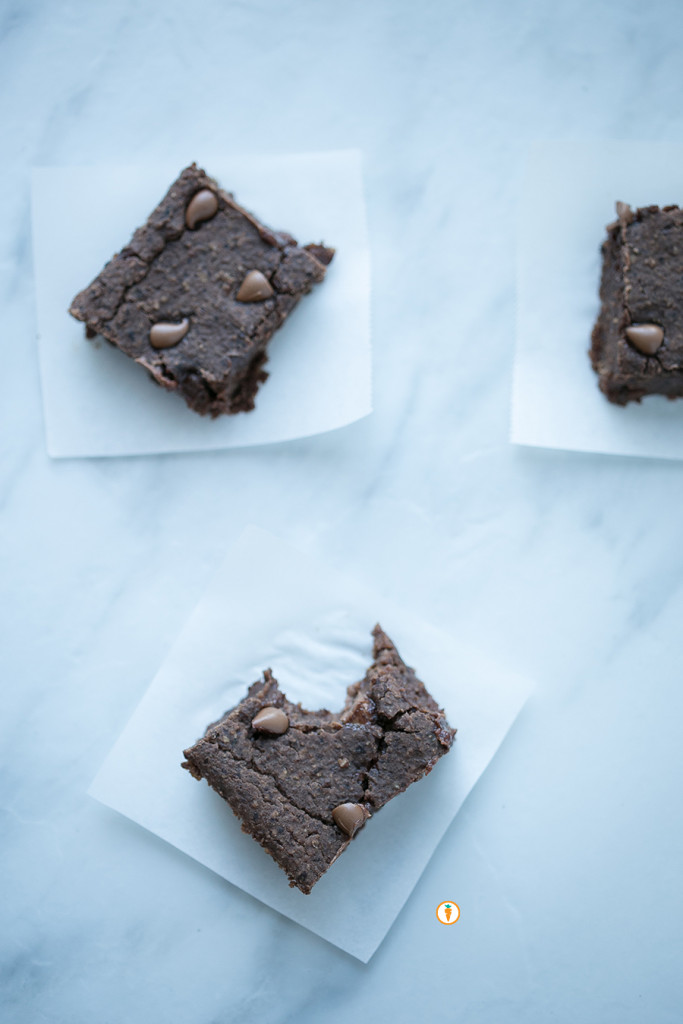
If you’re also making it a goal to experiment with new grains you’ll note that this recipe is actually wheat free. Instead, it uses oats. The original inspiration came from a fellow food blogger who we love, Chocolate Covered Katie. Our contributor Ceone had also made variations of the recipe in the past, so we wanted to share-share (what do they say? Sharing is caring). We made a few adaptations such as using applesauce to reduce the fat content and also decided to finely process the oats a bit more. The result is a brownie that resembles fudge but is still soft, a little gooey and chocolatey. All good things people. All good things.

From a nutrition standpoint, what I love about this dessert option is that it offers my clients an opportunity to still practice balance. In comparison to commercial or boxed brownies, this brownie is fairly low in sugar, offers up some fibre and protein which in turn will help you feel full for longer (that’s because fibre and protein are satiating). It’s totally the type of treat (or every day food) that really can be good for you. 

Carrots and Cake, Nita Sharda

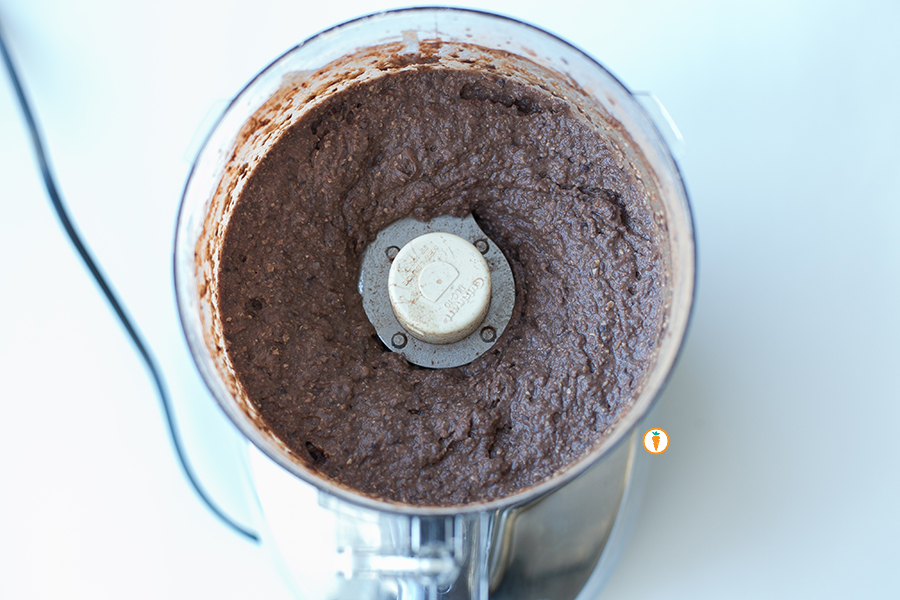
All mixed up.

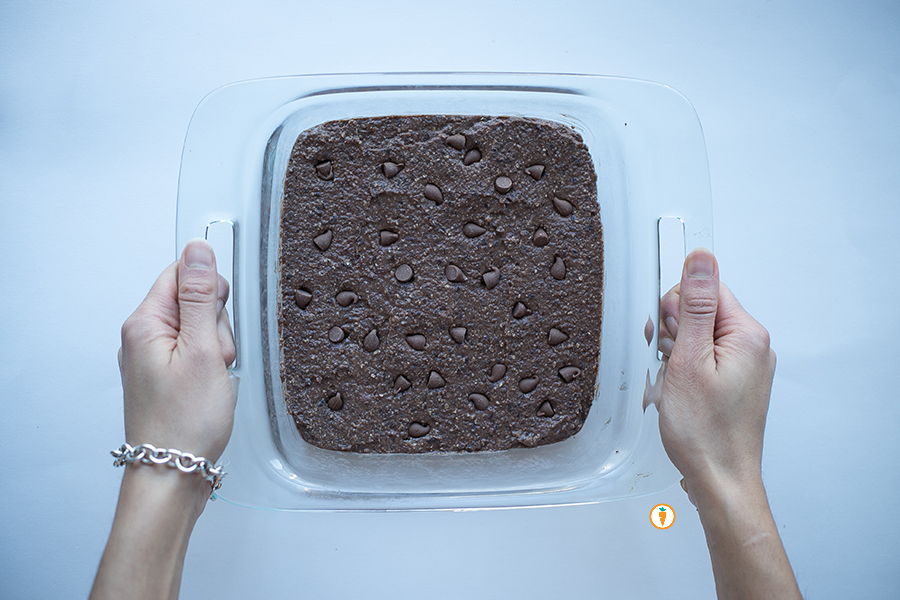
Before it goes into the oven.

Before it goes into the oven.

Carrots and Cake, Nita Sharda

After it’s been baked.

Okay, okay. Enough with the chatter. Recipe below:

Black Bean Brownies
 
Prep time
Cook time
Total time
 
Serves: 12
Ingredients
  • 1½ cups black beans, drained and rinsed
  • 2 tbsp cocoa powder
  • ½ cup quick oats or rolled oats
  • ¼ tsp salt
  • ⅓ cup maple syrup
  • ¼ cup unsweetened applesauce
  • 1 tbsp canola oil
  • 2 tsp vanilla extract
  • ½ tsp baking powder
  • ½ cup chocolate chips
Instructions
  1. Preheat oven to 350 F.
  2. Place oats into the bowl of a food processor and pulse until it resembles coarse flour.
  3. Add remaining ingredients except chocolate chips into a food processor and blend until completely smooth.
  4. Fold the chocolate chips into the batter.
  5. Place mixture into a greased 8×8 pan.
  6. Optional: sprinkle extra chocolate chips over the top.
  7. Cook the black bean brownies 20 minutes. Allow it to cool and set at least 10 minutes before trying to cutting into it. If they still look a bit undercooked, you can place them in the fridge overnight and they will magically firm up! Makes 12 brownies

1BlackBeanBrownies_squares

These photos  were taken by Ceone Dyck, 4th Year Human Nutritional Sciences student. To learn more about Ceone click here or follow her on Facebook.

                 – With Love, Carrots and Cake,

Carrots and Cake Nita Sharda

#GNI Indian Style: Vegan Mango Lassi

Nita Sharda, Carrots and Cake

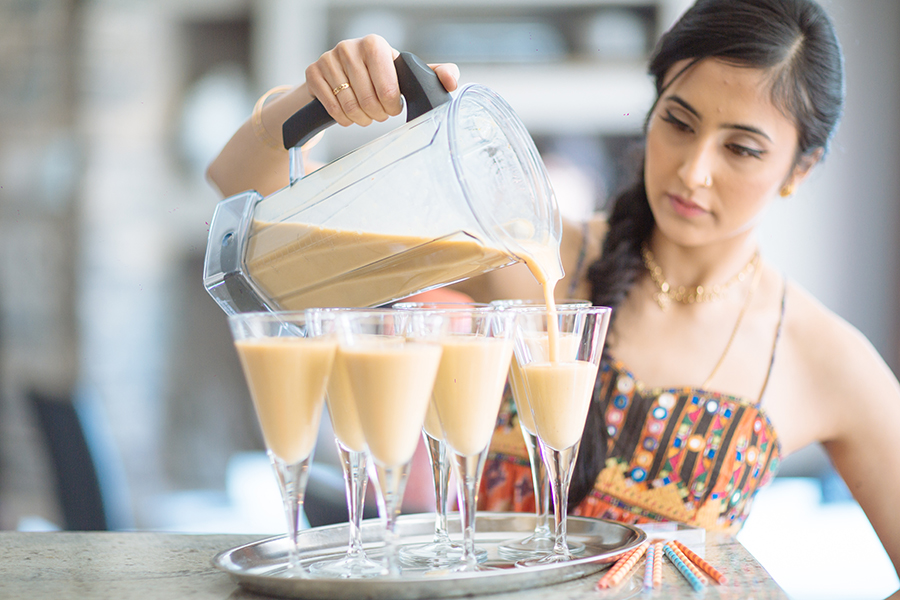
Pouring for my guests.

Every girls night needs a signature drink, right? Instead of opting for a boozy beverage I decided to take a twist on the traditional Mango Lassi and “vegan-ize” it. Lassi is a common beverage enjoyed in most parts of India. It isn’t always flavoured; in fact, my favorite type of lassi is actually “plain”! It’s perfect on hot days when you need something to quench your thirst and keep you cool. For those of you (myself included) who love dairy milk, you can easily swap out the ingredients as you wish! My girlfriends Courtney (The Fig Tree) and Chantal (Nutty 4 Nutrition) don’t do so well with cow’s milk so I was more than happy to accommodate their restrictions. And guess what? Everyone loved it!

The ingredient list as you’ll see is minimal and perhaps the most important ingredient of all is yogurt. When you peruse through other lassi recipes you’ll notice they almost all contain yogurt which helps to impart the slightly sour taste that you can’t help but love.
Carrots and Cake, Nita ShardaCarrots and Cake, Nita ShardaAs far as spices go, you can be as adventurous (or not) as you want to be. I love using similar spices as I would in my chai (tea) so I tend to stick with cardamom, cinnamon and cloves. I also added some saffron which is a commonly used spice among many Indian dishes. Because it can be difficult to come by and also extremely expensive I only used a small sliver for each serving.

You can slurp on this beverage as part of a healthy breakfast, post workout nutrition or simply offer it up to your guests at any time and for any occasion. Heck, serve it as a liquid dessert (that’s a great idea).

Happy sippin’ folks…and now, the recipe:

#GNI Indian Style: Vegan Mango Lassi
 
Prep time
Total time
 
Serves: 3 - 4 servings
Ingredients
  • 2 cups frozen mango, cubed
  • 2 cups soy yogurt, plain
  • 1 cup soy milk
  • ¼ - ½ cup water
  • ¼ tsp ground cinnamon
  • ¼ tsp ground cardamom
  • ¼ tsp ground cloves
  • Agave nectar (or honey) to taste *optional
  • Ice cubes
  • Saffron, for garnish
Instructions
  1. In a high speed blender (or large food processor) puree the mango until it is in liquid consistency.
  2. Add in yogurt, milk and spices. Blend for 45 seconds.
  3. Next, depending on how thin or thick you want your lassi, add in water. Be careful! Just add a little at a time until you reach your desired consistency.
  4. Pour lassi into glasses, add in ice cubes and one sliver of saffron to each glass.
  5. Serve and enjoy!

Nita Sharda, Carrots and CakeCarrots and Cake, Nita Sharda

Before you leave, check out this fun stop motion video about the girls night in I hosted, trust me you, you’re going to want to see it! It’s pretty darn cute if I don’t say so myself!

– With Love, Carrots and Cake,

Carrots and Cake Nita Sharda

#GNI Indian Style: Fudgy Coconut Ladoo

Carrots and Cake, Nita Sharda

Yes, dessert first! I’ve mentioned in previous posts that I prefer to always let my guests know that a dessert will be served. If the dessert is all set to be eaten, I don’t mind plating and having it available to my guests to eat. First. I know what you’re thinking: won’t they fill up on dessert and not eat the meal? Maybe, but maybe not.

Here are a few reasons why I choose to serve dessert first. For starters: I hate it when guests choose not to eat dessert because maybe they reached their “fullness” cue shortly after dinner. That’s fair. And, I’m not one to force anyone to have dessert because chances are, it may not make them feel well (even if it happens to be a low calorie dessert such as fruit). Secondly: I believe in offering people choice. Simple as that. And lastly, for those caring for young children, serving dessert first or with a meal takes the reward factor out. Children shouldn’t be coerced into eating their meat, veggies, milk etc because they’ve got a dessert waiting for them. Serving dessert with a meal and avoiding using it as a reward are big leaps of faith, but the return is amazing.

MOVING ON.

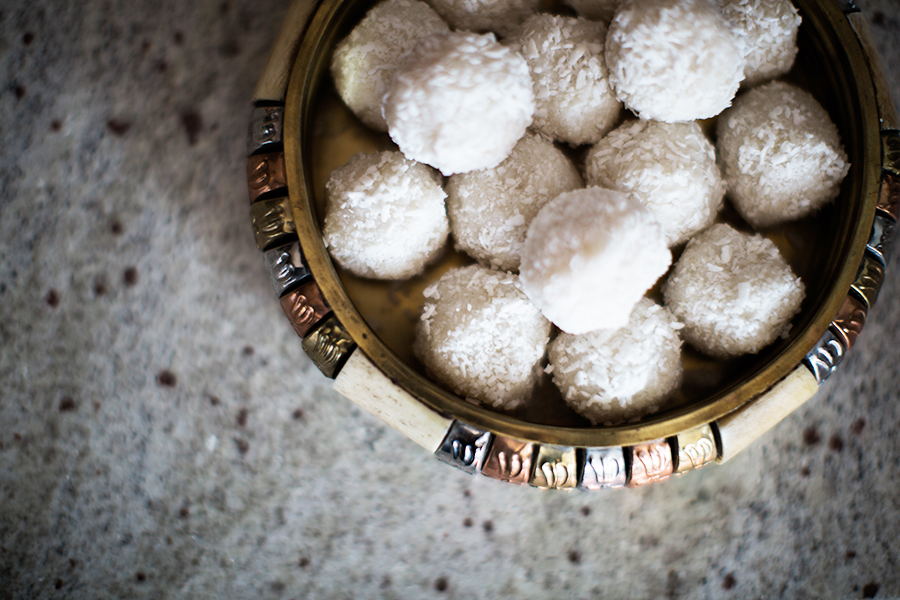
For the GNI my friend Courtney Rae of ‘The Fig Tree’ blog brought two items. One of them happens to be this easy and yummy Fudgy Coconut Ladoo. Imagine a ball of coconut goodness with a touch of cardamom that hits your sweet spot but without driving you into a sugar crash. The original recipe was created by a lovely vegan food blogger, Richa. She has recently launched her first cookbook titled Vegan Richa’s Indian Kitchen: Traditional and Creative Recipes for the Home Cook. If you want to get your hands on this baby, click here. In the mean time, whip these babies up yourself by clicking here to visit the recipe details on Richa’s website

Spotted! Christine and Jennifer Ashley (‘Pretty Little Details’) with the uber delicious ladoos. They were all gone!

Nita Sharda, Carrots and Cake

Nita Sharda, Carrots and Cake

Before you leave, check out this fun stop motion video about the girls night in I hosted, trust me you, you’re going want to see it! It’s pretty darn cute if I don’t say so myself!

– With Love, Carrots and Cake,

Carrots and Cake Nita Sharda

Soft Carrot Oatmeal Cookies #kidfriendly

Nita Sharda, Carrots and Cake

C’mon, don’t you celebrate your birthday all month long?

Okay, I can’t possibly be the only one that celebrates birthday’s all month long.  Right?  Lucky for you, in lieu of this blog’s first birthday I also whipped up a cookie recipe.  Sorry, this recipe isn’t loaded with sugar, chocolate or copious amounts of fat.  Instead, this soft and well textured cookie is full of yummy carrot goodness and is a big hit not just with adults, but kids too!  My nieces love snacking on this cookie and their moms feel good offering it as a snack. That’s a win win situation if you ask me.

If you’re going to compare this cookie to an Oreo or Chip’s Ahoy, that’s just not fair. Simple homemade cookies can’t compete with hyper-processed and sugar laced foods. This cookie is whole grain and contains whole ingredients. Nothing fake here.

Simple homemade foods can’t compete with hyper-processed foods.

I opted to use honey as my primary sweetener. You can choose to use maple syrup or agave nectar if you wish. Note to mama’s and papa’s: if baby is less than 12 months, you don’t want to offer them honey. Use maple syrup instead.

I got the inspiration from these cookies via another blog. The original recipe can be found here. Thanks Amy!

4.0 from 1 reviews
Soft Carrot Oatmeal Cookies #kidfriendly
 
Prep time
Cook time
Total time
 
Serves: 12 - 18
Ingredients
  • 1 cup quick cooking oats (source gluten free if necessary)
  • ¾ cup whole wheat flour (or, gluten free flour if necessary)
  • 1 ½ tsp baking powder
  • 1 ½ tsp ground cinnamon
  • ⅛ tsp salt
  • 2 tbsp canola oil (or, whatever type of fat you prefer)
  • 1 large egg
  • 1 tsp vanilla extract
  • ½ c honey, maple syrup or agave (I used honey)
  • ¾ c grated carrots (about 1 medium carrot)
Instructions
  1. In a medium sized bowl, combine oats, flour, baking powder, cinnamon, and salt.
  2. In another small bowl, whisk together the canola oil, egg, and vanilla extract. Stir in the honey until thoroughly incorporated. I prefer to use a hand mixer for this step.
  3. Add the wet mixture to your flour mixture. Don't over mix the contents - just enough to blend well. Then, fold in the carrots.
  4. As recommended by Amy, chill the dough for at least 30 minutes. (If chilling longer, cover with plastic wrap, ensuring it touches the entire surface of the cookie dough). This helps you out a lot when you start dropping the cookies onto your baking sheet.
  5. Preheat the oven to 325°F, and line a baking sheet with parchment paper.
  6. Drop the cookie dough into 15 rounded scoops on the baking sheet. (If chilled longer than 1.5 hours, flatten slightly.) Bake for 12-15 minutes or until a toothpick comes out clean.
  7. Cool on the baking sheet for at least 15 minutes, and then place on a wire rack.
  8. Now, enjoy.

And again, here’s to raising a forkful of Carrot Pineapple Loaf and toasting to a very, very happy first birthday!

– With Love, Carrots and Cake,

Carrots and Cake Nita Sharda

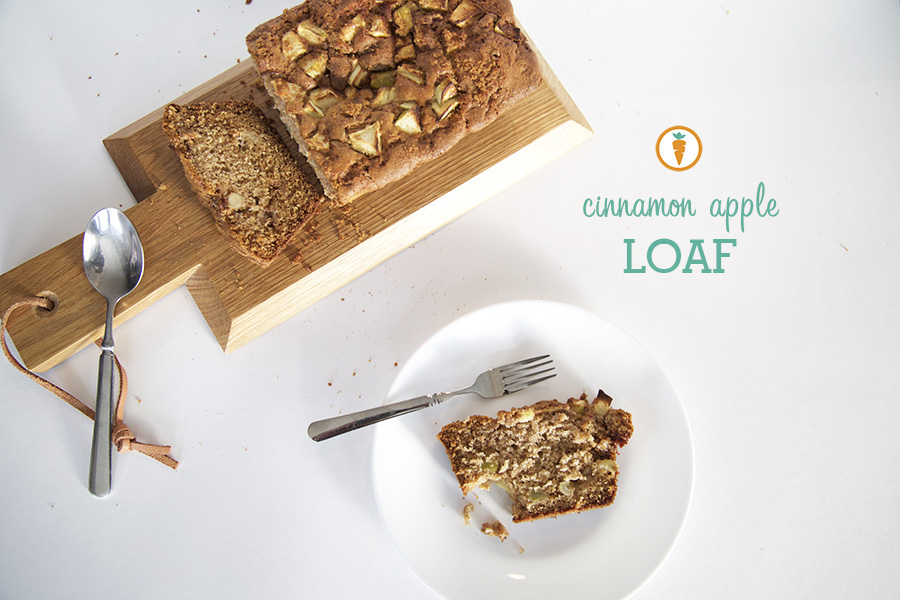
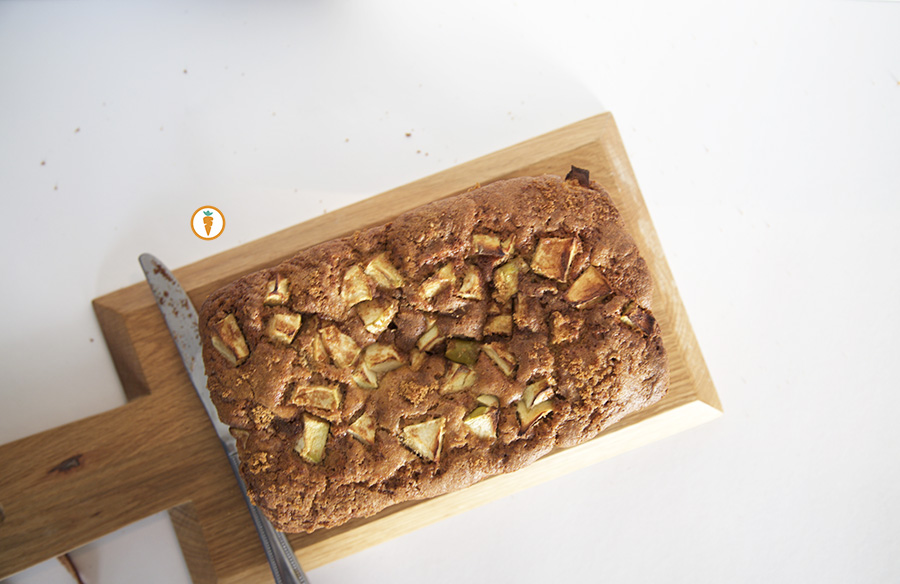
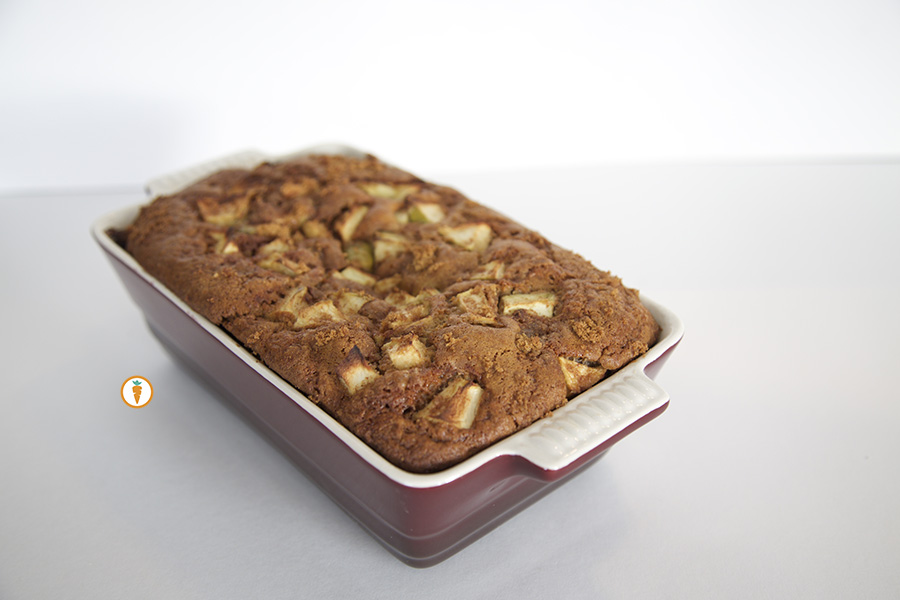
The Better Cinnamon Apple Loaf

Nita Sharda, Carrots and Cake

I’ve been working hard at mastering this recipe; I think I’ve finally nailed it (man, what a good feeling)! The original recipe came from my colleague; she brought her version into work and wow’d everyone. The next day, multiple copies of the recipe floated around my workplace. Eager to make it myself, I grabbed a copy and began making a few tweaks.

And then, the “Dietitian” in me came out.

The original recipe called for only white all-purpose flour and ½ cup of butter. In an effort to increase the fibre content of the loaf I opted to use a bit of whole-wheat flour. Secondly, instead of butter, I used a combination of applesauce and canola oil. But really, you could use the butter if you love that flavor and want to boost the fat content a bit. It really is a versatile recipe.

Note: if you use butter; be sure to really cream it into a smooth consistency for a good quality product.

4.0 from 1 reviews
The Better Cinnamon Apple Loaf
 
Prep time
Cook time
Total time
 
Ingredients
  • ⅓ cup brown sugar
  • 1 tsp ground cinnamon
  • 1 tsp ground nutmeg
  • ½ cup sugar
  • ¼ cup canola oil (or any oil you prefer)
  • ¼ cup applesauce, unsweetened
  • 2 eggs
  • 2 tsp vanilla
  • 1 cup all-purpose flour
  • ½ cup whole wheat flour
  • 2 tsp baking powder
  • 2 tsp baking soda
  • ½ cup milk (or milk alternative)
  • 1 apple, chopped (I used Granny Smith for tartness)
Instructions
  1. Preheat oven to 350 degrees. Grease your loaf pan.
  2. Mix brown sugar, nutmeg and cinnamon in a small bowl, set aside.
  3. In another medium sized bowl beat white sugar, applesauce and oil using a hand blender or beater. Beat until smooth and then one by one add in the eggs and vanilla.
  4. In a large bowl, blend flours, baking powder and baking soda.
  5. Add the wet ingredients to the dry ingredients. Your batter should be smooth, and wet. It won’t look like a whole lot but that’s okay. Don’t over mix!
  6. Pour ½ the batter into the prepared loaf pan. Next, add ½ the apples and ½ the brown sugar and cinnamon mixture.
  7. Lightly pat the apples into the batter
  8. Pour remaining batter of the apple layer, top with remaining apples and finish off with the sugar and cinnamon topping.
  9. Bake in your oven for approximately 30 – 40 minutes, or, until toothpick inserted comes out clean.

After it’s done, hide it somewhere special so your husband doesn’t gobble it down (sorry babe, xoxo). It’s that good.

Nita Sharda, Carrots and CakeNita Sharda, Carrots and Cake

– With Love, Carrots and Cake,

Carrots and Cake Nita Sharda

GNI Feature – Very Berry Pavlova

Nita Sharda, Carrots and Cake

Very Berry Pavlova

Pavlova – I was first introduced to this delicate dessert by a dear friend of mine. She’s the kind of friend who, no matter what, will always handcraft a dessert when we visit. No, she’s not the cake-mix kinda gal. She’s the whip your own whipping cream, chop berries and use a springform pan kinda woman. I like her. Okay I lied, I love her.

If you haven’t yet tried pavlova, you’re missing out. I prefer homemade versions over those sold in stores or at other restaurants. It’s a dessert that really needs to be enjoyed when it’s fresh. Each mouthful is packed with sweetness (but not too much), a cool touch of whipping cream and burst of fresh flavor from the fruit you use. I added pistachios to my final product to add a bit of a crunch, and color. If you want to go nut-free, by all means, go for it!

Nita Sharda, Carrots and Cake

Now, when it comes to dessert, this is full-fat, full-sugar. There’s no “lightening” up when it comes to pavlova (or atleast I haven’t tried). It’s an all-in kind of dessert. Does that make me feel badly? Of course not. Pavlova takes a gentle touch and I’d much rather prefer to spend as much time enjoying it as I took to prepare it. In situations like this, I always allude to something Michael Pollan wrote about in his book, Food Rules. He mentioned that french fries are often enjoyable. But, when you take time to prepare them by hand it can become quite labour-some. When you’re feeding a family that can amount to a lot of time and energy to hand-prepare fries if you’re serving them several times a week. So would you necessarily make french fries regularly? Probably not. But once every 6 – 8 weeks, sure! That’s how I feel about pavlova.

I was never raised in a family that placed emphasis on desserts. I remember my parents serving something sweet only “once in a while” in between birthdays. Looking back, since discovering pavlova roughly four years ago, I’ve probably only made it a handful of times. So, like I said, I go all in.

I hope you have the opportunity to enjoy this recipe and dessert as much as I do. It’s a definite crowd pleaser. You can bake it into what shape or size you wish. I changed things up by making a 4″ pavlovas. The recipe was sourced from The Joy of Baking website. And fair warning, prepare to make the pavlova 4-5 hour prior to serving, you’ll need time for it to cool slowly in the oven. See below:

Very Berry Pavlova
 
Prep time
Cook time
Total time
 
Serves: 6-8
Ingredients
  • Pavlova
  • 4 large egg whites
  • 1 cup superfine sugar
  • ½ tsp pure vanilla extract
  • 1 tsp white vinegar
  • 2 tsp cornstarch
  • Topping:
  • 1 cup whipping cream
  • 1½ tbsp granulated white sugar (or to taste)
  • ½ tsp pure vanilla extract
  • Fresh fruit of your choice- kiwi, strawberries, raspberries, blackberries, passion fruit, peaches, pineapple, mango etc.
Instructions
  1. Preheat oven to 250 degrees F and place rack in center of oven. Line a baking sheet with parchment paper and draw a 7 - 8 inch circle on the paper. Turn the parchment paper over so the circle is on the reverse side.
  2. In the bowl of your electric mixer, with the whisk attachment, beat the egg whites on medium speed until they hold soft peaks. Start adding the sugar, a tablespoon at a time, and continue to beat, on high speed, until the meringue holds very stiff and shiny peaks (about 5-6 minutes). Test to see if the sugar is fully dissolved by rubbing a little of the meringue between your thumb and index finger. The meringue should feel smooth, not gritty. If it feels gritty the sugar has not fully dissolved so keep beating until it feels smooth between your fingers.
  3. Beat in the vanilla extract.
  4. Sprinkle the vinegar and cornstarch over the top of the meringue and, with a rubber spatula, gently fold in.
  5. Spread the meringue inside the circle drawn on the parchment paper, smoothing the edges, making sure the edges of the meringue are slightly higher than the center; you want a slight well in the center of the meringue to place the whipped cream and fruit.
  6. Bake for 60 to 75 minutes or until the outside is dry and is a very pale cream color. Turn the oven off, leave the door slightly ajar, and let the meringue cool completely in the oven.
  7. The outside of the meringue will feel firm to the touch, if gently pressed, but as it cools you will get a little cracking and you will see that the inside is soft and marshmallowy.The cooled meringue can be made and stored in a cool dry place, in an airtight container, for a few days.
  8. Just before serving gently place the meringue onto a serving plate.
  9. Whip the cream in your electric mixer, with the whisk attachment, until soft peaks form. Sweeten with the sugar and vanilla and then mound the softly whipped cream into the center of the meringue.
  10. Arrange the fruit randomly, or in a decorative pattern, on top of the cream. Serve immediately as this dessert does not hold for more than a few hours.

A few more drool-worthy photos by: Samba Joy Photo & Art.

Nita Sharda, Carrots and CakeNita Sharda, Carrots and Cake

Nita Sharda, Carrots and Cake

Here we go, all in!

Oh, and just incase you missed the magical video that my friends at Samba Joy created for me, see below!

                 – With Love, Carrots and Cake,

Carrots and Cake Nita Sharda


Sharing Stories: Summer, with Ice Cream

Nita Sharda, Carrots and Cake

Just when you thought it might not come, it did. Summer came to Winnipeg.

I rang in the start of my favorite season by driving to a local grocer, picking up a pale of ice cream, chopping a few juicy strawberries and enjoying a modest portion of Cornell Crème’s Natural Vanilla Bean ice cream.  Yes people, I, Nita Sharda, Registered Dietitian eat full fat ice cream #aintnoshame.  For me, eating ice cream or any “treat” is a proclamation of how content I am with my physical body, and I’d also like to think it reflects the control I have over my personal health and well being.

You may not spot me licking ice cream on a daily basis, but when the occasion calls for it, I’m all in. I’ve bid farewell to the days of feeling “guilty” after inhaling a high-sugar high-fat food item. Instead of being bogged down by treats, I allow them to elevate me and remind myself that yes, I am in control. Besides, life is short and fine-tuning that balance is something we all struggle with as we work through life.

Okay, okay, I’m done with my venting.

What I’m really excited to share is some briefing notes from a cyber chit-chat I had with Lisa Dyck, owner of Cornell Crème ice cream which is taking over Manitoba. Similar to when I shared my personal food philosophy, Lisa feels it’s important to know where her food comes from, to become well versed in reading nutrition labels and to understand ingredient lists. As an ice cream producer herself, she admits that life is about balance: “eat a balanced diet; treat yourself in moderation”.

Nita Sharda Carrots and Cake

Lisa Dyck, Cornell Creme

Cornell Crème is sold across Manitoba with several retailers’ right in Winnipeg. For more information on where you can make your purchase, click here. Also keep your eyes open for Dan, the ‘Cornell Creme Bike Man’. He can be spotted at local jams, festivals and hot spots in the city. I’ve spotted him myself around Osbourne Village offering up a mini serving of ice cream to local folks. Here’s more from Lisa:

How did the birth of Cornell Crème come to be?
Cornell Creme evolved over time; from making a natural, good tasting ice cream at home for my family to wanting to develop a real-deal product made from our milk.

We wanted to make the best tasting ice cream from our farm’s milk. We support ethical ideals such as sourcing ingredients from local suppliers, Fair Trade, Non-GMO and Kosher. Every ingredient we use is sourced with thought and effort. We want to make sure we feel good about the product we are making as well as contributing to an ethically sound environment.

Do you promote the use of preservatives in your ice cream?  
No. I try to let our ingredient list speak for itself. All natural with no preservatives. This means we only use cream, milk, sugar, egg yolks and extracts that are either organic or kosher certified.

How do you raise your cows?
To a dairy farmer the health of his or her cows is number one.  Farmers work very hard to make sure their cows are fed top quality feed and that they receive the best care. We are very serious about our cows and their care, health and happiness comes first on our farm. Our cows are in a free-stall/free-roaming barn. They have access to nutritious feed three times a day with liters upon liters of fresh water. If the cows are happy, then farmer is happy.

Let’s talk about the flavors. Malty Ale Pale—how the heck did you dream of this one?
*insert giggles* A friend of mine who happens to be a chef suggested the beer flavor. We went with it and never looked back.

Where do you find inspiration for your flavors? They certainly are unique, not to mention mouth-watering.
Most flavor inspirations are derived from what goes on in my brain. I try to base selections on what I like and what is popular with consumers. My family, friends and fellow tweeters also offer up suggestions. If it will fit our production method, we consider it.

How is Cornell Crème Ice Cream different from those that are mass produced?
We use fresh milk straight from our farm to plant. We stick to the five basic ingredients. Being a local producer, we try our best to source local ingredients within our networks. Our ice cream also has a very low overrun. Overrun means the amount of air that is pumped into ice cream. So, if the overrun is high (lighter ice cream) you will be paying for more air in the product. You do get what you pay for but we believe when comparing prices you may actually be getting a little more than you are paying for with our ice cream.

We also went with high butterfat content because taste is carried through fat as the medium in (many) foods. When your body/palate craves “fat”, you can actually eat very little of our ice cream and your brain will register it has had enough. With lower fat ice cream you may need to eat more of the product to feel the satisfaction. Ice cream is meant to be a decadent treat not a meal replacement.

A part of being an entrepreneur is preparing yourself for more and more growth. How do you plan to grow Cornell Crème? Would you consider selling across to other provinces?
We make the ice cream at a CFIA (Canadian Food Inspection Agency) approved facility. This ultimately means we can sell nationally across Canada. If we move from our current plant (our plan this year) we have the opportunity to upscale production.  If we get sales in other provinces, yes, we will consider it! We are trying to grow one step at a time ensuring we are making the right decision for our family and for Cornell Crème. We certainly do not want to grow too big, too fast.

And for the grand finale, last question (enter drum roll): What is your favorite flavor?
Hands down, without a doubt: Vanilla Bean!

Thank you again, Lisa, for spending some time with Carrots and Cake. I’m humbled to have met you and wish you and Cornell Crème nothing but the best!

If you want get to know Cornell Crème a bit more, follow their blog here. You can also follow them on Twitter, Instagram and Facebook.

Nita Sharda

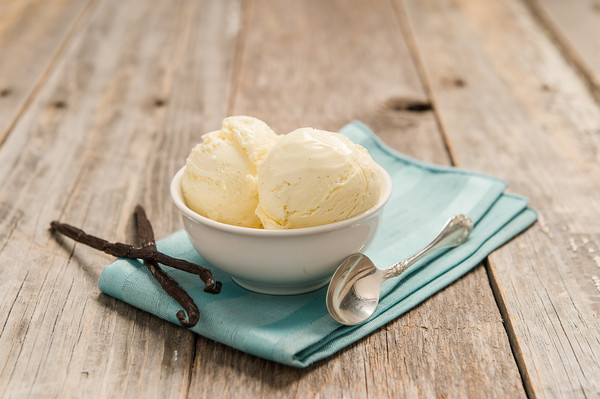
Lisa’s favorite, Natural Vanilla Bean

The opinions contained within this blog post are solely my own (unless otherwise stated) and are intended purely for educational and sharing purposes. The purpose of the above post is not to display advertisement. Carrots and Cake did not and will not accept reimbursement for the above post.

                                – With Love, Carrots and Cake,

Carrots and Cake Nita Sharda