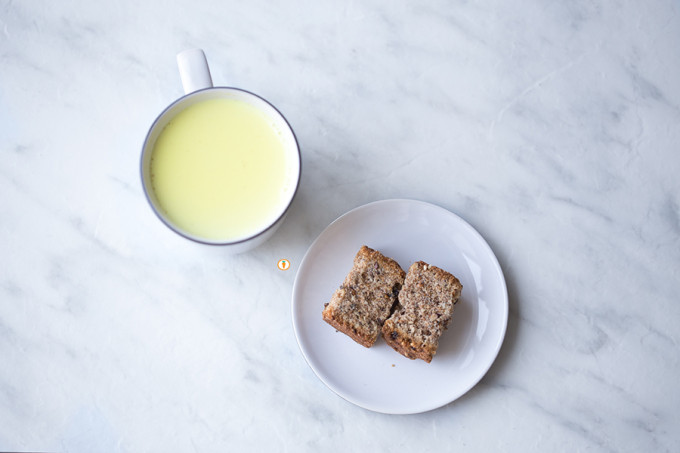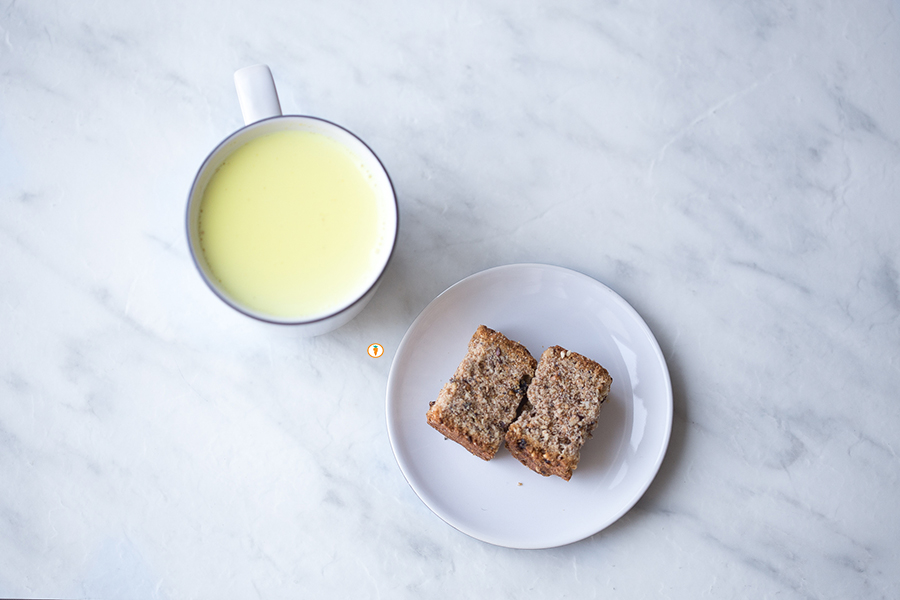
Turmeric Milk aka Haldi Ka Dhood

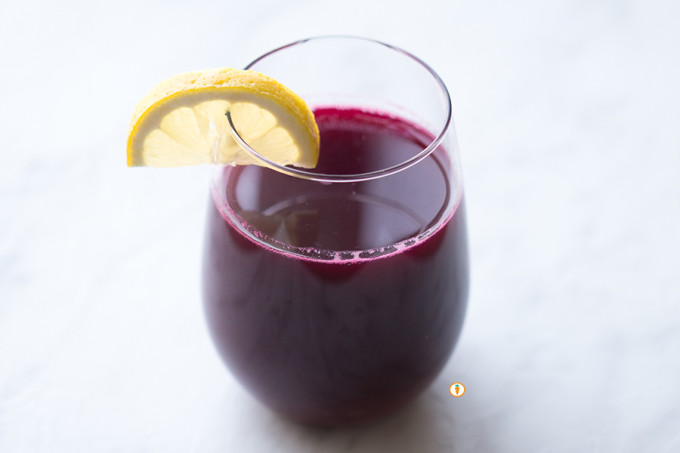
Tumeric Milk_birds eyeYeah, that’s right. Turmeric milk. It’s totally all the craze right now but ironically enough, this recipe for warm milk is close to home for many East Indians. Turmeric milk, also known as “golden milk” or in Hindi haldi ka dhood is incredibly nourishing. Ayruvedic experts believe it helps with the prevention of common coughs, colds and insomnia (or so my mom tells me). The star ingredient in this recipe is turmeric which we now KNOW is anti-inflammatory, chalk full of antioxidants and also has anti-bacterial properties to it.

But that’s not the only reason why you should try this recipe. Try it, because it’s delicious, easy and a feel-good kinda bevy.

It’s all things cozy and relaxing.
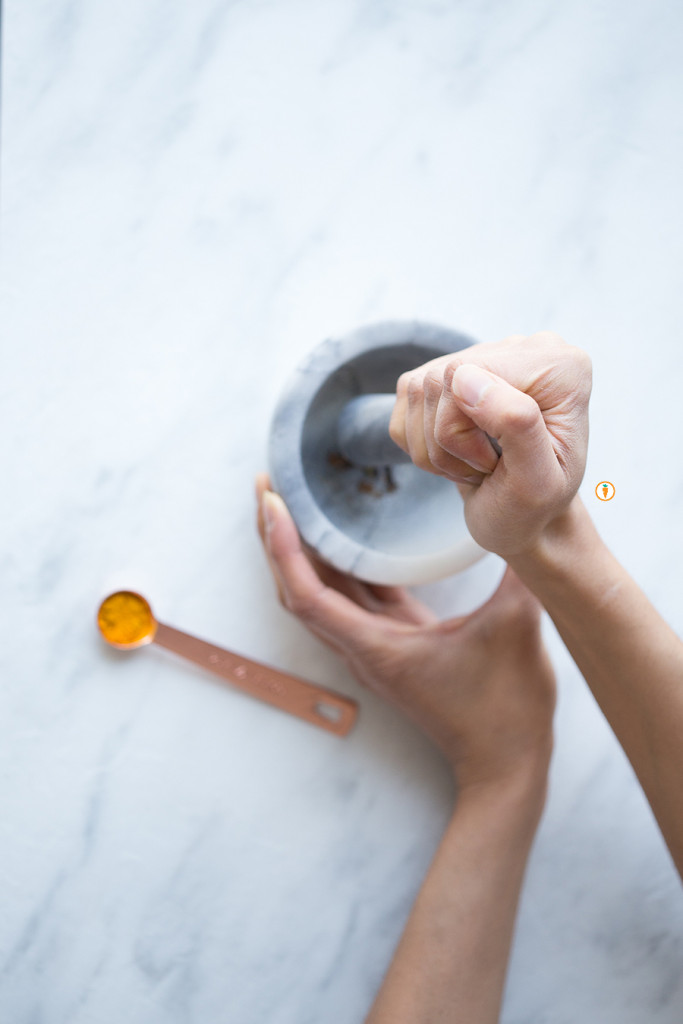
Tumeric Milk_handsHere’s my version of haldi ka dhood: 

Turmeric Milk aka Haldi Ka Dhood
 
Prep time
Total time
 
Serves: 1 cup 1 serving
Ingredients
  • 1¼ cup milk
  • ½ tsp turmeric (or as much as tolerated)
  • ⅛ tsp ground cinnamon
  • ⅛ tsp ground cloves
  • ⅛ tsp ground cardamom
  • Drizzle honey *optionals
Instructions
  1. Pour milk into a small pot and turn onto low heat. Stir in the turmeric powder, cinnamon, cloves and cardamom.
  2. Bring to gentle boil and allow to simmer for 3 - 4 minutes. Be sure to keep a watchful eye on the pot, you don't want to burn the milk.
  3. Pour into a cup and sweeten with honey.
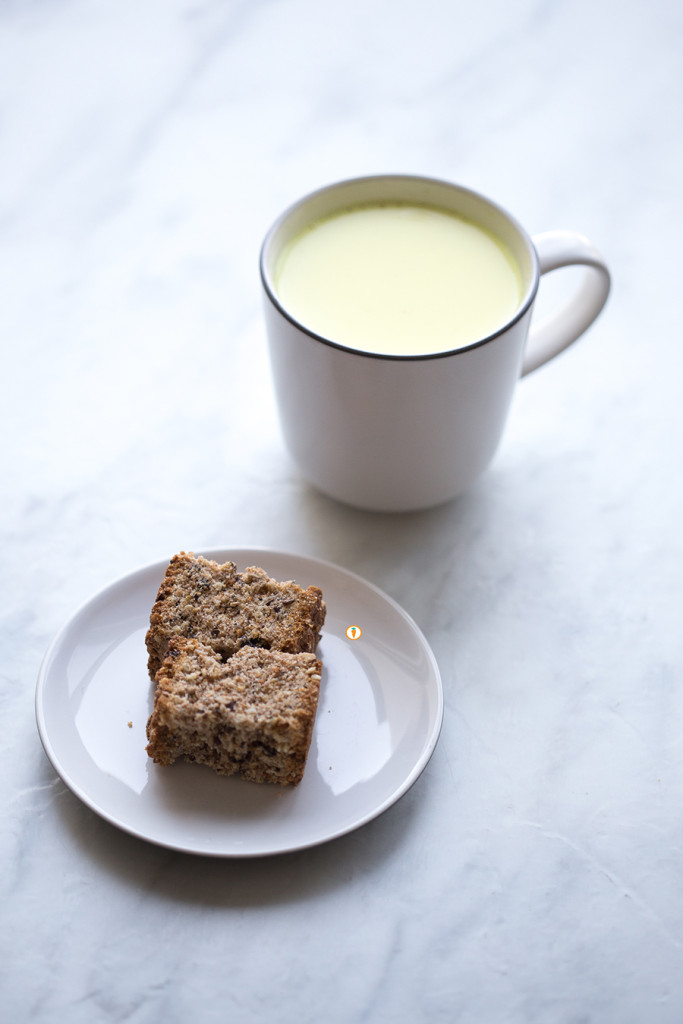
Tumeric Milk_cupFood photography done by the talented Ceone Dyck. To learn more about Ceone click here or follow her on Facebook.

Don’t forget to follow Carrots and Cake on Instagram to see tiny square snap shots of my life.

                 – With Love, Carrots and Cake,

Carrots and Cake Nita Sharda

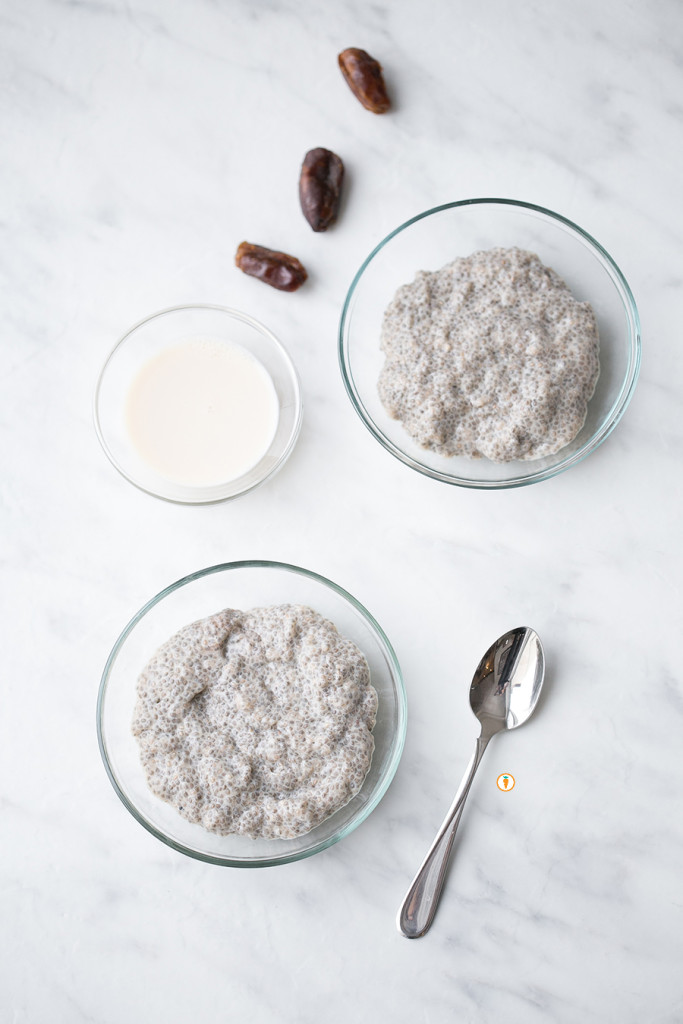
Chia Seed Pudding

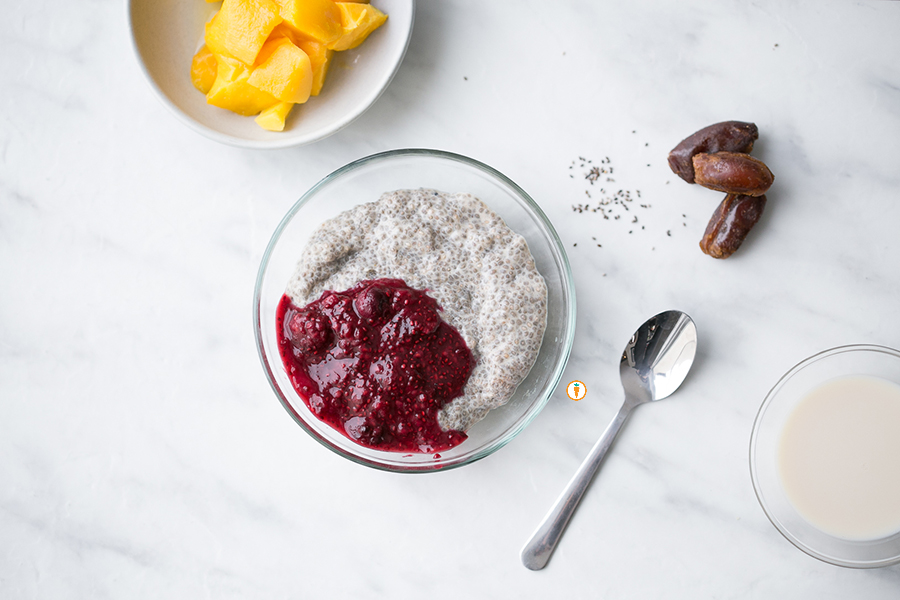
Nita Sharda, Carrots and CakeOh, hello! Welcome back – I hope you enjoyed learning about whole grains on our last post. We’re going to take a break from nutrition education and share this uber simple recipe with ya’ll. You’ve previously seen me use and talk about the health benefits of chia seeds, like when I showcased my version of a 5 Ingridient Berry Sauce. When I heard my food friends talk about chia seed pudding, I was totally hooked and needed to give it a try.

Here’s what I love in particular about this recipe:

  • calls for only 5 ingridients
  • offers up 10 grams of fibre
  • source of calcium
  • source of protein
  • allows for customization
  • naturally gluten free
  • no cooking, just stirring

Nita Sharda, Carrots and CakeOkay, I think you’re sold.

5.0 from 1 reviews
Chia Seed Pudding
 
Prep time
Total time
 
Serves: 2 - 3
Ingredients
  • ⅓ cup chia seeds (black or white)
  • 1½ cups milk (dairy or dairy free)
  • 2 tbsp runny honey or maple syrup
  • 1 tsp vanilla extra
  • 1 tsp cinnamon
Instructions
  1. Place all ingredients into a bowl. Mix very, very, very well and cover with saran wrap.
  2. Place bowl into the fridge for thirty minutes. Stir again.
  3. Return back to the fridge for at least another 2 - 3 hours. The result is a thick pudding similar to rice pudding.
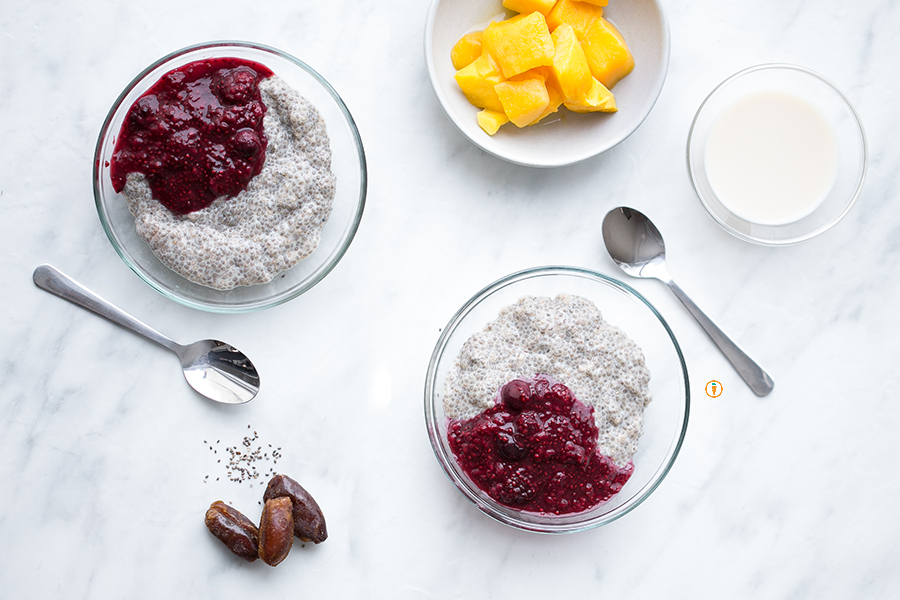
  4. Top with additional fruit if you wish. I love it with tart raspberries, mango or kiwi.

Nita Sharda, Carrots and Cake
Food photography done by the talented Ceone Dyck. To learn more about Ceone click here or follow her on Facebook.

Don’t forget to follow Carrots and Cake on Instagram to see tiny square snap shots of my life.

                 – With Love, Carrots and Cake,
Carrots and Cake Nita Sharda

No Bake Granola Bar

Nita Sharda, Carrots and CakeI love a good granola bar. It’s basically like having portable nutrition in your hand! Mind you, a good quality product can often be hard to spot. Most large-chain grocers have entire aisles dedicated to this iconic food item. The tough part is distinguishing which one truly is a granola bar versus which one is…well..basically a chocolate bar.
Tips to sourcing a quality granola bar:

  • When I’m on the hunt for a bar I try to look for something that has less than 8 – 9 grams of sugar and offers me up at least 3 grams of fibre.
  • Protein is another POWERHOUSE nutrient that I scout for. If you’re looking for a nut-free product, it will be difficult to find a protein bar with more than 2 grams of protein. Otherwise, if nuts are your thang, you’ll likely have no trouble finding something that can offer you atleast 4 – 5 grams of protein.
  • Look at the ingredient list and find something that is 100% whole grain.
  • Avoid granola bars that are chocolate or yogurt covered. These bars can have upwards of 3 teaspoons of sugar in a small serving.

Or HAYYYYYYhow about making your own?

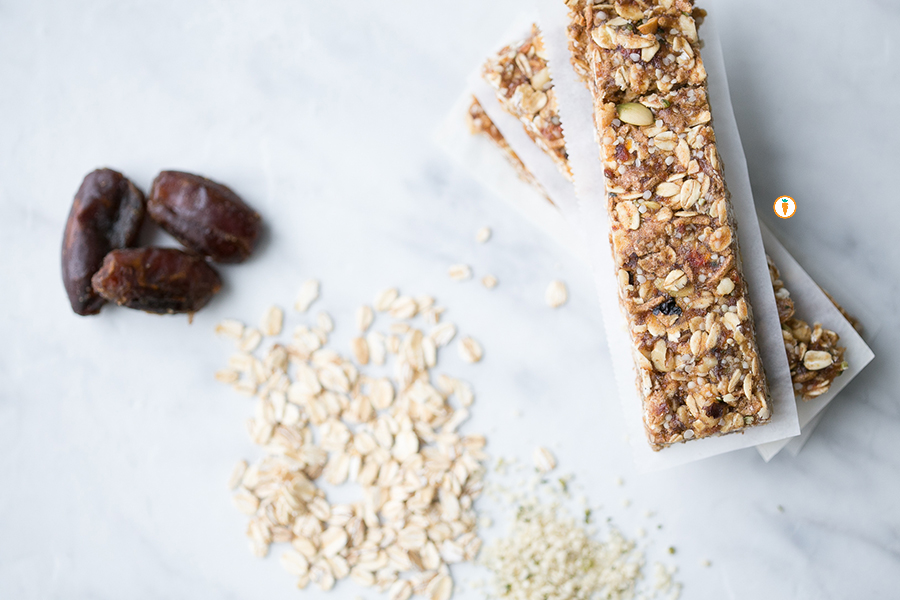
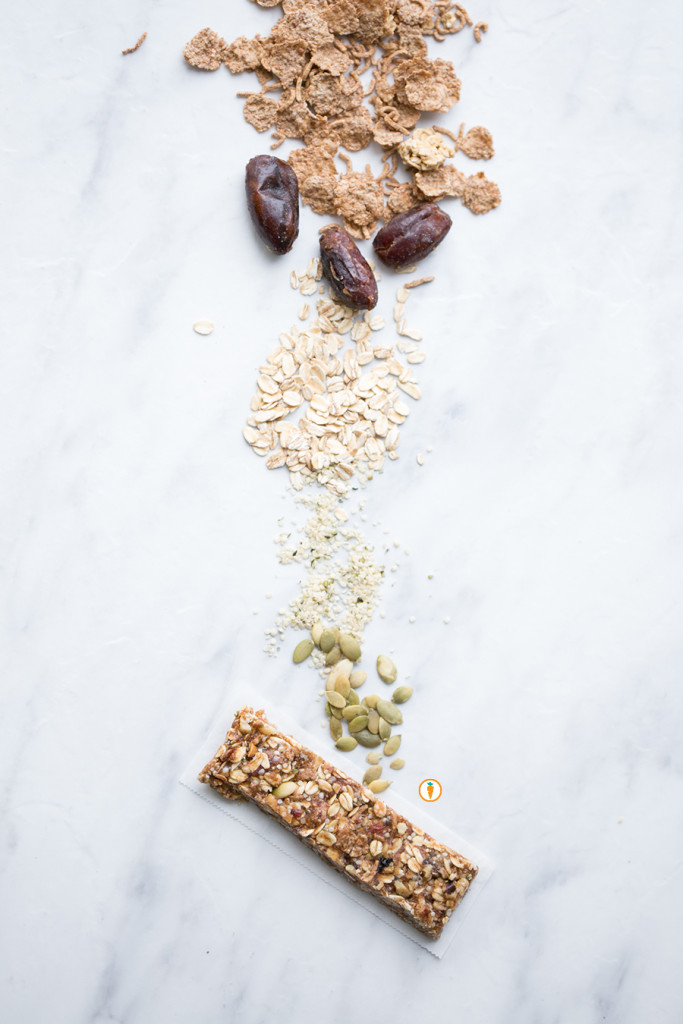
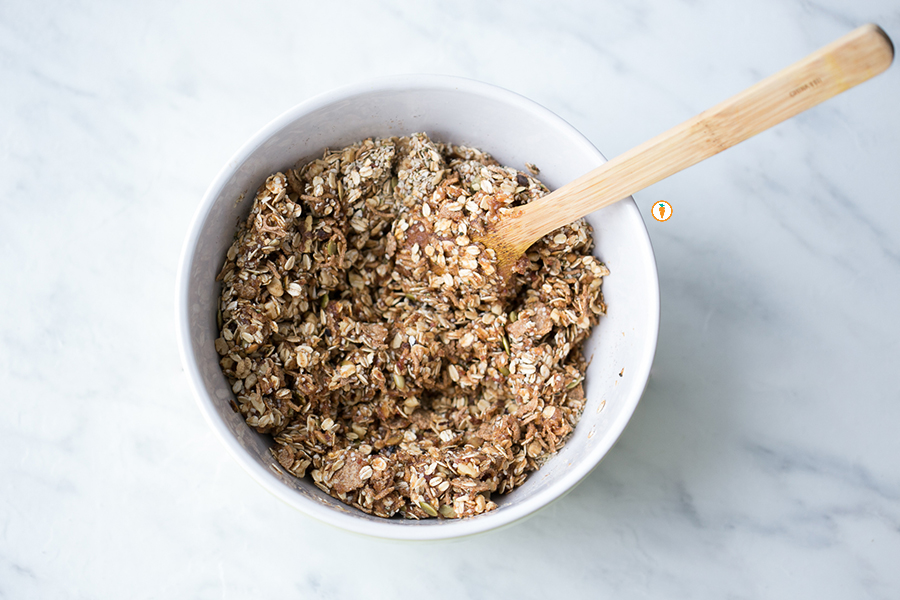
When I have a bit of extra time on my hands, I take pleasure in being able to make my own granola bars that I can snack on. The ingredients in this recipe (adapted from Cookspiration) include all the foods I enjoy eating as snacks: dates, walnuts, pumpkin seeds and hemp hearts are the super heroes behind this bar. Seriously, you’ll feel so good after making them, eating them…and maybe even sharing them. You’ll notice – the recipe doesn’t call for any refined sugar. The sweetness is brought to you naturally from the dates and honey. Don’t cha love nature?
Nita Sharda, Carrots and Cake

Nita Sharda, Carrots and CakeNita Sharda, Carrots and CakeOkay, recipe deets below:

5.0 from 1 reviews
No Bake Granola Bar
 
Ingredients
  • 1 ½ cup All Bran Flakes cereal (I used PC brand from Superstore)
  • 1 ½ cup large flake oats
  • ½ cup chopped walnuts
  • ¼ cup pumpkin seeds
  • ½ cup hemp hearts
  • 1 cup dates (about 12 - 15 dates)
  • ¼ cup honey or maple syrup for vegan option
  • ⅓ cup almond or peanut-butter
Instructions
  1. In a large nonstick skillet, toast oats, walnuts and pumpkin seeds over medium heat, stirring often for about 8 minutes or until light golden and fragrant. You'll even hear the pumpkin seeds "pop".
  2. Pour this mixture into a large bowl and let cool slightly; stir in bran flakes and hemp hearts.
  3. In the bowl of a food processor, pulse dates until finely chopped. For me, it rolls into one giant blob.
  4. In a small saucepan, heat together honey and almond butter over medium low heat until melted and smooth. Add dates and stir to combine.
  5. Pour into oat mixture and stir together until dates are distributed evenly throughout and oats are coated well.
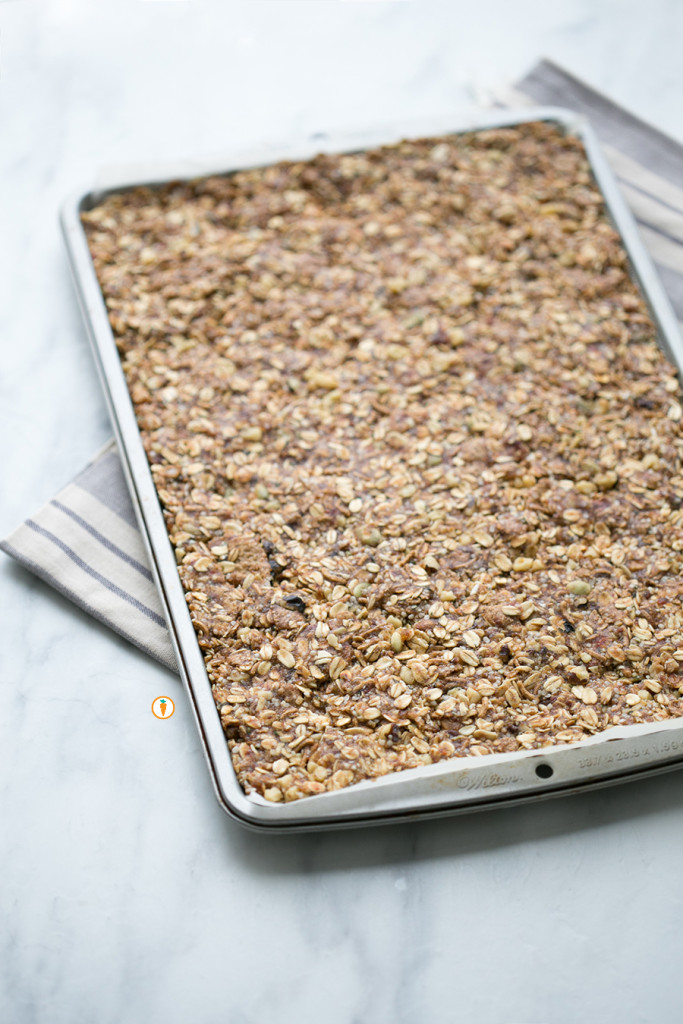
  6. Press mixture into 23 cm (9 inch) parchment or foil lined baking pan and press to flatten evenly (warning: don't place it on a pan that's too big - you want the mixture to be "tight").
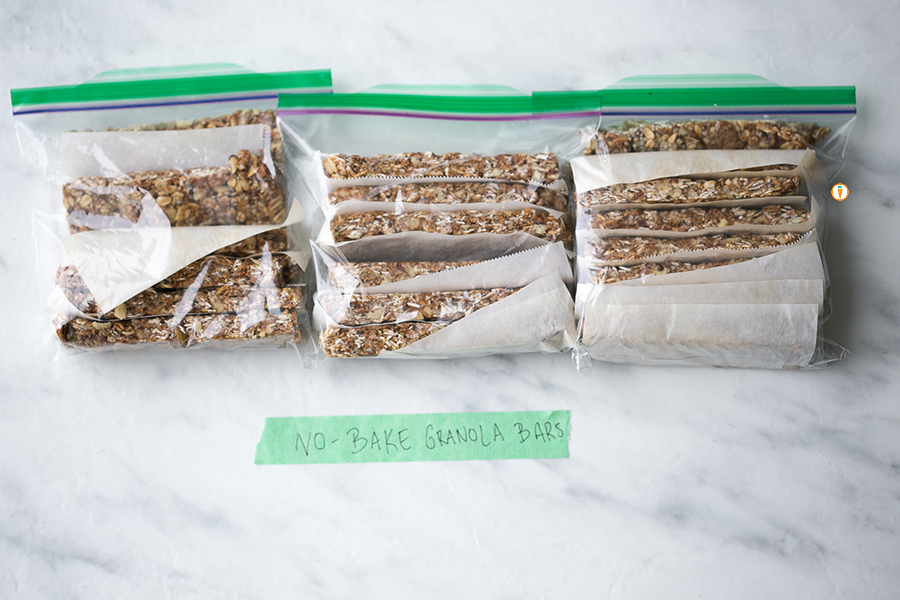
  7. Cover and refrigerate for at least 1 hour or until firm. Cut into bars and wrap individually with plastic wrap and store in refrigerator for up to 1 week or in the freezer for longer.
No Bake Granola Bar_Stacked

STACKS ON STACKS OVER HERE!!

For more granola bar inspiration, here are a few ideas from my personal food friends:

Food photography done by the talented Ceone Dyck. To learn more about Ceone click here or follow her on Facebook.

Don’t forget to follow Carrots and Cake on Instagram to see tiny square snap shots of my life.

                 – With Love, Carrots and Cake,

Carrots and Cake Nita Sharda

Overnight Oats

Nita Sharda, Carrots and CakeI’m all about making sure we’re eating a variety of whole grains in this house. Sometimes without knowing it, we get stuck in a rut and stick to one primary grain (wheat, and by the way: there is nothing wrong with that). Consequently, we don’t get a chance to enjoy the wonder and benefits other grains have to offer us.
Oats. I LOVE OATS. a) they are hella cheap  b) they are super versatile  c) they are easy to cook  d) you can enjoy them sweet, savory, warm or cold!  e) for folks who are sensitive to gluten, they can enjoy certified gluten free oats. What more do ya want from a grain?

Want the nutrition jiffy on oats?

  • They are whole grain! Health Canada recommends that 50% of your grains should be whole grain; we know people who eat whole grains have a lower risk of heart disease, stroke, diabetes, cancer and digestive disorders.
  • They are rich in soluble fibre; this type of fibre helps improve blood cholesterol and can help manage blood sugar levels too.
  • A half cup serving (dry, large flake oats) offers up nearly 8 grams of protein.
  • They are a source of B vitamins, iron and vitamin E.

Why overnight oats?

It’s great for people who require a quick grab n’ go style breakfast; maybe you’re someone who prefers to enjoy breakfast at work or are too busy preparing breakfast for your little ones. This is a great alternative!

Mornings can be rough for some of us so overnight oats take the prep-work out in the morning. You can prepare a few batches to last you throughout the week.

Overnight oats are incredibly versatile. You can change the proportion of milk/yogurt/oats as needed to suit your needs.

In general, you’re getting a great source of protein, carbohydrate, fat if you add some nuts/seeds and fruit. These components make it a complete and balanced meal.

It’s a nice change from your typical bowl of hot oatmeal.

Variations: 

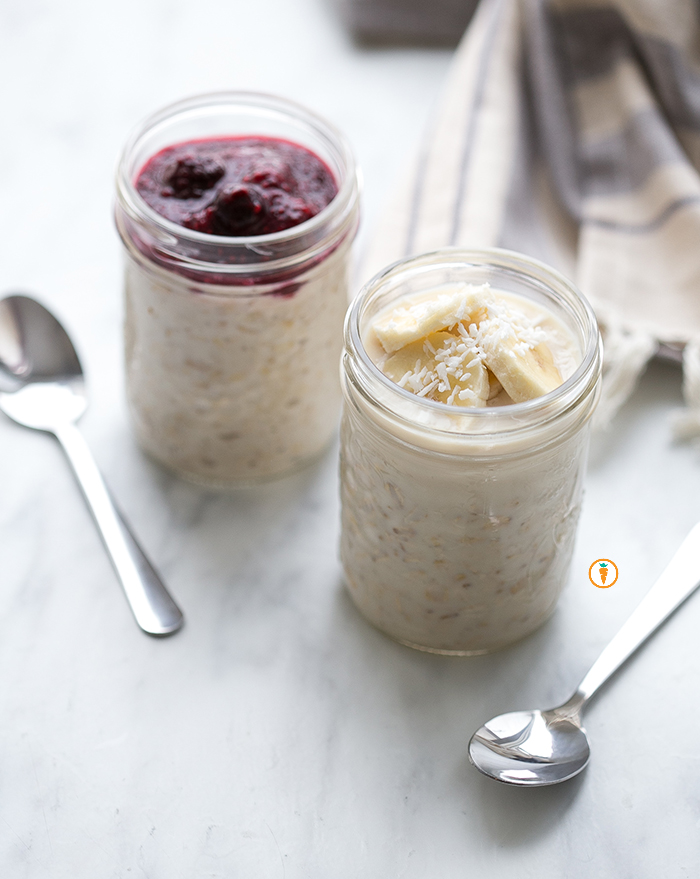
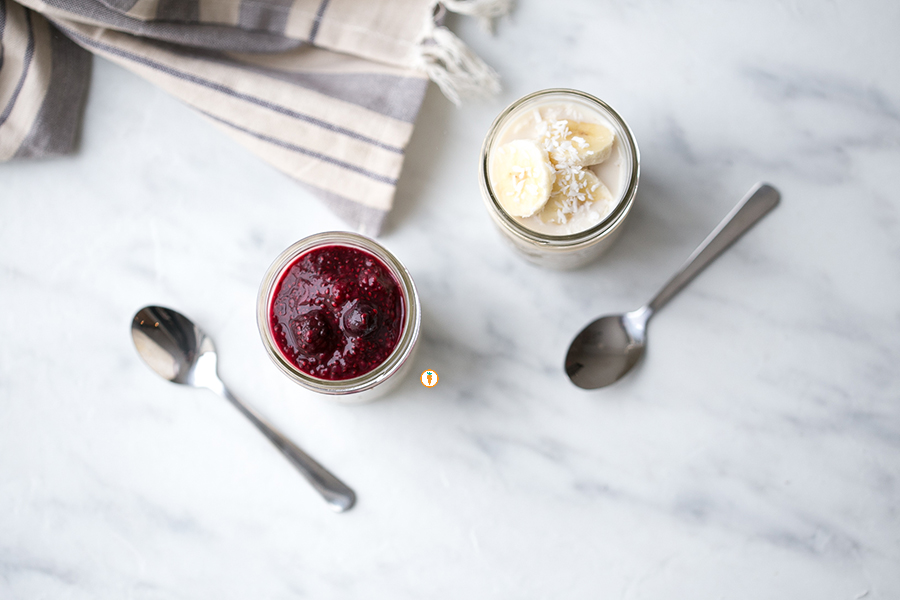
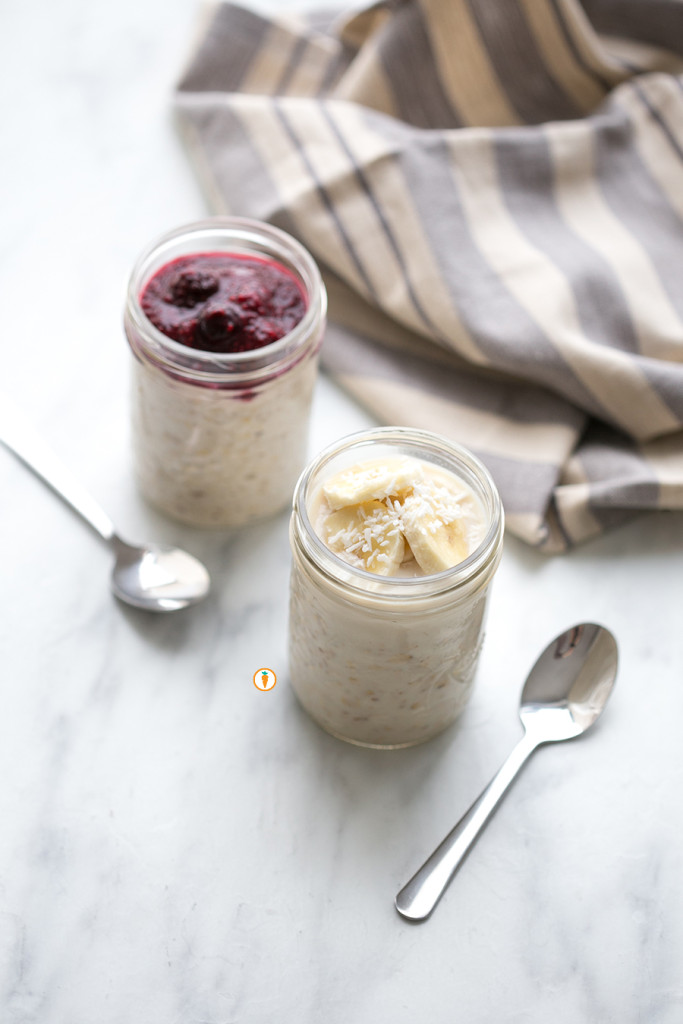
  • Top it with my 5 Ingredient Berry Sauce, bananas, shredded coconut, apples, canned peaches or any other favorite fruit.
  • Switch up the milk from a dairy milk, nut milk or soy milk.
  • Add nuts and seeds for extra protein such as pumpkin seeds, walnuts, almonds or toasted hazelnuts. My friend Chantal of Nutty for Nutrition loves adding chia seed to her concoction, just make sure add extra moisture if you go this route because chia seeds love to suck up liquid!
  • Feel free to use your favorite sweetener such as brown sugar, maple syrup, honey or stevia if that’s what you fancy.

Nita sharda, Carrots and Cake

Overnight Oats
 
Prep time
Total time
 
Serves: 1
Ingredients
  • ½ cup rolled oats (large flake)
  • ½ cup milk
  • ¼ - ⅓ cup vanilla Greek yogurt
  • 2 tsp flax seed
  • Pinch of cinnamon
  • Drizzle of maple syrup, honey or your preferred sweetener
  • Fruit
Instructions
  1. Place oats, milk, yogurt, flax seed, cinnamon and sweetener into a Tupperware, mason jar or cereal bowl. Stir until smooth.
  2. Top with your choice of fruit. Leave overnight.
  3. The next day, enjoy it cold or feel free to nuke it in the microwave for 20 seconds! If it's a little too thick for you add a dash of milk or water until you've got your desired consistency.

Nita sharda, Carrots and CakeFood photography done by the talented Ceone Dyck. To learn more about Ceone click here or follow her on Facebook.

Don’t forget to follow Carrots and Cake on Instagram to see tiny square snap shots of my life.

                 – With Love, Carrots and Cake,

Carrots and Cake Nita Sharda

5 Ingredient Berry Sauce

Nita Sharda, Carrots and CakeI remember the first time I made a berry sauce. It was for a brunch I was hosting and waffles were on the menu. It was some random recipe that Mr. Google found for me. It called for 1 cup of juice and 1 cup of sugar for only two cups of berries. Jesse whiz, that is A LOT of sugar. What’s a Dietitian/Food Nerd to do?
Develop her own recipe! 

I prepare this berry sauce quite regularly for our meal-prep line up. It’s extremely low maintenance and the recipe is pretty darn easy to memorize. There are so many uses for this sauce, here’s what I’ve tried so far:

  • Great in smoothies
  • Lovely on top of plain yogurt
  • Fabulous over pancakes or waffles
  • Yummy on warm or cold oats
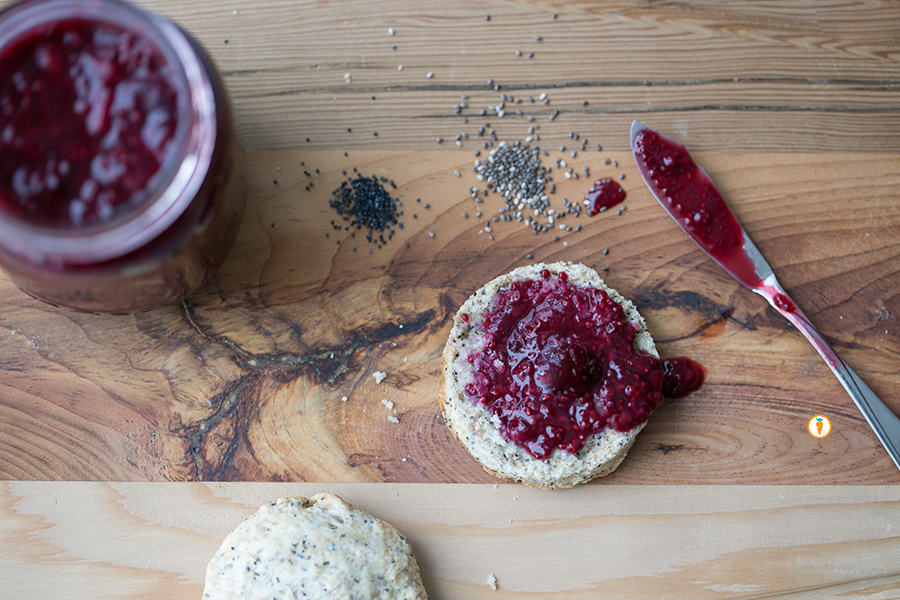
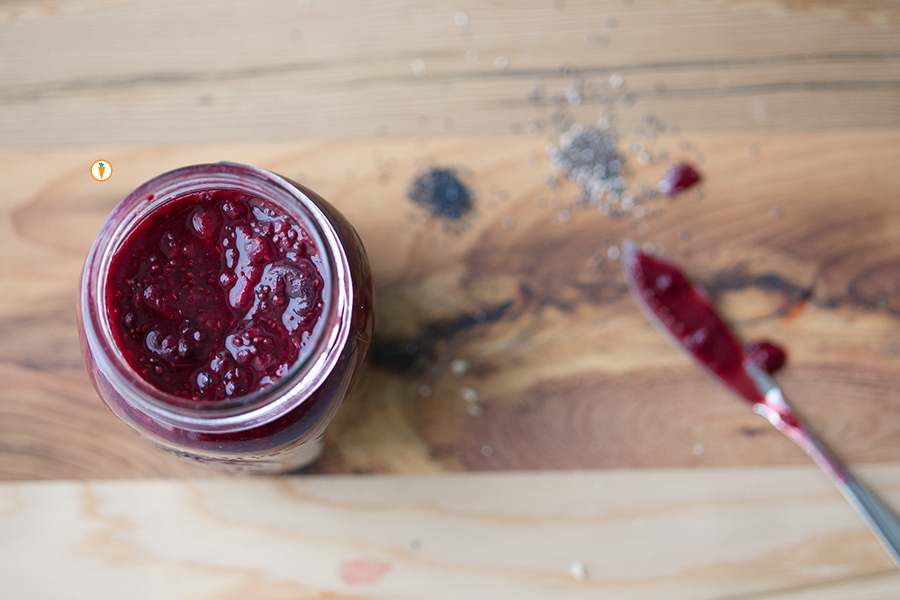
  • Genius as a jam on toast or biscuits

The recipe uses a super cool ingredient that might be new to you. It’s chia seeds! You can find these little guys at any bulk store and they can also be spotted in the “health food” aisle of many large-chain stores. Chia seeds harness a lot of nutrition, offering up some omega-3 power, fibre, calcium and a wee-bit of protein too. Chia seeds are crucial for this recipe as they suck up (literally) moisture from the concoction, leaving you with a nice saucy texture. I promise you’ll love it.

Recipe taymeee.Nita Sharda, Carrots and CakeNita Sharda, Carrots and Cake

5.0 from 1 reviews
5 Ingredient Berry Sauce
 
Prep time
Cook time
Total time
 
Ingredients
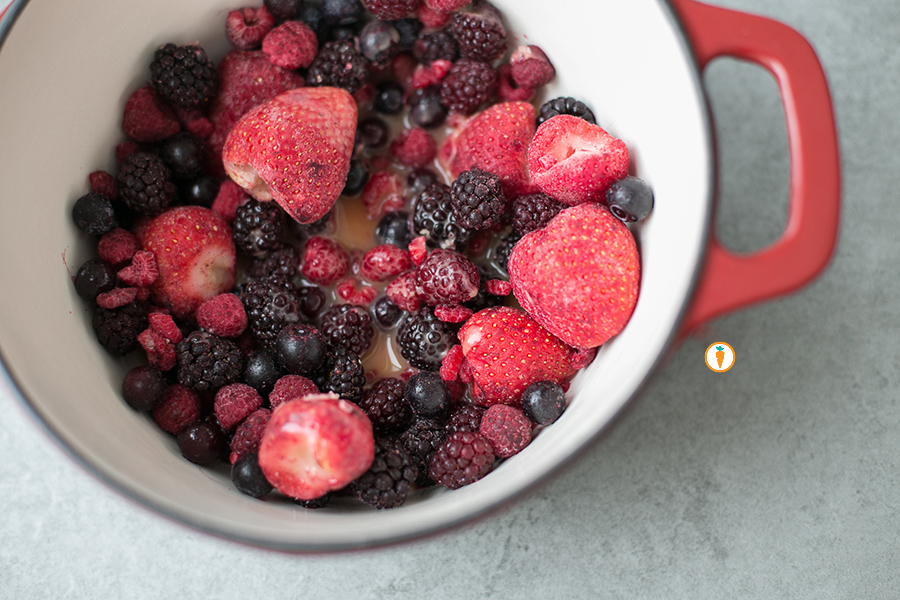
  • 3 cups frozen berries, mixed variety
  • ½ cup 100% orange juice or water
  • 2 tbsp maple sryup
  • 1 tsp vanilla
  • 2 tbsp chia seed
Instructions
  1. Place frozen berries into a medium sized pot. Add in orange juice or water.
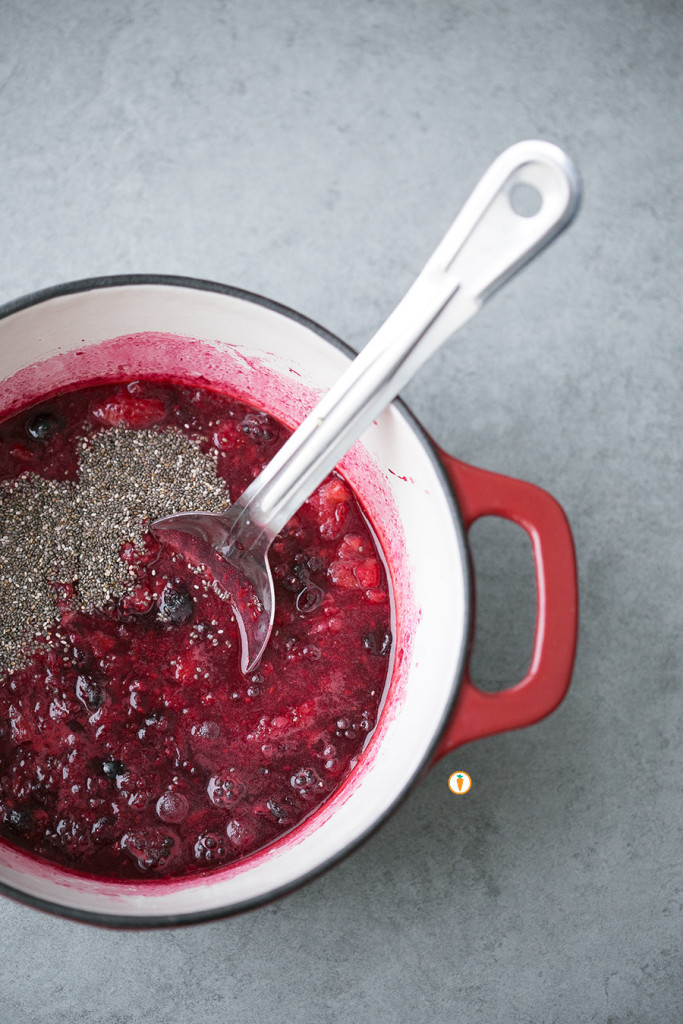
  2. Turn heat to medium and bring mixture to a gentle simmer. When this happens, using a potato masher muddle the berries to a desired consistency. I prefer to leave mine a little chunky, but to each their own!
  3. Next, add in maple syrup and vanilla. Stir to combine.
  4. Remove pot from heat and add in chia seeds.
  5. Stir and wait about 20 minutes. The mixture will begin to thicken.
  6. Store in a mason jar or tupperware for one week, refrigerated.

Nita Sharda, Carrots and Cake
Food photography done by the talented Ceone Dyck. To learn more about Ceone click here or follow her on Facebook.

Don’t forget to follow Carrots and Cake on Instagram to see tiny square snap shots of my life.

                 – With Love, Carrots and Cake,

Carrots and Cake Nita Sharda

Black Bean Brownies

Carrots and Cake, Nita Sharda

Seriously, yummy.

Earlier this week we talked to you about how excited we are that 2016 is the International Year of the Pulse. Hip hip hooray! In today’s recipe post we’re sharing an exciting brownie recipe that uses black beans. Yes, you read that right: BLACK BEANS. Please, don’t be scared – the results are amazing and dddddelish.

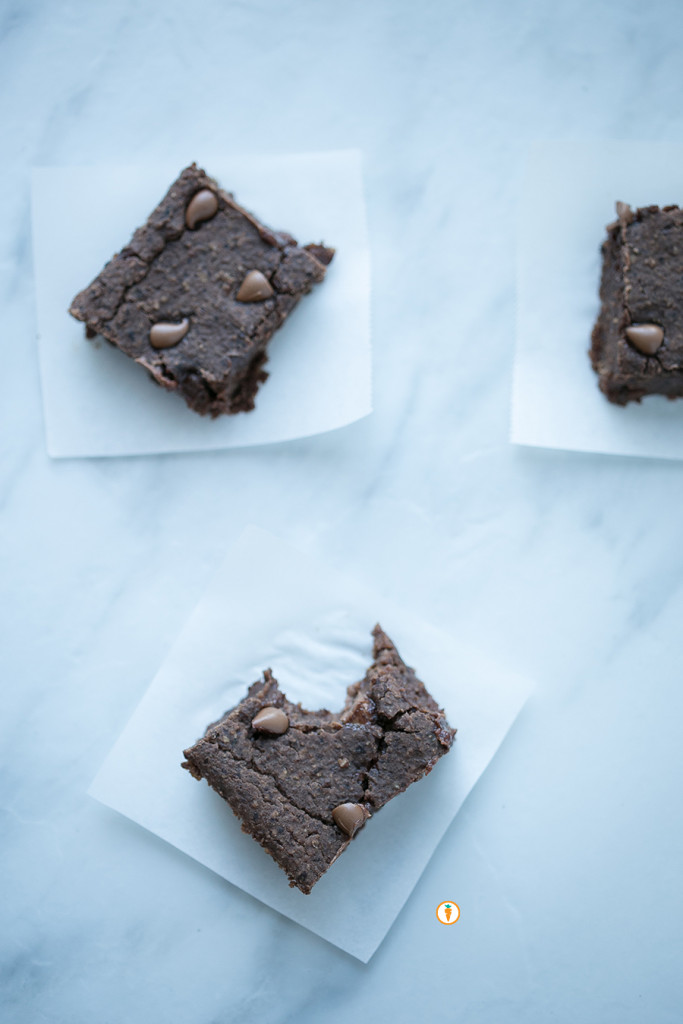
If you’re also making it a goal to experiment with new grains you’ll note that this recipe is actually wheat free. Instead, it uses oats. The original inspiration came from a fellow food blogger who we love, Chocolate Covered Katie. Our contributor Ceone had also made variations of the recipe in the past, so we wanted to share-share (what do they say? Sharing is caring). We made a few adaptations such as using applesauce to reduce the fat content and also decided to finely process the oats a bit more. The result is a brownie that resembles fudge but is still soft, a little gooey and chocolatey. All good things people. All good things.

From a nutrition standpoint, what I love about this dessert option is that it offers my clients an opportunity to still practice balance. In comparison to commercial or boxed brownies, this brownie is fairly low in sugar, offers up some fibre and protein which in turn will help you feel full for longer (that’s because fibre and protein are satiating). It’s totally the type of treat (or every day food) that really can be good for you. 

Carrots and Cake, Nita Sharda

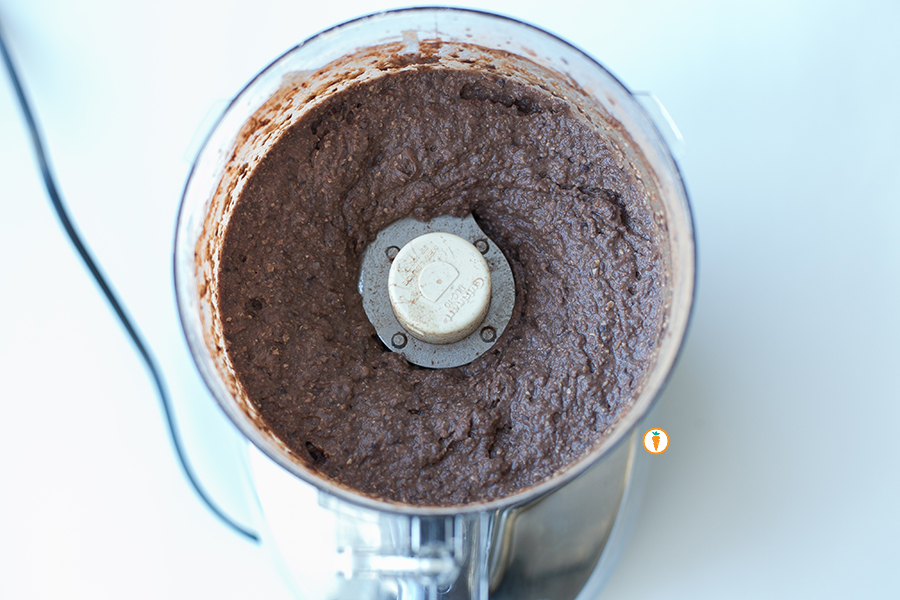
All mixed up.

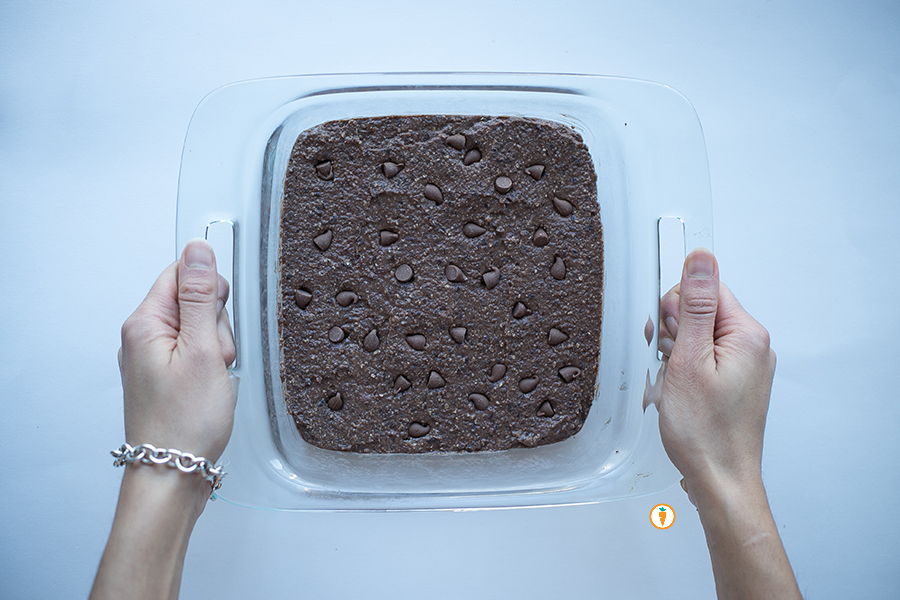
Before it goes into the oven.

Before it goes into the oven.

Carrots and Cake, Nita Sharda

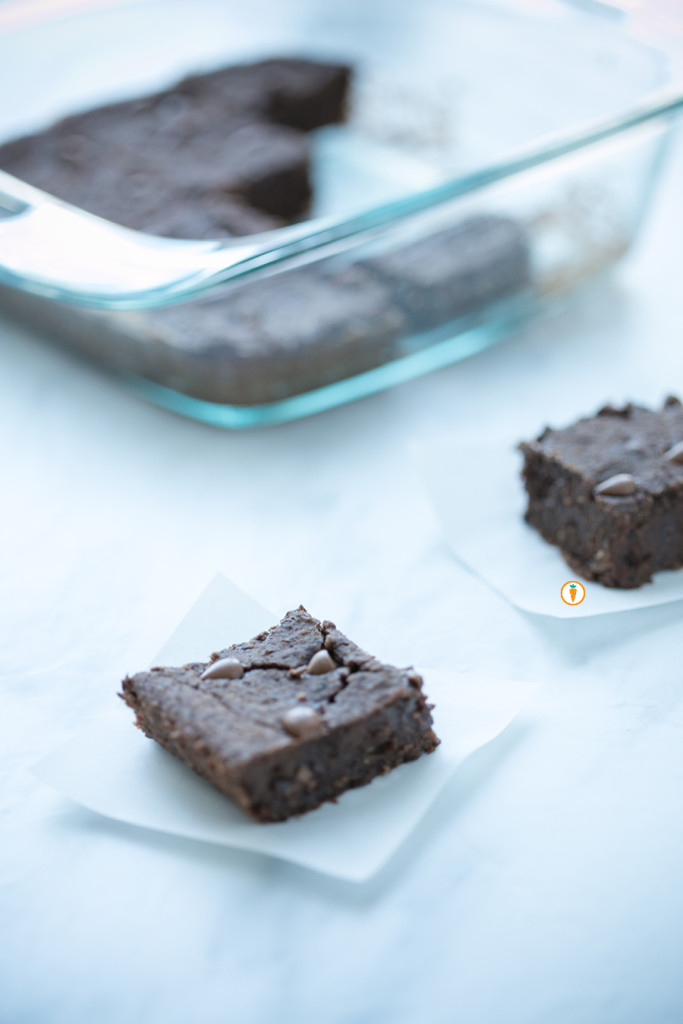
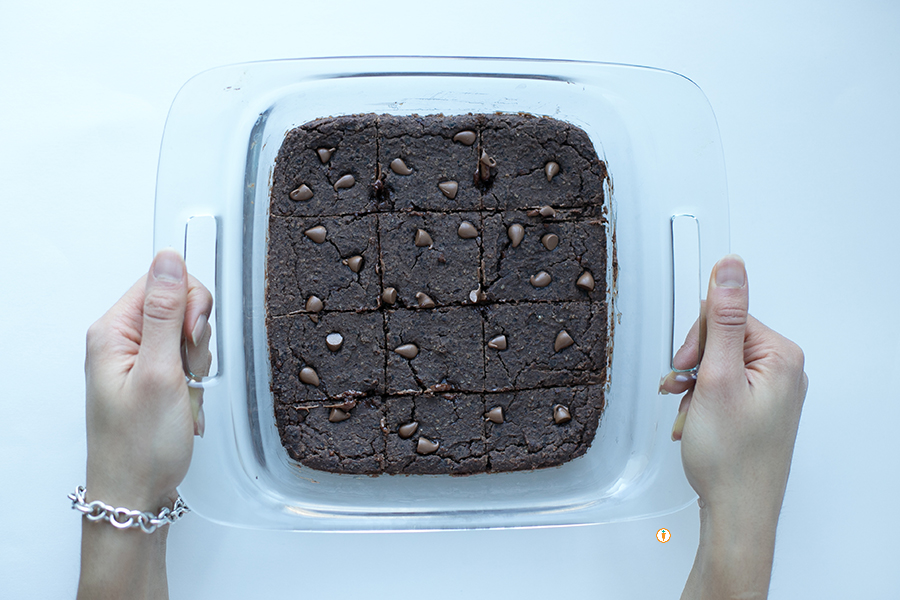
After it’s been baked.

Okay, okay. Enough with the chatter. Recipe below:

Black Bean Brownies
 
Prep time
Cook time
Total time
 
Serves: 12
Ingredients
  • 1½ cups black beans, drained and rinsed
  • 2 tbsp cocoa powder
  • ½ cup quick oats or rolled oats
  • ¼ tsp salt
  • ⅓ cup maple syrup
  • ¼ cup unsweetened applesauce
  • 1 tbsp canola oil
  • 2 tsp vanilla extract
  • ½ tsp baking powder
  • ½ cup chocolate chips
Instructions
  1. Preheat oven to 350 F.
  2. Place oats into the bowl of a food processor and pulse until it resembles coarse flour.
  3. Add remaining ingredients except chocolate chips into a food processor and blend until completely smooth.
  4. Fold the chocolate chips into the batter.
  5. Place mixture into a greased 8×8 pan.
  6. Optional: sprinkle extra chocolate chips over the top.
  7. Cook the black bean brownies 20 minutes. Allow it to cool and set at least 10 minutes before trying to cutting into it. If they still look a bit undercooked, you can place them in the fridge overnight and they will magically firm up! Makes 12 brownies

1BlackBeanBrownies_squares

These photos  were taken by Ceone Dyck, 4th Year Human Nutritional Sciences student. To learn more about Ceone click here or follow her on Facebook.

                 – With Love, Carrots and Cake,

Carrots and Cake Nita Sharda

Red Thai Curry with Tofu

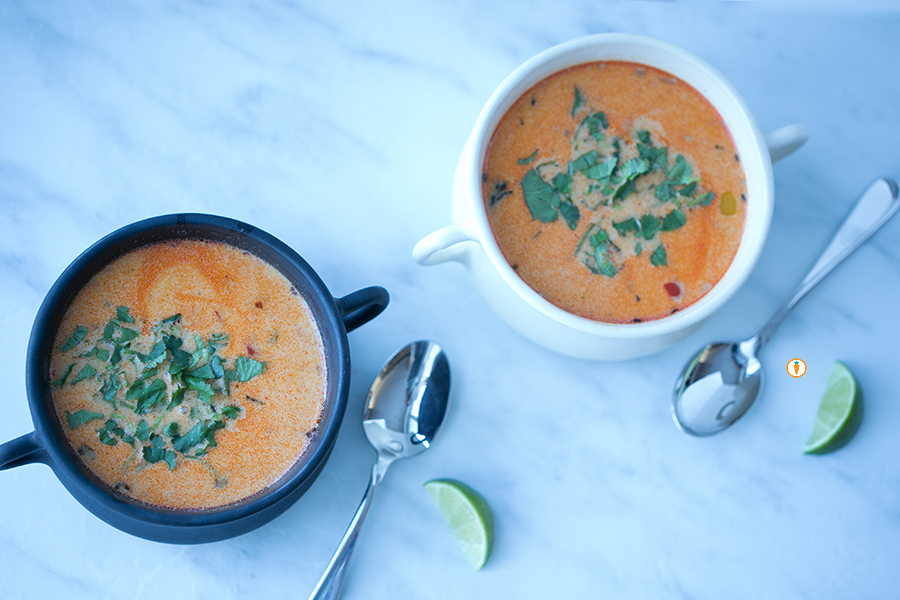
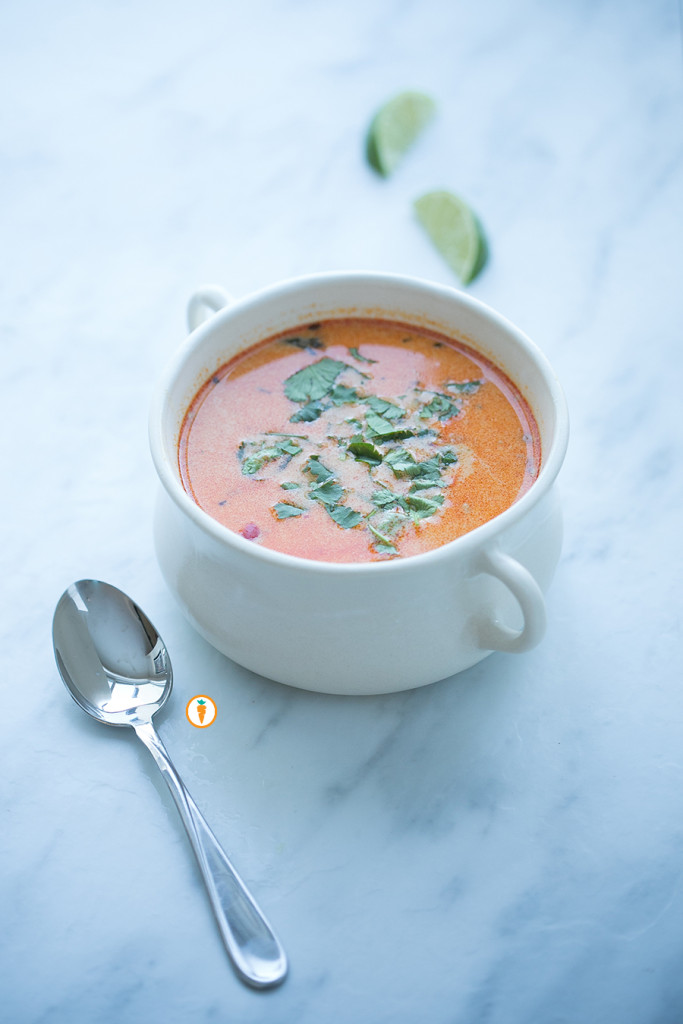
Nita Sharda, Carrots and CakeRemember a few posts ago I talked to you about living in Winterpeg, Manisnowba (Winnipeg, Manitoba). Well, the past two weeks have been cold. Like, hella cold. What’s a girl to do? Make curry! Curries are enjoyed all over the world and although they may appear complicated, they don’t have to be! Plus, during these winter months I find a bowl of curry just heats from the inside out.

I love many variations of curry but this winter I find myself cooking quite a bit of Thai inspired dishes (ahem, husband, please fly me to Bangkok). I love the richness of coconut milk, the flexibility in produce that I can use and the aroma it leaves in my home.

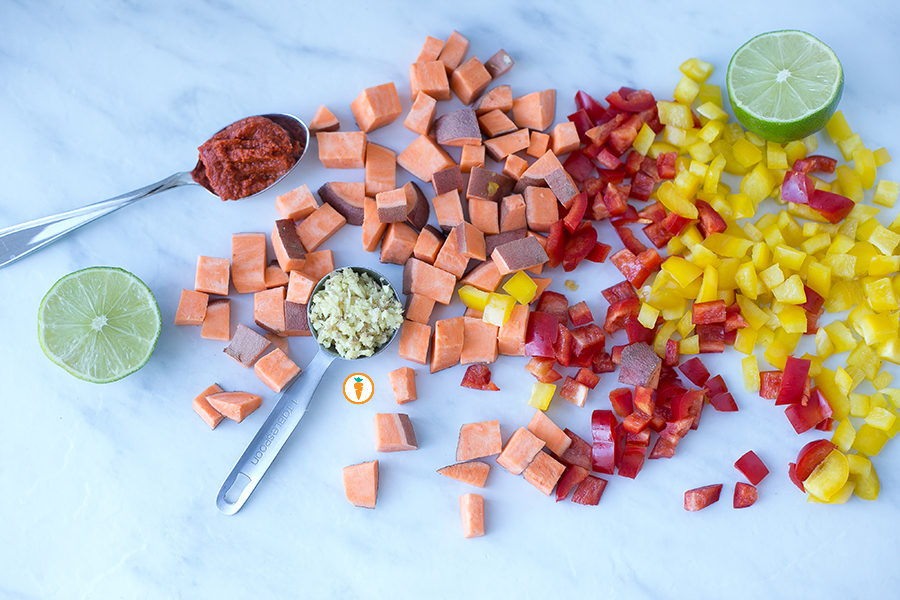
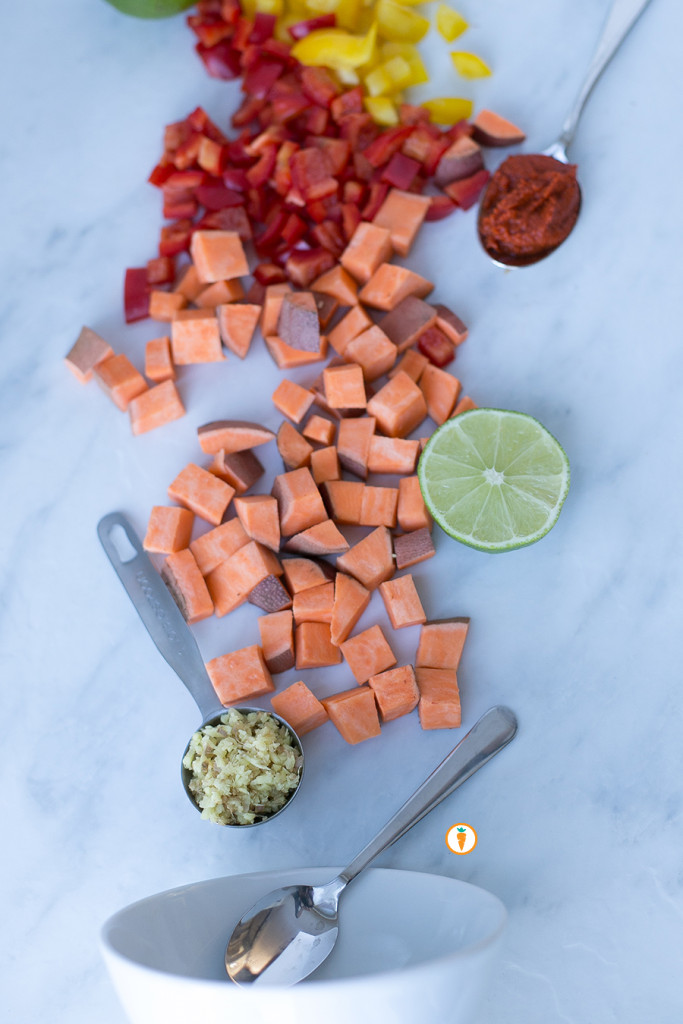
For this recipe my veggies included:

  • Sweet potato
  • Red Bell Pepper
  • Yellow Bell Pepper

As far as fat goes, I chose to use canola oil. As many of you might gather, it’s one of my staple liquid fats around the house. But that doesn’t mean you have to follow my suite. Other fat options include:

  • coconut oil
  • grapeseed oil
  • olive oil
  • avocado oil
  • camelina oil

Nita Sharda, Carrots and CakeNita Sharda, Carrots and CakeNita Sharda, Carrots and Cake

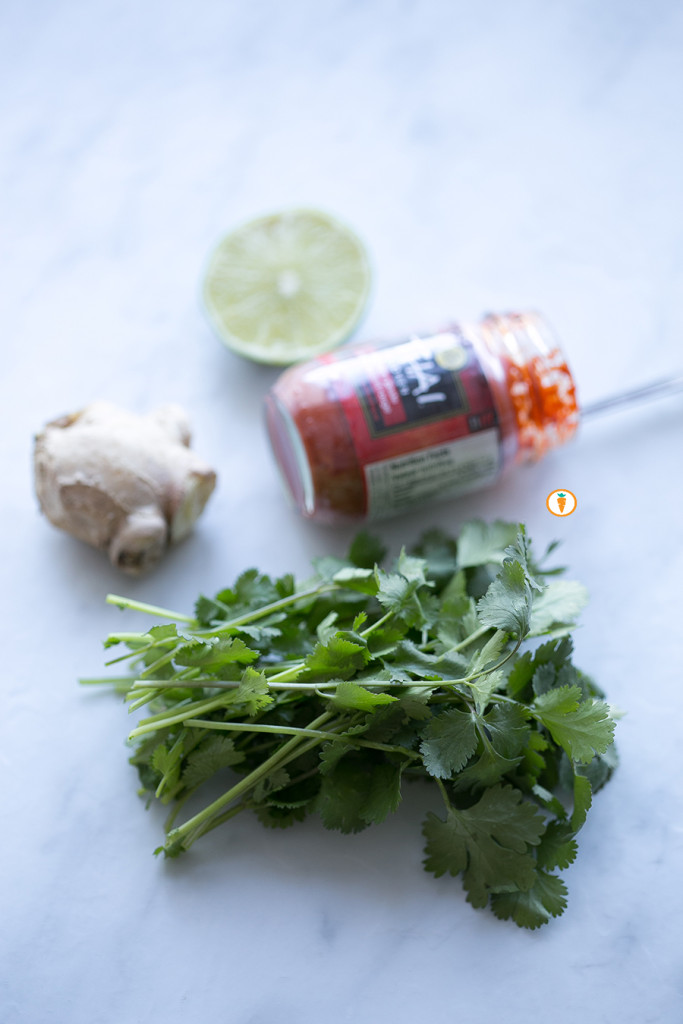
You can certainly try your hand at making your own curry paste – that’s something I haven’t ventured into just yet. Or, you can purchase a ready-made paste such this product by Thai Kitchen. Now, if you fancy other veggies or proteins, the options are endless:

  • Onion
  • Bamboo shoots
  • Snow peas
  • Mushrooms
  • 2 chicken breasts, cubed
  • Edamame beans
  • etc.

Once you’ve tried this recipe. Try it again and get creative with all types of ingredients and spices.

Nita Sharda

Easy as ONE, TWO, THREE.

Okay, okay. Rant over. Recipe below.

Red Thai Curry with Tofu
 
Prep time
Cook time
Total time
 
Serves: 4-5
Ingredients
  • 2 tbsp canola oil
  • 1 tbsp ginger, minced
  • 1 tbsp cilantro stalk, minced
  • 2 tbsp Thai red curry paste
  • 1 ½ cup cubed sweet potato (leave the skin on, fibre! This is about 300 grams)
  • ½ red bell pepper, diced
  • ½ yellow bell pepper, diced
  • 800ml low sodium vegetable broth
  • Pinch of salt, black pepper and red chilli flakes (all optional)
  • 1 can coconut milk (14oz or approx. 400ml)
  • 1 cup tofu, cubed into 1” pieces (medium-firm or firm)
  • ½ lime
  • Cilantro, to garnish
Instructions
  1. In a medium sized pot heat canola oil, ginger, cilantro stalk and red curry paste. Heat over low-medium temperature just until the ginger and cilantro stalks begin to sizzle.
  2. Add in cubed sweet potato, red bell pepper and yellow bell pepper. Give the mixture a whirl ensuring the paste has smothered all the veggies. Cook for 5 – 6 minutes on medium heat ensuring you’re stirring the contents every minute or so.
  3. Pour in vegetable broth. Add in your desired pinch salt, black pepper and red chilli flakes.
  4. Once the vegetable broth has come to a boil, allow the sweet potato to be cooked through until they are soft. About 12 minutes.
  5. Once potatoes have been cooked, turn the heat down to low-medium and pour in coconut milk. Allow the mixture to heat through.
  6. Using a potato masher, mash some of the mixture to create a thick curry. Or if you prefer, feel free to blend a portion of the curry using an immersion blender or any other blender you may have.
  7. Gently add in tofu cubes, juice of ½ lime and cilantro.
  8. Serve.

Nita Sharda, Carrots and Cake
Food photography done by the talented Ceone Dyck. To learn more about Ceone click here or follow her on Facebook.

Don’t forget to follow Carrots and Cake on Instagram to see tiny square snap shots of my life.

                 – With Love, Carrots and Cake,

Carrots and Cake Nita Sharda

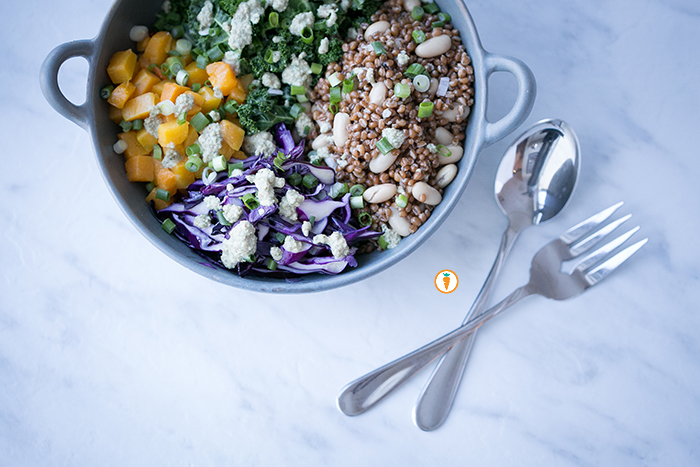
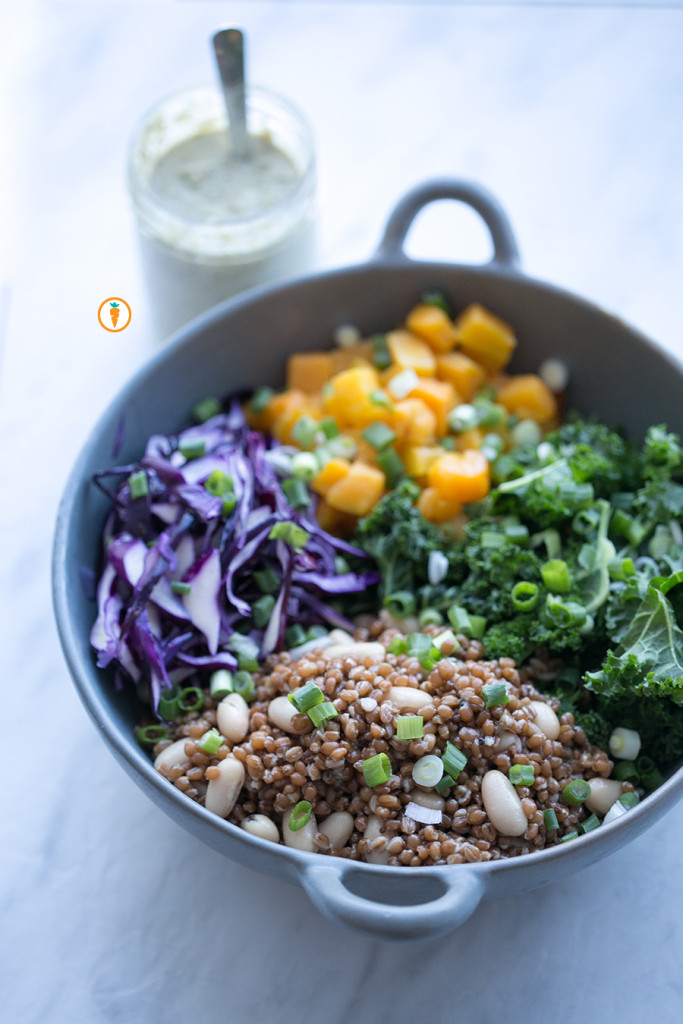
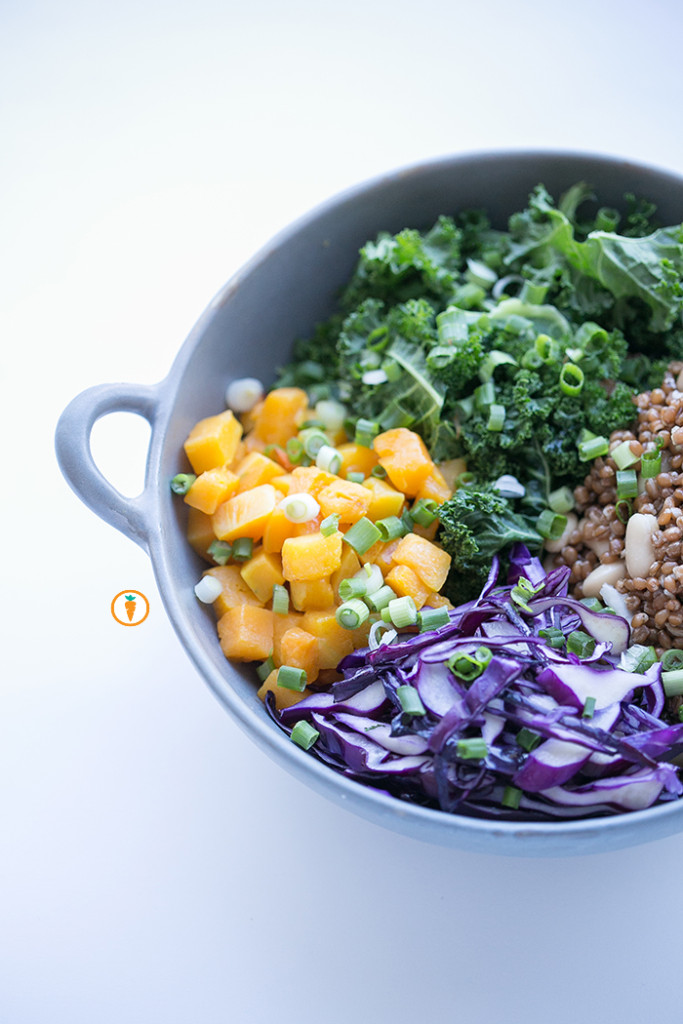
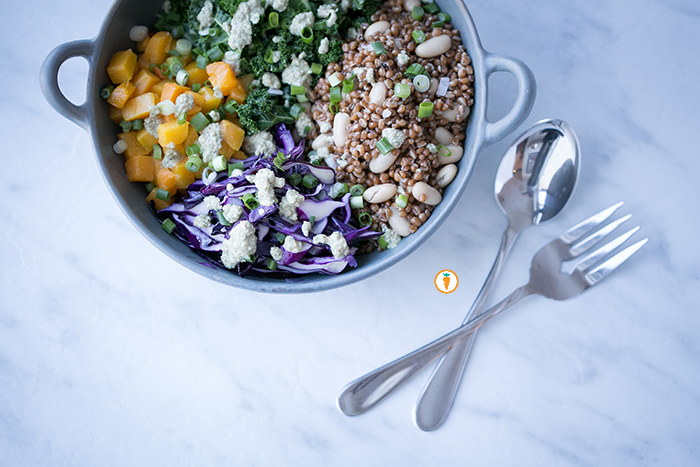
Roasted Butternut Squash Salad Bowl

Nita Sharda, Carrots and Cake

Who knew winter veggies could be so colourful?

Earlier this week on the blog we shared some tips on how keep things “fresh” when it comes to salads. If you missed that post, click here. This time around we’ve enlisted other veggie varieties to create a salad.

This time around I opted to roast butternut squash for a nutty flavour that just-so-happens to be pretty to look at. Butternut squash is particularly rich in beta-carotene which is what gives the flesh a bright orange colour.  In our body beta-carotene is tactfully converted to vitamin A. This under-rated nutrient imparts anti-cancer benefits, helps our immune system, acts as an anti-oxidant and helps to fight signs of aging (yes please!).

Side note: I actually use frozen pre-chopped butternut squash. Frozen produce is often priced well and the nutrient content is just the same. With our busy schedules I often don’t have the time (or strength) to cut through a squash. Now that’s a convenience food I’m down for. 

For the starch component I opted to use wheat berries. New to this grain? Actually, you’re not! Wheat berries are intact WHOLE-wheat kernels! That’s what your all-purpose and whole-wheat flour are milled from. Once cooked (basically you boil the crap out of them) they have a mild nutty flavour that most of us can enjoy. This whole grain is great in a salad because it has a chewy texture that holds it’s shape (aka it won’t get soggy on you). Because wheat berries go through  minimal processing they retain a lot of vitamins, minerals and antioxidants making it an A+ choice for your salad.

Side note: I got my hands on these beautiful wheat berries when I was at Canola Harvest Camp visiting a grain elevator. I made friends with a fellow farmer and she hooked me up with a stash. Score!

Nita Sharda, Carrots and CakeNita Sharda, Carrots and Cake

Now in the last post we talked about how you should dress your salad. Here, I’m going to get you out of your comfort zone to make a creamy salad dressing using seeds. Yeah! Pumpkin seeds! The inspiration for this dressing came from a plant based blog My New Roots. The final product is a really interesting one – the dressing has a grittiness to it and tastes lovely on the bed of veggies. It won’t drizzle like a typical dressing so don’t be alarmed.

Okay, okay. Enough with the nutrition rant. Look below to learn more about how I assembled the salad:

Roasted Butternut Salad Bowl
 
Prep time
Cook time
Total time
 
Ingredients
  • ½ cup wheat berries
  • Butternut squash, cubed (use as much as you would like)
  • Kale
  • Red cabbage, shredded thinly
  • White kidney beans or cannellini
  • Green onion, chopped
  • 1 tsp olive oil
  • ½ cup pumpkin seeds
  • 1 clove garlic
  • 1 - 2 tbsp maple syrup
  • 2 tbsp olive oil
  • 1 tbsp white wine vinegar
  • Juice of half a lemon
  • ¾ water
  • Pinch of salt and black pepper
Instructions
  1. Rinse wheat berries under water to ensure they are clean.
  2. Bring 1¼ cup water to a boil on the stove. Add rinsed wheat berries to the boiling water and stir. Once water starts to boil again, turn the heat to low, cover, and simmer for 45 minutes to 1 hour. You know the wheat berries are done when they are soft.You'll have enough wheat berries for 2 - 3 servings.
  3. While your wheat berries are cooking toss your butternut squash with olive oil and roast in the oven for 20 minutes at 350 degrees celsius or until they are cooked through.
  4. Massage 1 tsp of olive oil into your kale. This helps to soften the kale so it's not so tough.
  5. Once your wheat berries and squash are ready, assemble the remaining salad ingredients into a salad bowl (shredded cabbage, white kidney beans, kale and green onion). Add as much or as little of each ingredient as you wish (yup, you decide what and how much you want).
  6. For the dressing: toast pumpkin seeds in a non-stick pan over low heat for 10 - 12 minutes until they become fragrant. In a food processor blend: cooled pumpkin seeds, garlic, maple syrup, olive oil, vinegar, lemon juice and water. Season as desired with salt and black pepper.

Nita Sharda, Carrots and Cake
This recipe was created with the help of Christy Lai, 4th Year Human Nutritional Sciences student. Follow Christy on Instagram, trust me, you’ll want to. Food photography done by the talented Ceone Dyck. To learn more about Ceone click here or follow her on Facebook.

                 – With Love, Carrots and Cake,

Carrots and Cake Nita Sharda

Roasted Cauliflower Salad Bowl

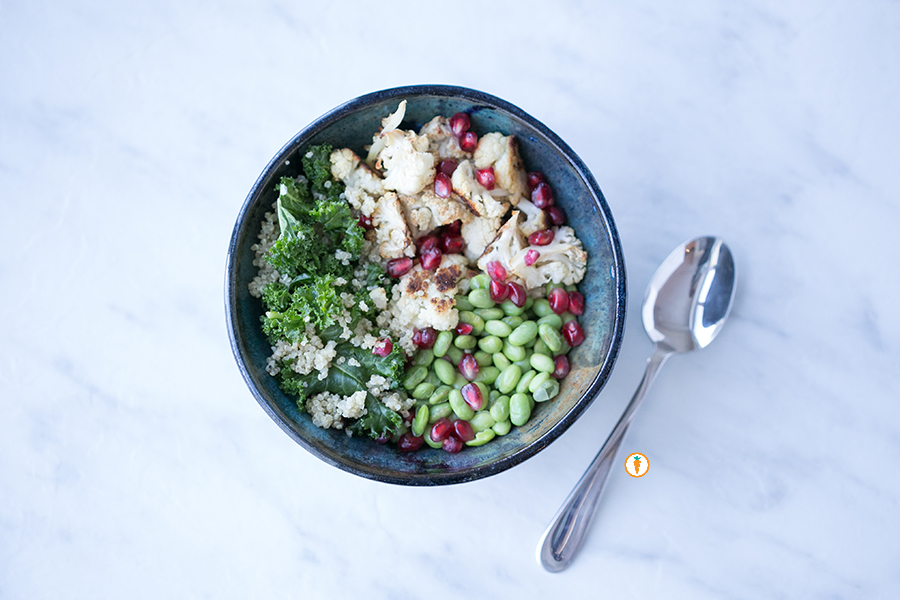
Nita Sharda, Carrots and Cake

YUMMY YUMMY!

If you’re living somewhere that is currently in the middle of winter (read: “Winterpeg, Manisnowba”), cold and raw veggies is probably the last thing you feel like eating. On the other hand, many of us are trying to UP our veggie intake. Salad is a great way to increase the amount of fruit and vegetable servings in our diet, but it can get old pretty fast.

We have a secret though (shhh): with a little creativity, salad doesn’t have to be boring, and yes, they can be hearty. Here are some tips to creating your own salads that you’ll actually look forward to eating this winter (and no one will be accusing you of eating rabbit food! How rude!):

 salad doesn’t have to be boring

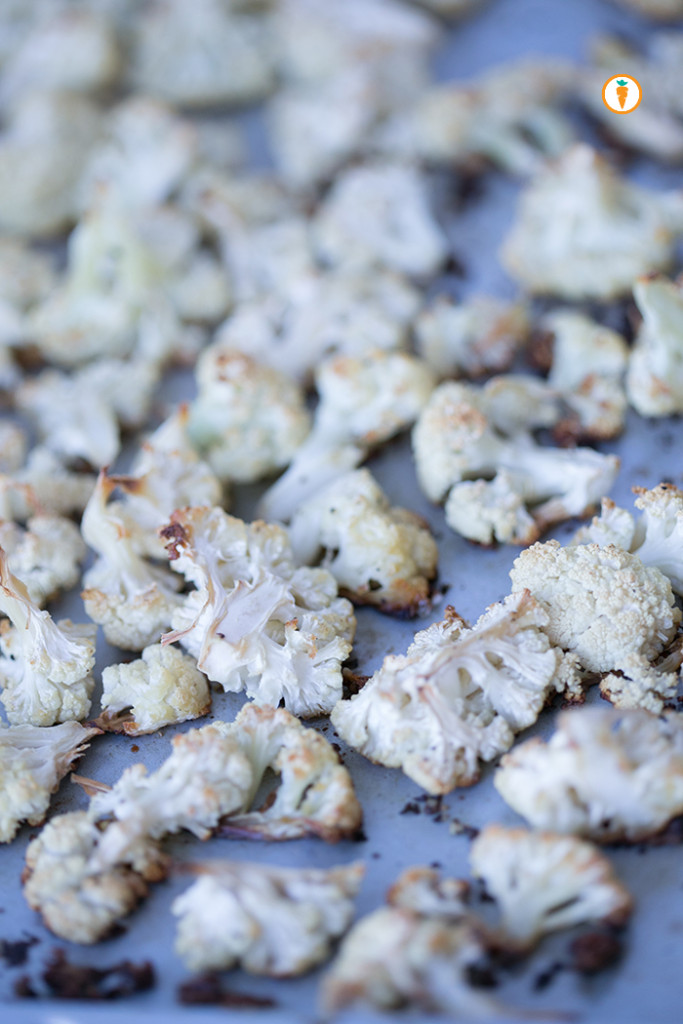
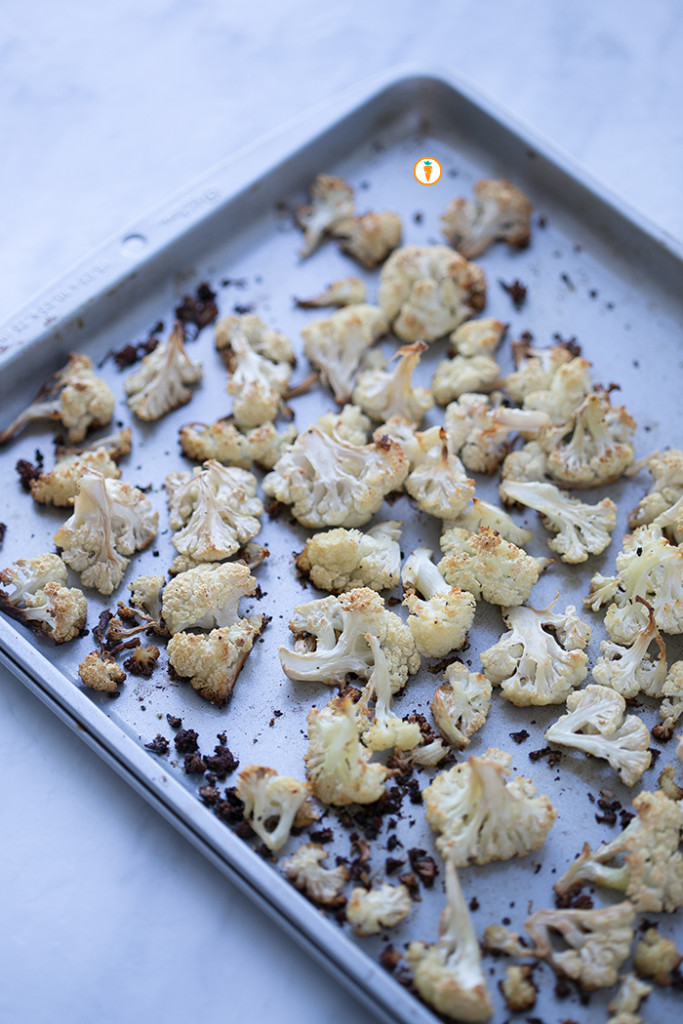
  • Warm it up. Roast some of your vegetables to bring out those warm, nutty flavours – you can play around with spices such as cinnamon, cumin or chili to add an extra dimension of flavour. When prepping ahead of time, pack the cooked portion separate from your greens so you can warm it up right before eating, and keep the greens from getting soggy. Veggies that love to be roasted: broccoli, beets, peppers, cauliflower, green beans, squash, zucchini, eggplant, and potatoes. Here we opted to roast cauliflower. Isn’t it gorgeous?

Nita Sharda, Carrots and CakeNita Sharda, Carrots and Cake


  • Stay balanced. Be sure to include carbohydrates (aka carb) and protein in your salad if you are having it as a meal. Got that? IT IS NOT A MEAL WITHOUT CARB AND PROTEIN. Doing so will ensure that you feel full and that you consume a variety of nutrients (oh and it will keep you from reaching for that candy bar when hunger strikes).

    • Carb options: brown rice, quinoa, bulgur, potatoes, sweet potato, or squash.
    • Protein options: grilled or steamed chicken breast and salmon, tofu, beans, chickpeas, and lentils (Psst: 2016 is the year of pulses! More on that in a later post).
  • Eat the rainbow. We all know that we eat with our eyes first, but including a variety of colours not only makes your salad pretty, it ensures that you are also getting a variety of vitamins and minerals with each bite. Opt for dark, leafy greens as a base, and then add 2-3 other colours to the mix. Carrots, red cabbage, beets, pomegranate, and squash are all in season.
  • Dress to impress. When choosing a dressing, vinaigrettes are the better option, as they have less saturated fat than cream-based dressings such as caesar or ranch. If you prefer to purchase dressing rather than make your own, be sure to check out the ingredients list and choose a dressing that has simple ingredients that you can pronounce and would likely have in your pantry; such as oil, vinegar, and spices. Here’s a simple go-to canola oil dressing I love. So simple.
  • Fake it till you make it. If you’re a fan of creamy dressings, try using hummus, tahini (sesame seed paste), or plain yogurt as alternatives when making dressings.
  • Go nuts! Nuts and seeds are a great way to add healthy fat, protein, fibre and texture to salad. Try adding roasted and unsalted almonds, walnuts, cashews, pumpkin seeds or sunflower seeds for extra crunch and flavour.

Whew! The possibilities are endless when it comes to “ a salad”. The best way to avoid getting stuck in a rut is to experiment and see what works best for you.

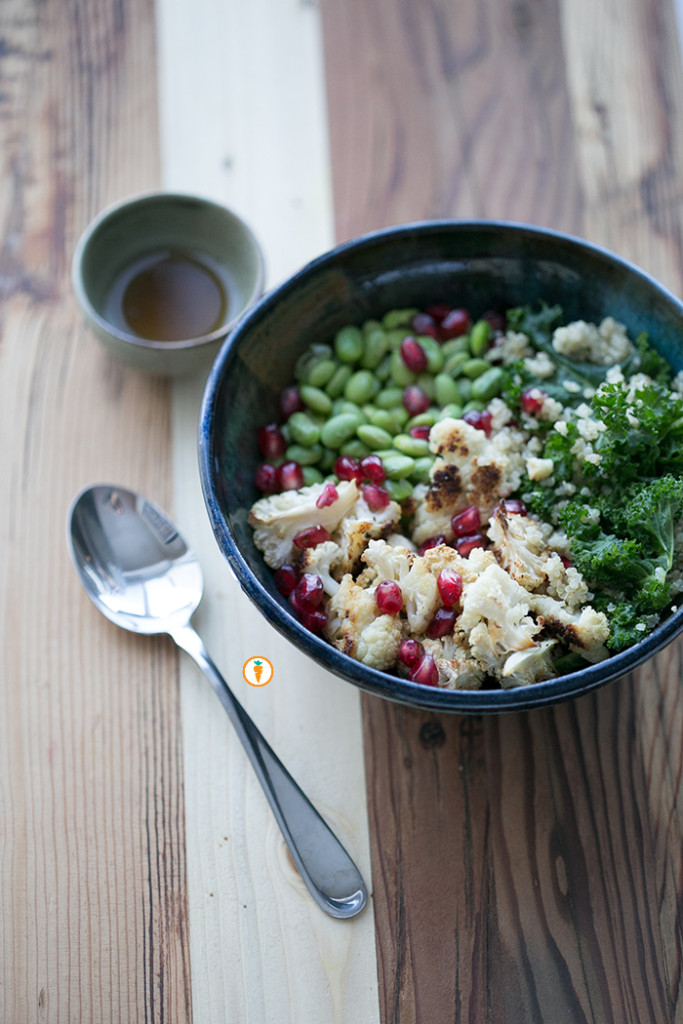
ANYWAY, here is a cozy and delicious winter salad to get you started:

Nita Sharda, Carrots and Cake

Cauliflower Salad Bowl
 
Prep time
Cook time
Total time
 
Ingredients
  • Kale
  • Edamame bean, steamed
  • Cauliflower
  • Quinoa, cooked
  • Pomegranate
  • Salt and pepper
  • 2 tbsp extra virgin olive oil plus extra for drizzling
  • 1 tbsp maple syrup
  • 1 tbsp white wine vinegar
Instructions
  1. Preheat oven to 350 degrees celcius.
  2. Chop cauliflower into bite size florets. Lay onto a baking sheet and drizzle lightly with olive oil. Sprinkle with a pinch of black pepper, salt and any other herbs you'd like to use.
  3. Roast in the oven for 15 - 20 minutes until cauliflower is tender and beginning to brown.
  4. In the mean time, assemble your salad bowl by combining kale, steamed edamame beans, cooked quinoa and pomegranate. Add as much or as little of each ingredient as you wish.
  5. For the dressing, whisk together 2 tbsp extra virgin olive oil, 1 tbsp each of maple syrup and white wine vinegar. Pour over salad and massage into your kale (this helps to tenderize and soften the kale).
  6. Once the cauliflower is ready, add it onto your salad bowl. Enjoy!
This blog post was written by Christy Lai, 4th Year Human Nutritional Sciences student. Follow Christy on Instagram, trust me, you’ll want to.
Food photography done by the talented Ceone Dyck. To learn more about Ceone click here or follow her on Facebook.

                 – With Love, Carrots and Cake,

Carrots and Cake Nita Sharda

Super Seedy Chocolate Chip Cookies

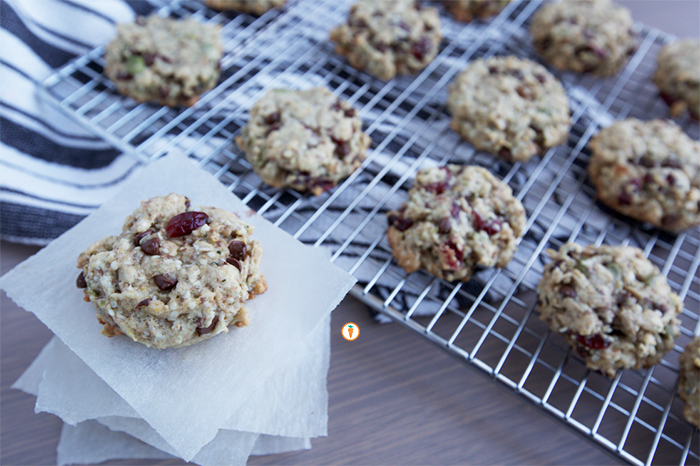
Nita Sharda, Carrots and CakeHave you ever experienced that moment when you perfect the most incredible recipe? I have. It was a great feeling but one that certainly came with a lot of errors, epic-fails and me wracking my brain to problem solve. The issue was I kept getting a cookie that was too dense and too “hard”. After altering the recipe (five times) and most importantly decreasing the baking time, I got it. PS it totally pays to have friends like Jenn and Courtney who offer up baking advice! Here it is…the perfect Super. Seedy. Chocolate Chip. Cookie.
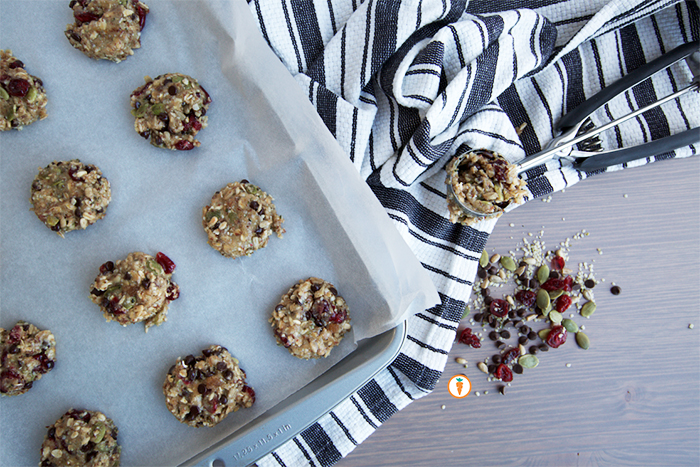
Oh and hey mama’s! You can send these little guys to you children’s school. It’s loaded with protein but it totally no-nut friendly!

What are some things that I love about this cookie?

  1. Vegan friendly. ‘Nuff said.
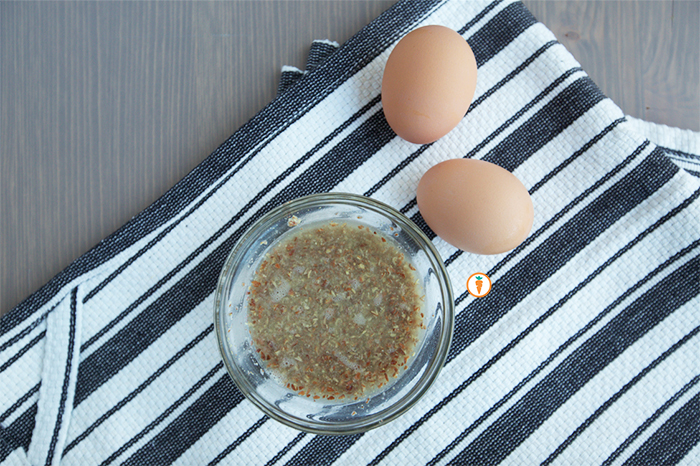
  2. Flax-water Replacement. Instead of using an egg to bind and moisten my cookie, I used a flax-water replacement. Yup, that’s right you can use 1 tbsp ground flax meal + 2.5 tbsp water to replace one egg. Voila!
  3. Seedy. Healthy and compact, seeds are amazingly nourishing. They often packed with  protein, fibre, iron, vitamins and omega-3 fatty acids. In this cookie I use: hemp hearts, pumpkin seeds and sunflower seeds.
  4. Sweet, but not too sweet. I originally started off this recipe using 1/2 cup each of sugar and brown sugar. Coupled with the chocolate chips, it was just way too sweet for me. I also knew that if I offered it to my niece with reduced sugar, she probably wouldn’t notice. So why bother? I reduced the sugar to 1/3 cup of white and brown sugar and it’s great.
  5. Healthy fats. I chose to use a plant-based fat, canola oil, for this recipe. There’a s few reasons why:
    • Canola oil is extremely neutral in taste. This means, the flavors from your ingredients are never masked.
    • I’m a prairie girl. Using canola oil means I’m supporting my local economy and most importantly our local family-farmers. Did you know, canola oil is 100% Canadian.
    • Canola oil is economical – yes, this Dietitian is on a budget!
    • Lastly, canola oil means more to me than it simply being a fat. Towards the end of my summer I was invited to join the Canola Eat Well team at Canola Camp. I learned a lot about the agriculture industry that I didn’t know about before. A few things: growing canola allows farmers to nourish their soil (it gives back nutrients), it sustains our bees that are often busy producing honey for us and provides livestock with high quality protein for their feed. Quite honestly canola is life-sustaining. I’m still working through my journal (and brain) to really articulate what my experiences were like at camp to share with you, so stay-tuned.
      • Recipe tip: did you know that when a recipe calls for a solid fat to be melted you can often use canola oil instead? This works easily for cakes and muffins. Use this conversion chart.

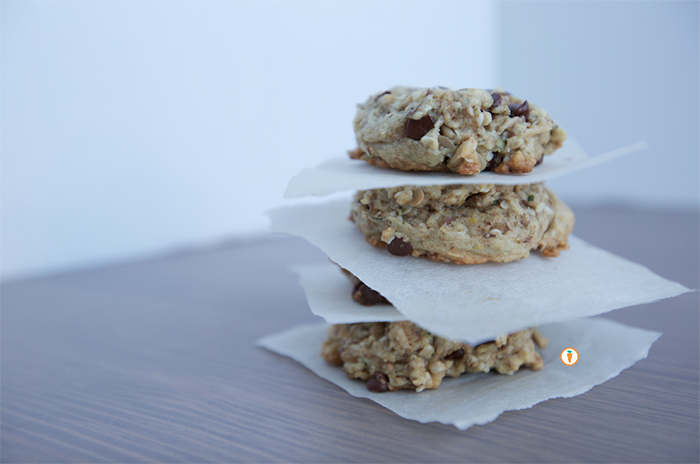
Nita Sharda, Carrots and CakeIn the mean time, bake these cookies. Pour yourself a glass of milk.
Enjoy.

Super Seedy Chocolate Chip Cookies
 
Prep time
Cook time
Total time
 
Serves: 24
Ingredients
  • ⅓ cup canola oil
  • ⅓ cup brown sugar
  • ⅓ cup white sugar
  • 2 tbsp flax meal
  • 5 tbsp water
  • ½ tsp baking soda
  • 2 tsp hot water
  • ½ cup whole wheat flour
  • ½ cup white flour
  • ½ cup large-flake rolled oats
  • ½ tsp baking powder
  • ⅓ cup chocolate chips (dairy free for vegan option)
  • ½ cup dried cranberries or raisins
  • 1 cup seeds or nuts (your choice; I do a mixture of sunflower seed, pumpkin seeds and hemp seeds)
Instructions
  1. Preheat oven to 350 degrees F.
  2. Soak flax meal in water. Ensure you’ve mixed it thoroughly with a fork. Let it stand 5 minutes.
  3. In another small pinch bowl stir together baking soda in hot water. Set aside.
  4. In a large bowl or in your stand mixer, combine canola oil, white sugar and brown sugar until well mixed.
  5. Add in your flax and water mixture. Stir to combine.
  6. Add in the baking soda and water mixture. Sitr to combine.
  7. In a separate bowl combine the remaining dry ingredients. Once thoroughly combined add this dry mixture to the wet ingredients. Give this all a whirl with your mixer or beater – be sure not to over-mix!
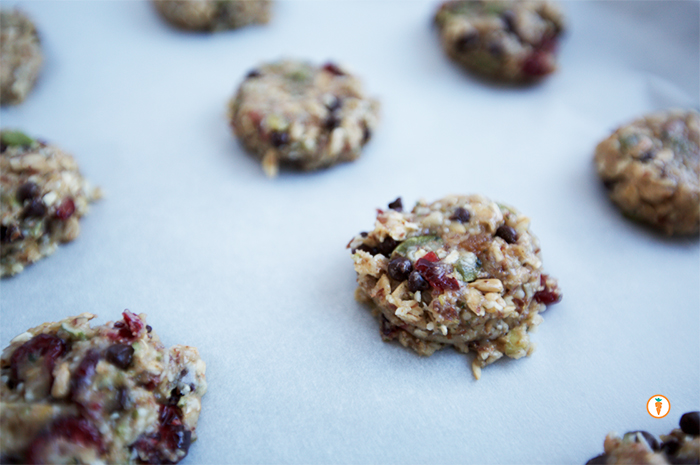
  8. Drop a spoonful of batter at a time onto a non-stick pan (I prefer to use parchment paper).
  9. With your fingers, lightly press the cookie-dough rounds so they are slightly flat (see photo above). These cookies wont run or expand much!
  10. Bake for 10 minutes (important: do not over bake).
  11. Makes approximaly 30 cookies.
Nita Sharda, Carrots and Cake

Here’s your egg substitute made with flax meal and water!

Nita Sharda, Carrots and CakeNita Sharda, Carrots and Cake

Please note all opinions in this post are my own. I have not received compensation for this post.

                 – With Love, Carrots and Cake,

Carrots and Cake Nita Sharda