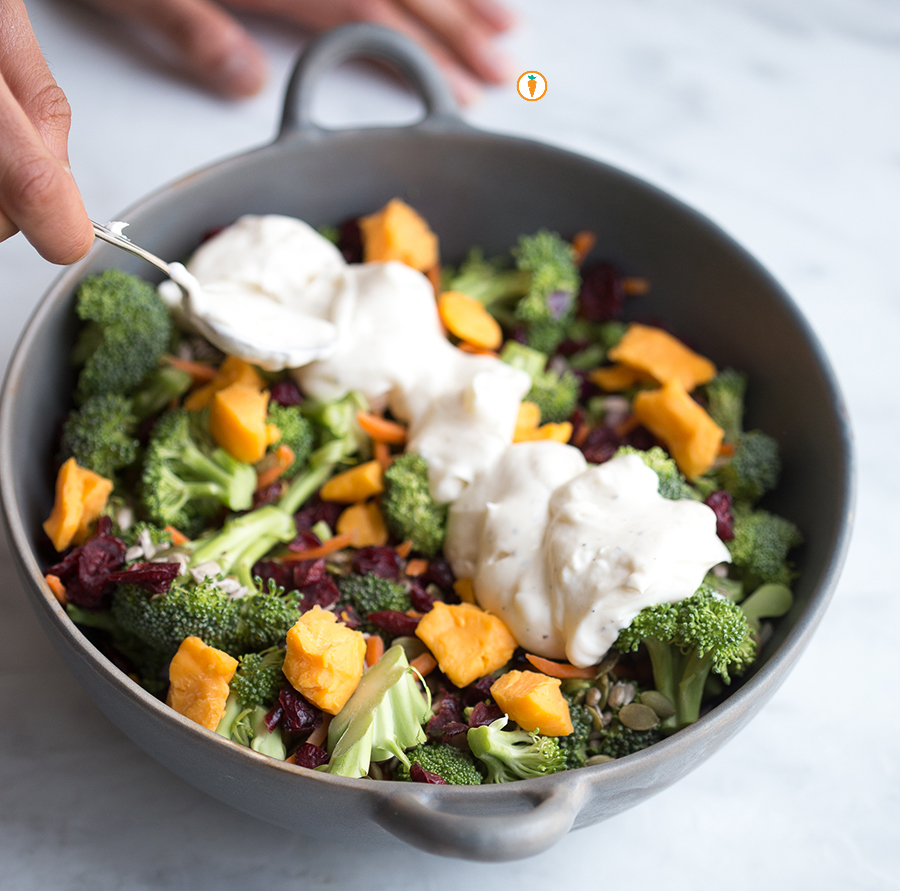
 As per the title of this blog post, the feature vegetable in this summer salad is none other than the broccoli. Growing up we typically only enjoyed broccoli when it was cooked into saag which is a giant mush (I’m not joking) of cooked down onion, spinach, broccoli and an array of spices. Now, I have fun using broccoli in stir fry’s, roasted, dunked into a ranch dip and of course, all dressed up in a Greek yogurt dressing.
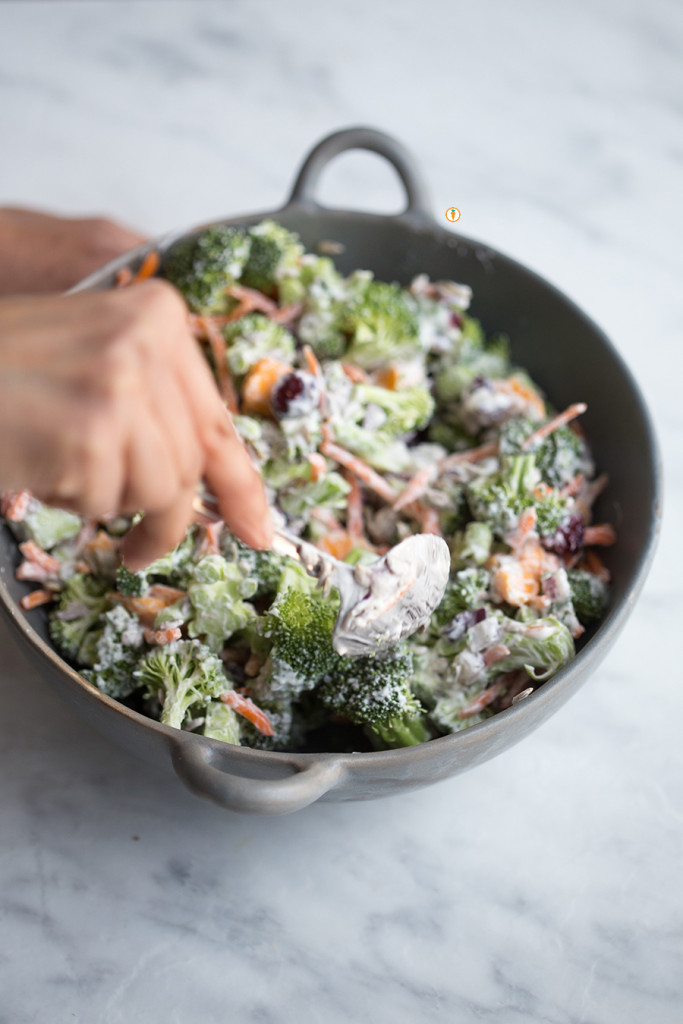
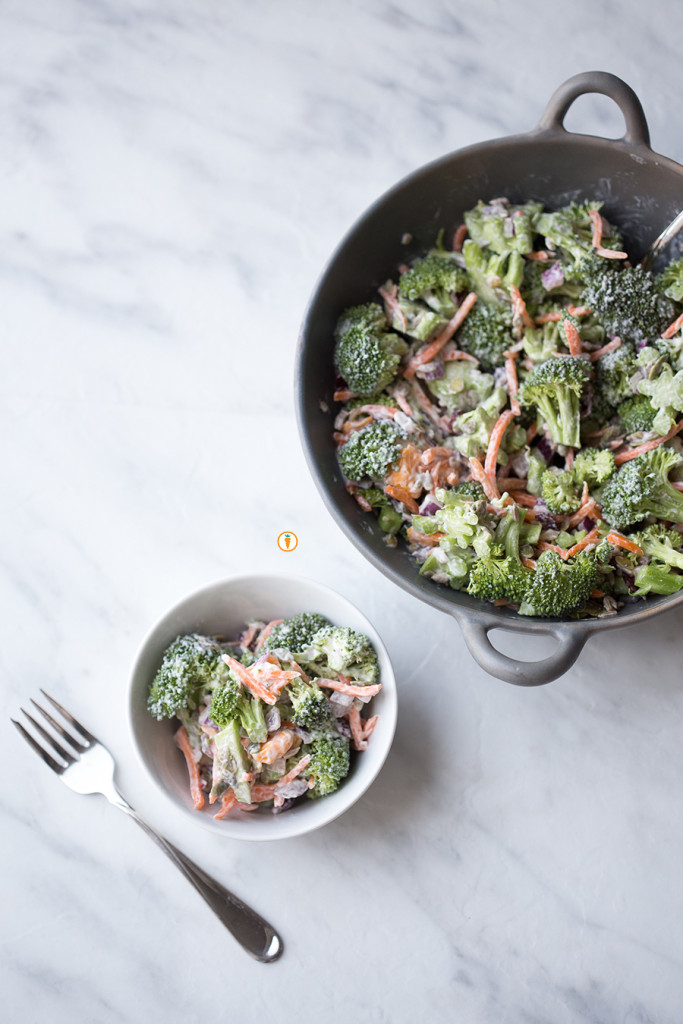
I’m sure you’ve tried a few versions of this recipe. But I really think you should make my recipe your go-to for summer potlucks, dinners or even enjoy this salad as a snack. Along with broccoli, this salad also includes a juicy apple, red onion, carrot sticks, cranberry and pumpkin seeds. Feel free to swap out ingredients and change the quantities as you wish. The “OG” version of recipe usually calls for copious amounts of mayo and sometime bacon. THIS version is laced with a high protein dressing courtesy of Greek yogurt.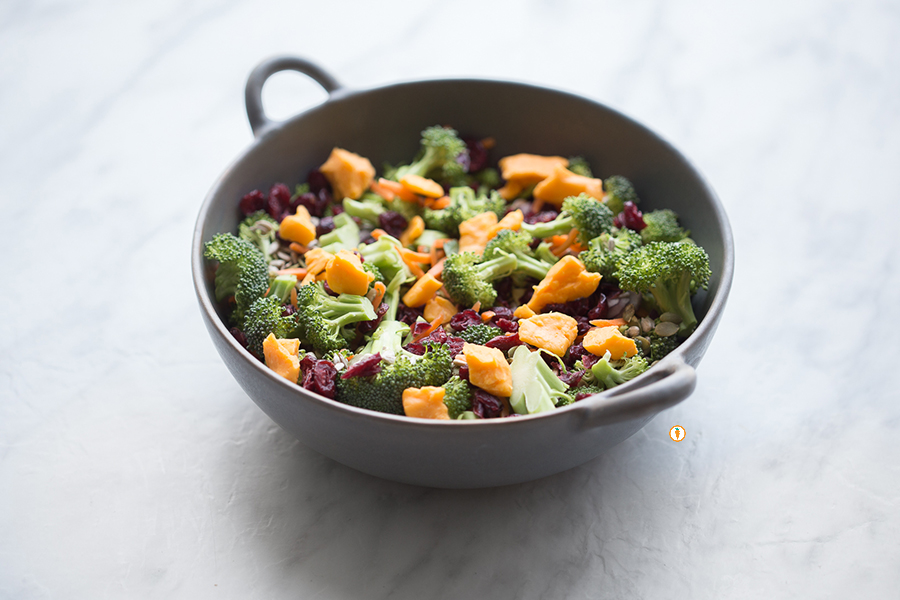
Arrrrrright, let’s move onto what you’re really here for.
The recipe.
- 3 cups broccoli, chopped
- 1 Gala apple, chopped
- ¼ cup red onion, chopped
- 1 cup grated or julienne carrots
- ¼ cup pumpkin seeds
- ¼ cup dried cranberries
- ½ cup chopped SqueaK'rs, cheddar (or grated)
- Dressing
- ¾ cup 2% M.F. Greek yogurt
- ⅓ cup mayonnaise
- 2 tablespoon honey
- Juice of ½ lemon
- Pinch of salt and pepper
- Pink of paprika
- Place all prepared veggies, apple, cranberries, pumpkin seeds and cheese into a bowl. Toss together.
- To prepare the dressing stir together Greek yogurt, mayonnaise, honey, lemon, salt, pepper and paprika.
- Pour the dressing (only half at a time) over the salad, ensuring the veggies are well coated. Let the salad sit in the fridge for 20 minutes to soften the broccoli. Add more dressing if desired.
- Serve and enjoy!
 Food photography done by the talented Ceone Dyck. To learn more about Ceone click here or follow her on Facebook.
Don’t forget to follow Carrots and Cake on Instagram to see tiny square snap shots of my life.
– With Love, Carrots and Cake,

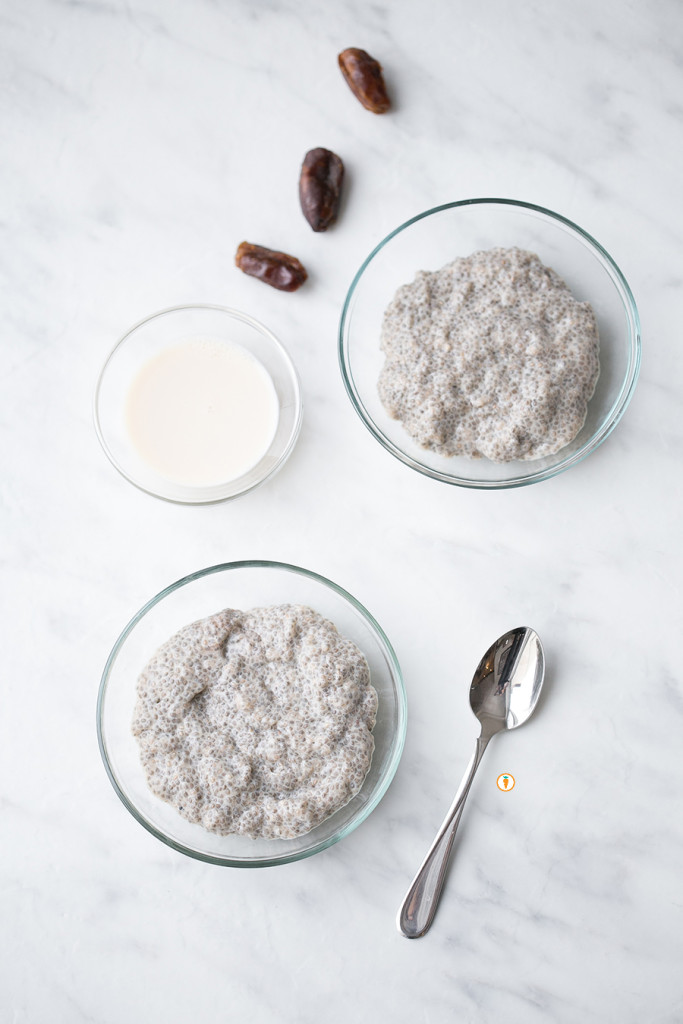
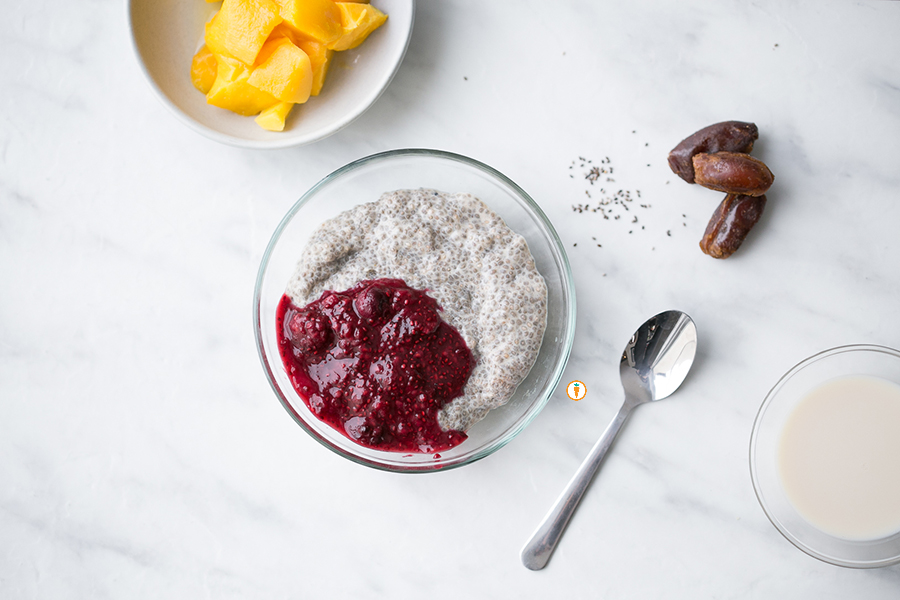 Oh, hello! Welcome back – I hope you enjoyed learning about whole grains on our last post. We’re going to take a break from nutrition education and share this uber simple recipe with ya’ll. You’ve previously seen me use and talk about the health benefits of chia seeds, like when I showcased my version of a 5 Ingridient Berry Sauce. When I heard my food friends talk about chia seed pudding, I was totally hooked and needed to give it a try.
Here’s what I love in particular about this recipe:
- calls for only 5 ingridients
- offers up 10 grams of fibre
- source of calcium
- source of protein
- allows for customization
- naturally gluten free
- no cooking, just stirring
 Okay, I think you’re sold.
- ⅓ cup chia seeds (black or white)
- 1½ cups milk (dairy or dairy free)
- 2 tbsp runny honey or maple syrup
- 1 tsp vanilla extra
- 1 tsp cinnamon
- Place all ingredients into a bowl. Mix very, very, very well and cover with saran wrap.
- Place bowl into the fridge for thirty minutes. Stir again.
- Return back to the fridge for at least another 2 - 3 hours. The result is a thick pudding similar to rice pudding.
- Top with additional fruit if you wish. I love it with tart raspberries, mango or kiwi.
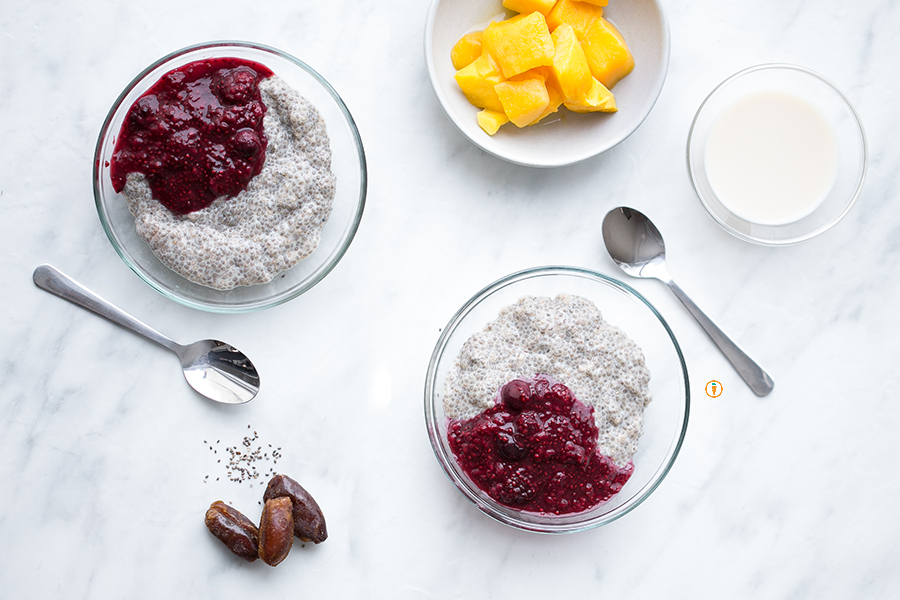
Food photography done by the talented Ceone Dyck. To learn more about Ceone click here or follow her on Facebook.
Don’t forget to follow Carrots and Cake on Instagram to see tiny square snap shots of my life.
– With Love, Carrots and Cake,

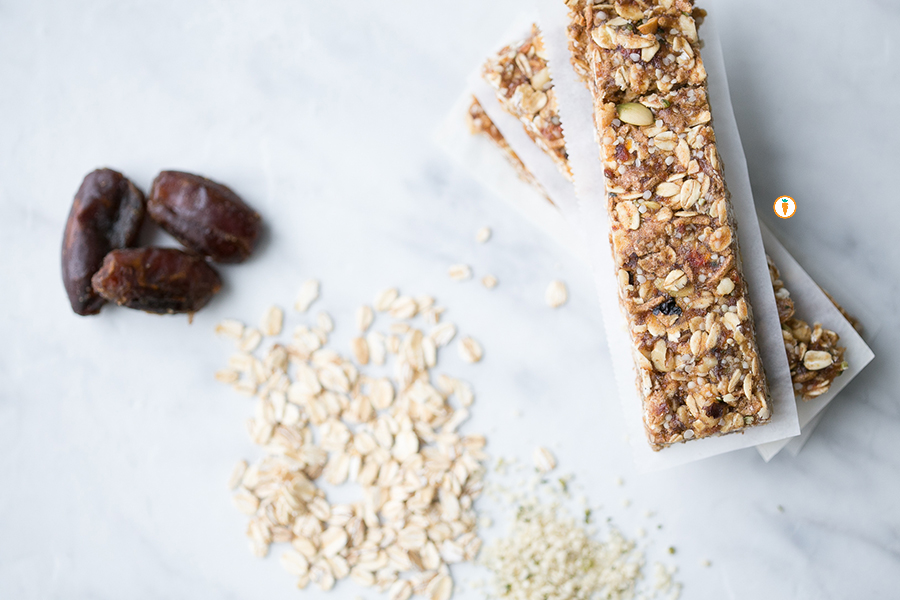 I love a good granola bar. It’s basically like having portable nutrition in your hand! Mind you, a good quality product can often be hard to spot. Most large-chain grocers have entire aisles dedicated to this iconic food item. The tough part is distinguishing which one truly is a granola bar versus which one is…well..basically a chocolate bar.
Tips to sourcing a quality granola bar:
- When I’m on the hunt for a bar I try to look for something that has less than 8 – 9 grams of sugar and offers me up at least 3 grams of fibre.
- Protein is another POWERHOUSE nutrient that I scout for. If you’re looking for a nut-free product, it will be difficult to find a protein bar with more than 2 grams of protein. Otherwise, if nuts are your thang, you’ll likely have no trouble finding something that can offer you atleast 4 – 5 grams of protein.
- Look at the ingredient list and find something that is 100% whole grain.
- Avoid granola bars that are chocolate or yogurt covered. These bars can have upwards of 3 teaspoons of sugar in a small serving.
Or HAYYYYYY – how about making your own?
When I have a bit of extra time on my hands, I take pleasure in being able to make my own granola bars that I can snack on. The ingredients in this recipe (adapted from Cookspiration) include all the foods I enjoy eating as snacks: dates, walnuts, pumpkin seeds and hemp hearts are the super heroes behind this bar. Seriously, you’ll feel so good after making them, eating them…and maybe even sharing them. You’ll notice – the recipe doesn’t call for any refined sugar. The sweetness is brought to you naturally from the dates and honey. Don’t cha love nature?
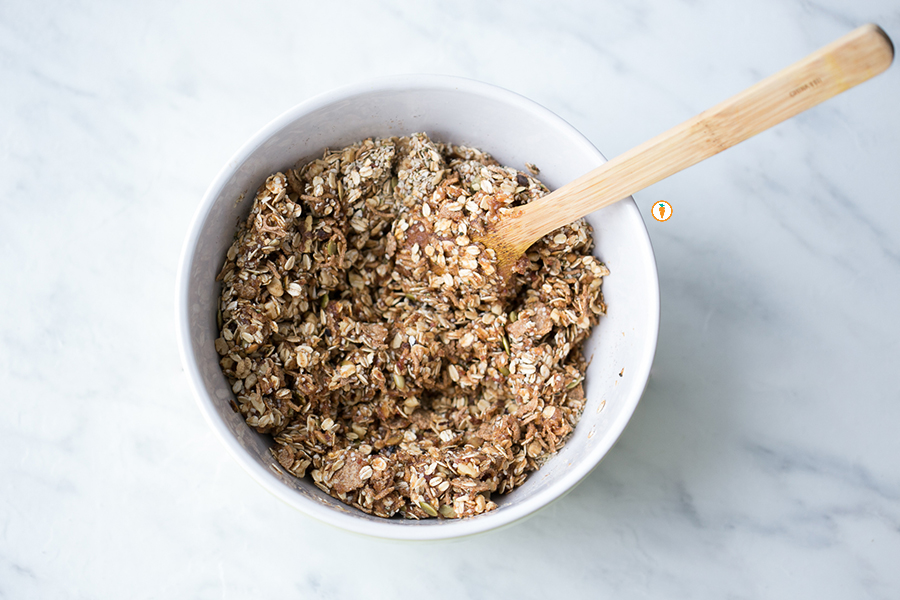
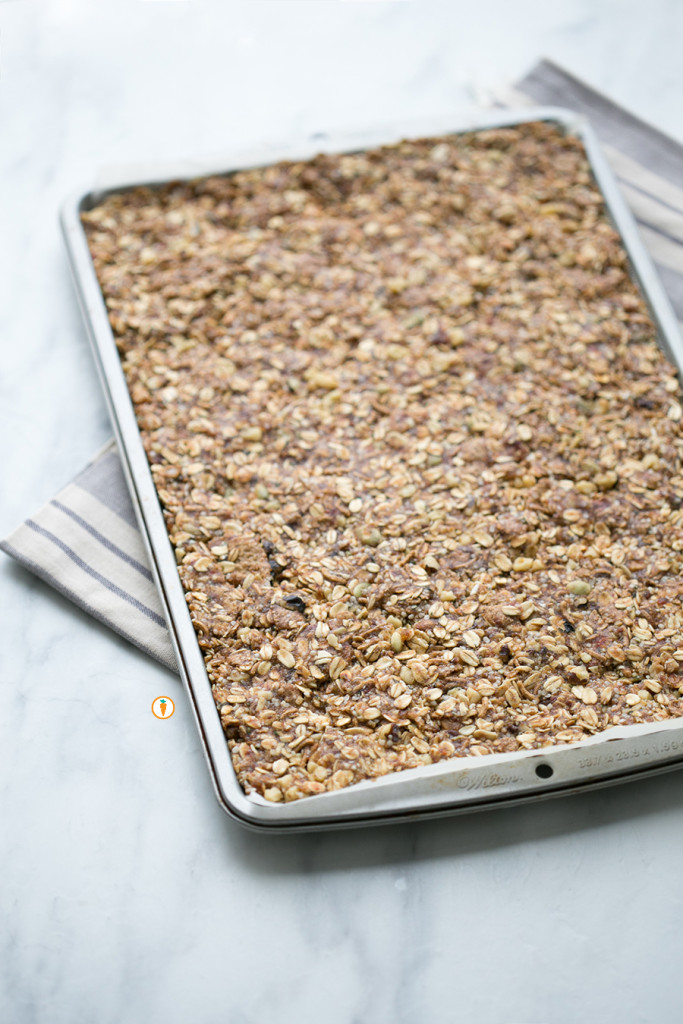
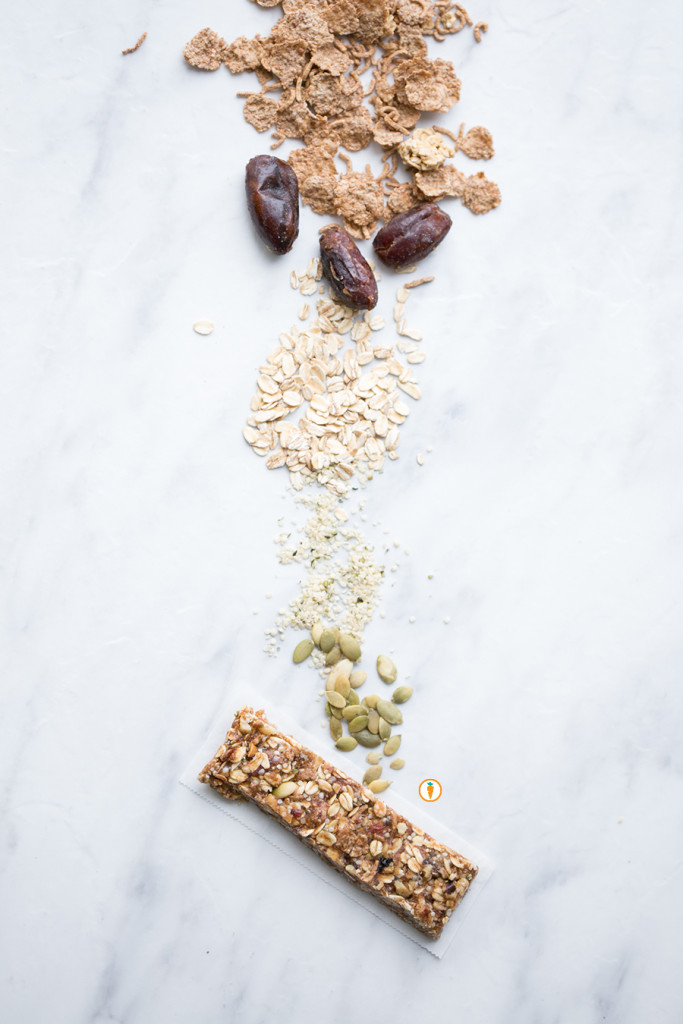 Okay, recipe deets below:
- 1 ½ cup All Bran Flakes cereal (I used PC brand from Superstore)
- 1 ½ cup large flake oats
- ½ cup chopped walnuts
- ¼ cup pumpkin seeds
- ½ cup hemp hearts
- 1 cup dates (about 12 - 15 dates)
- ¼ cup honey or maple syrup for vegan option
- ⅓ cup almond or peanut-butter
- In a large nonstick skillet, toast oats, walnuts and pumpkin seeds over medium heat, stirring often for about 8 minutes or until light golden and fragrant. You'll even hear the pumpkin seeds "pop".
- Pour this mixture into a large bowl and let cool slightly; stir in bran flakes and hemp hearts.
- In the bowl of a food processor, pulse dates until finely chopped. For me, it rolls into one giant blob.
- In a small saucepan, heat together honey and almond butter over medium low heat until melted and smooth. Add dates and stir to combine.
- Pour into oat mixture and stir together until dates are distributed evenly throughout and oats are coated well.
- Press mixture into 23 cm (9 inch) parchment or foil lined baking pan and press to flatten evenly (warning: don't place it on a pan that's too big - you want the mixture to be "tight").
- Cover and refrigerate for at least 1 hour or until firm. Cut into bars and wrap individually with plastic wrap and store in refrigerator for up to 1 week or in the freezer for longer.
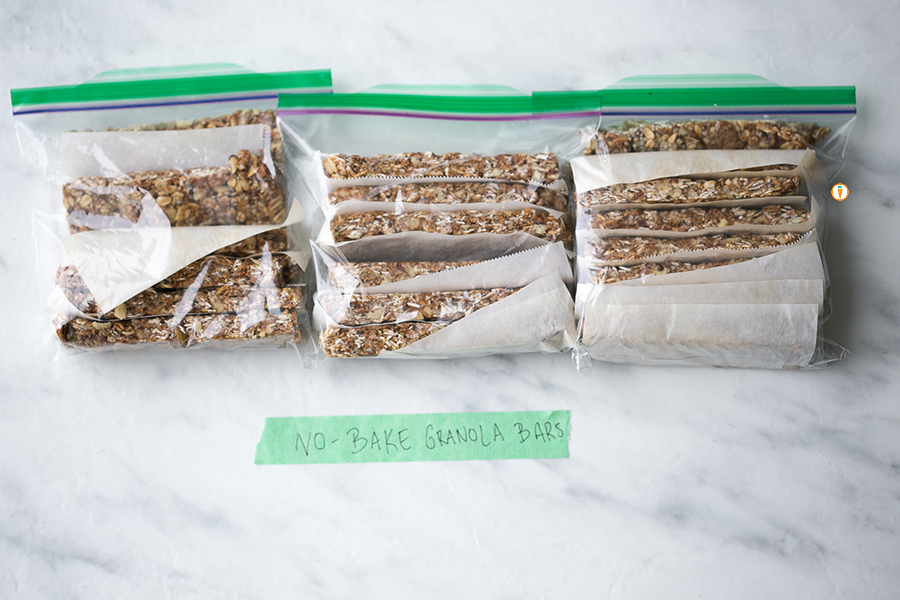
STACKS ON STACKS OVER HERE!!
For more granola bar inspiration, here are a few ideas from my personal food friends:
- Dixya’s No Bake Oats and Peanut-butter Granola Bar
- Jessica’s Everything Granola Bar
- Jenn’s Chewy Granola Bar
- Getty’s Coffee Lover’s Energy Bar (I actually got to try some on a plane-trip with Getty!)
- Abbey’s No-Bake Gluten Free Peanut-butter Apricot Bar
- Caroline’s Ultimate Guide to Granola Bars and Bites
Food photography done by the talented Ceone Dyck. To learn more about Ceone click here or follow her on Facebook.
Don’t forget to follow Carrots and Cake on Instagram to see tiny square snap shots of my life.
– With Love, Carrots and Cake,

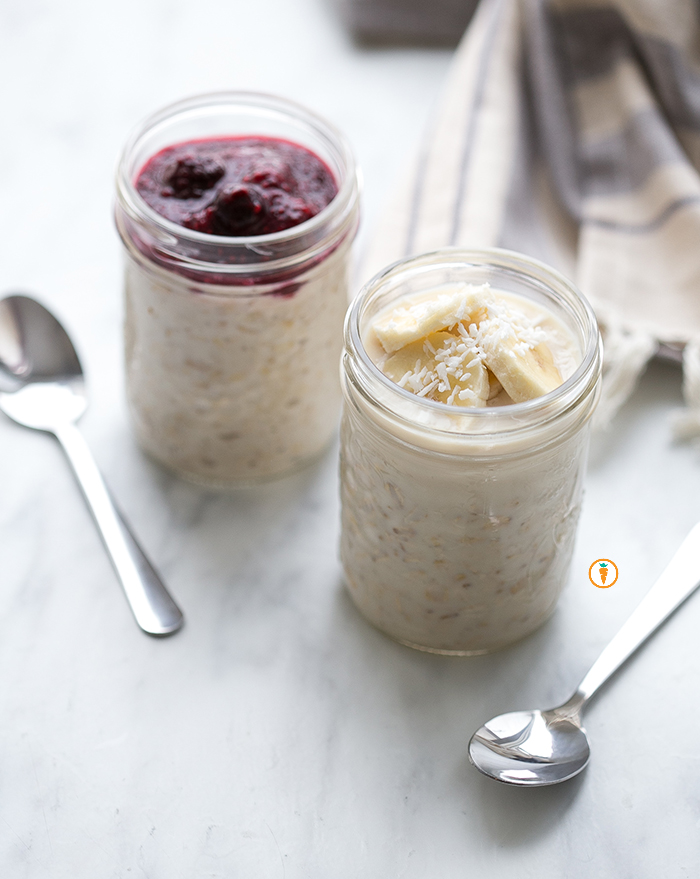 I’m all about making sure we’re eating a variety of whole grains in this house. Sometimes without knowing it, we get stuck in a rut and stick to one primary grain (wheat, and by the way: there is nothing wrong with that). Consequently, we don’t get a chance to enjoy the wonder and benefits other grains have to offer us.
Oats. I LOVE OATS. a) they are hella cheap b) they are super versatile c) they are easy to cook d) you can enjoy them sweet, savory, warm or cold! e) for folks who are sensitive to gluten, they can enjoy certified gluten free oats. What more do ya want from a grain?
Want the nutrition jiffy on oats?
- They are whole grain! Health Canada recommends that 50% of your grains should be whole grain; we know people who eat whole grains have a lower risk of heart disease, stroke, diabetes, cancer and digestive disorders.
- They are rich in soluble fibre; this type of fibre helps improve blood cholesterol and can help manage blood sugar levels too.
- A half cup serving (dry, large flake oats) offers up nearly 8 grams of protein.
- They are a source of B vitamins, iron and vitamin E.
Why overnight oats?
It’s great for people who require a quick grab n’ go style breakfast; maybe you’re someone who prefers to enjoy breakfast at work or are too busy preparing breakfast for your little ones. This is a great alternative!
Mornings can be rough for some of us so overnight oats take the prep-work out in the morning. You can prepare a few batches to last you throughout the week.
Overnight oats are incredibly versatile. You can change the proportion of milk/yogurt/oats as needed to suit your needs.
In general, you’re getting a great source of protein, carbohydrate, fat if you add some nuts/seeds and fruit. These components make it a complete and balanced meal.
It’s a nice change from your typical bowl of hot oatmeal.
Variations:
- Top it with my 5 Ingredient Berry Sauce, bananas, shredded coconut, apples, canned peaches or any other favorite fruit.
- Switch up the milk from a dairy milk, nut milk or soy milk.
- Add nuts and seeds for extra protein such as pumpkin seeds, walnuts, almonds or toasted hazelnuts. My friend Chantal of Nutty for Nutrition loves adding chia seed to her concoction, just make sure add extra moisture if you go this route because chia seeds love to suck up liquid!
- Feel free to use your favorite sweetener such as brown sugar, maple syrup, honey or stevia if that’s what you fancy.
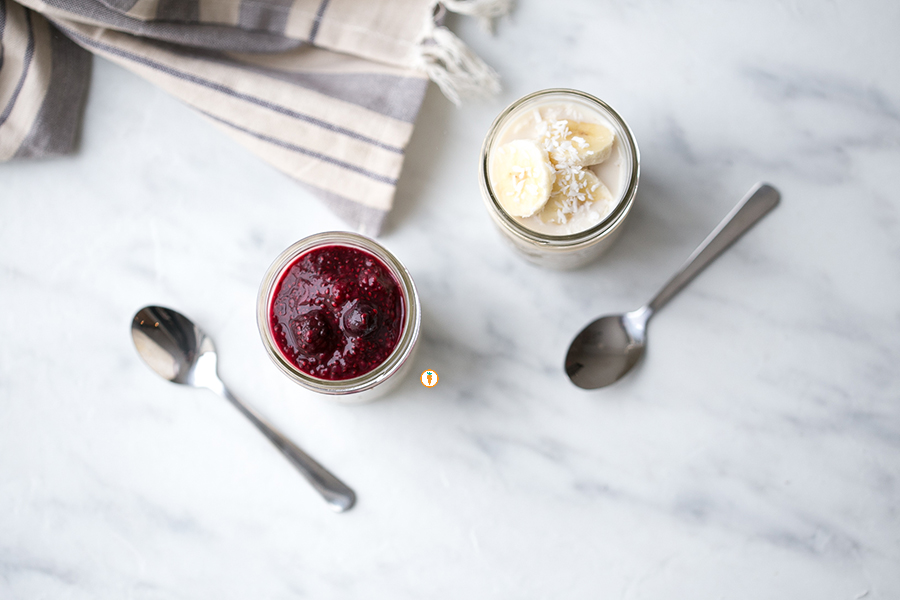
- ½ cup rolled oats (large flake)
- ½ cup milk
- ¼ - ⅓ cup vanilla Greek yogurt
- 2 tsp flax seed
- Pinch of cinnamon
- Drizzle of maple syrup, honey or your preferred sweetener
- Fruit
- Place oats, milk, yogurt, flax seed, cinnamon and sweetener into a Tupperware, mason jar or cereal bowl. Stir until smooth.
- Top with your choice of fruit. Leave overnight.
- The next day, enjoy it cold or feel free to nuke it in the microwave for 20 seconds! If it's a little too thick for you add a dash of milk or water until you've got your desired consistency.
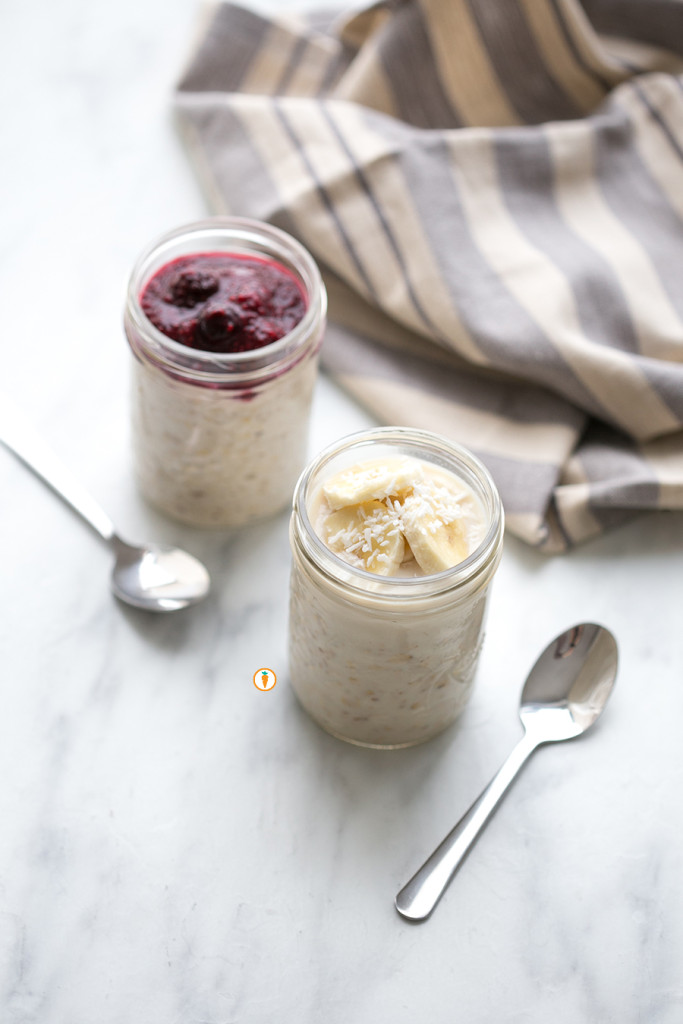 Food photography done by the talented Ceone Dyck. To learn more about Ceone click here or follow her on Facebook.
Don’t forget to follow Carrots and Cake on Instagram to see tiny square snap shots of my life.
– With Love, Carrots and Cake,

 Woah. How did that happen? Today marks the second birthday for Carrots and Cake Balanced Nutrition Consulting. What was supposed to initially be a “lets try to see five clients per month” kinda gig has turned into visiting with at least twenty clients monthly, blogging, recipe development, writing for cool food producers and as of late, mentoring Nutritional Science students that are hoping to get their feet wet in the dietetic industry. By the way, all of this on top of a nearly full time job in an area of clinical practice I love.
A very sincere thank you to all of my friends, readers, clients and colleagues who continue to support me through my growth. When I gave birth to Carrots and Cake it was all very organic. I never felt like anything was being forced into place – there really was no financial goal, strategic plan or real incentive other than to connect with people, about food.
I remember last year when I celebrated Carrots and Cake’s first birthday I showcased this Carrot and Pineapple Loaf. And then, I celebrated some more with these yummy Carrot Oatmeal Cookies. The sweetest was coming into work and my colleague had prepared some of these goodies for me and our team to enjoy.
Needless to say, I am SO looking forward to what 2016 has in store for me.
Here’s what happened over the last twelve months:
- I moved from a condo into our home (that has a great big island, yaaaaassss)
- Got a Vitamix…that’s a big deal, right?
- Joined a Women’s in Business group made up of fine business women in Winnipeg
- Completed several Women and Weights classes via good friend, RD extraordinaire and Personal Trainer, Chinwe – so basically, I’m way stronger than last year
- I partnered with some awesome food industry folks like Bothwell Cheese which allows me an opportunity to write more often, something I love to do
- I learned and helped my food loving friend, Getty Stewart can some tomatoes
- Completed my second Manitoba Marathon Relay while the hubs added a second half marathon to his list
- I went on an amazing #CanolaConnect Harvest Camp with the lovely folks of Canola, Eat Well
- On the same note, I also had a chance to attend a Grow Canada conference c/o #CanolaConnect – picture this: being only meters away from Clara Hughes and former LGen Romeo Dallaire – MIND BLOWN
- Went through a lot of professional struggles at work, but came out stronger than I ever thought I was
- Took on two student volunteers to help with content creation, recipe development and photography
- As of LAST NIGHT, my sister (many of you might know her as Myuz Artistry) gave birth to a sweet baby boy AND my other sister is expecting her first babe
- On that note, I officially have baby fever
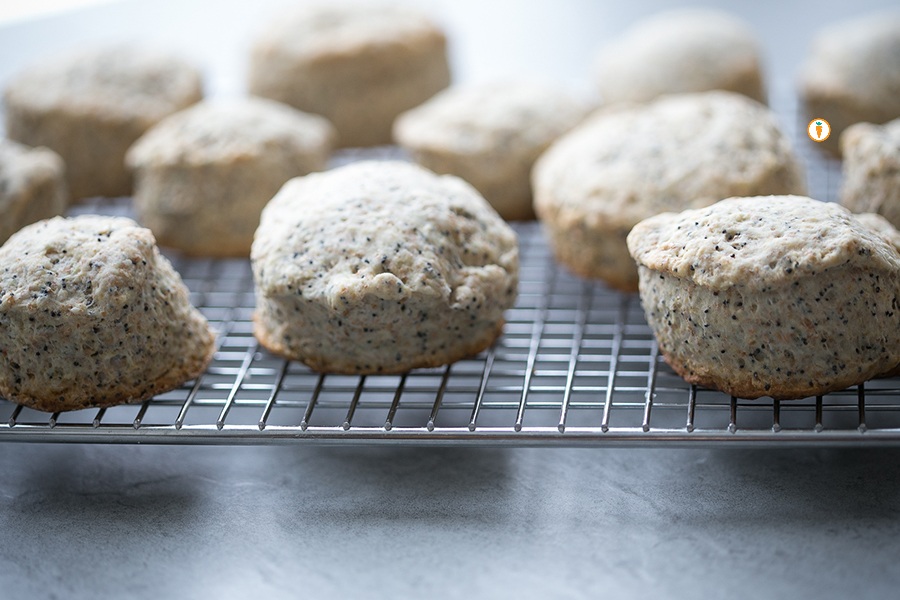
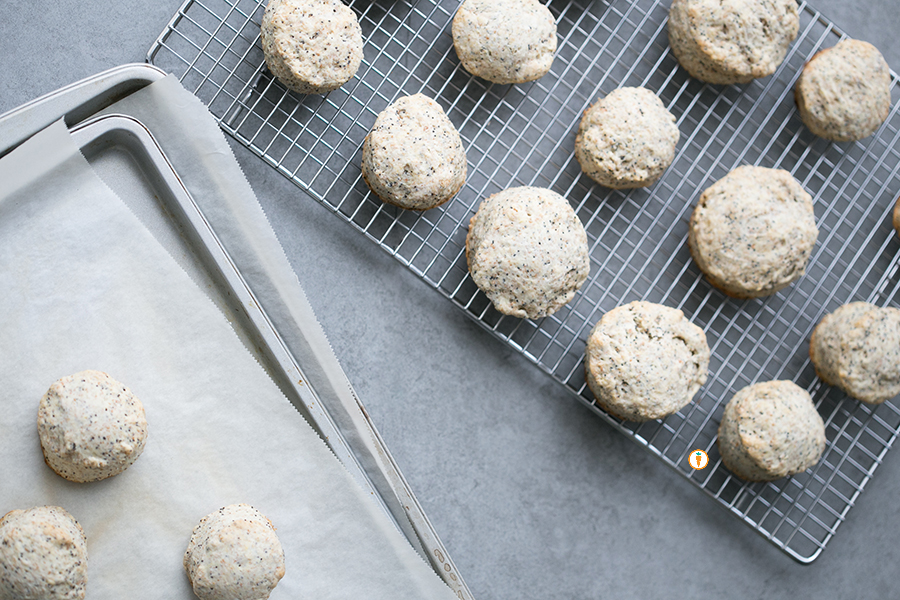
Okay, okay. I know why you’re ALL really here, it’s for this SUPER DUPER amazing recipe for Poppy Seed Biscuits. This recipe hails from somewhere…I just can’t remember where. It’s the kind I just wrote down with pencil and pen after trying them at a friends house years ago when I live in B.C.. The recipe stuck with me.
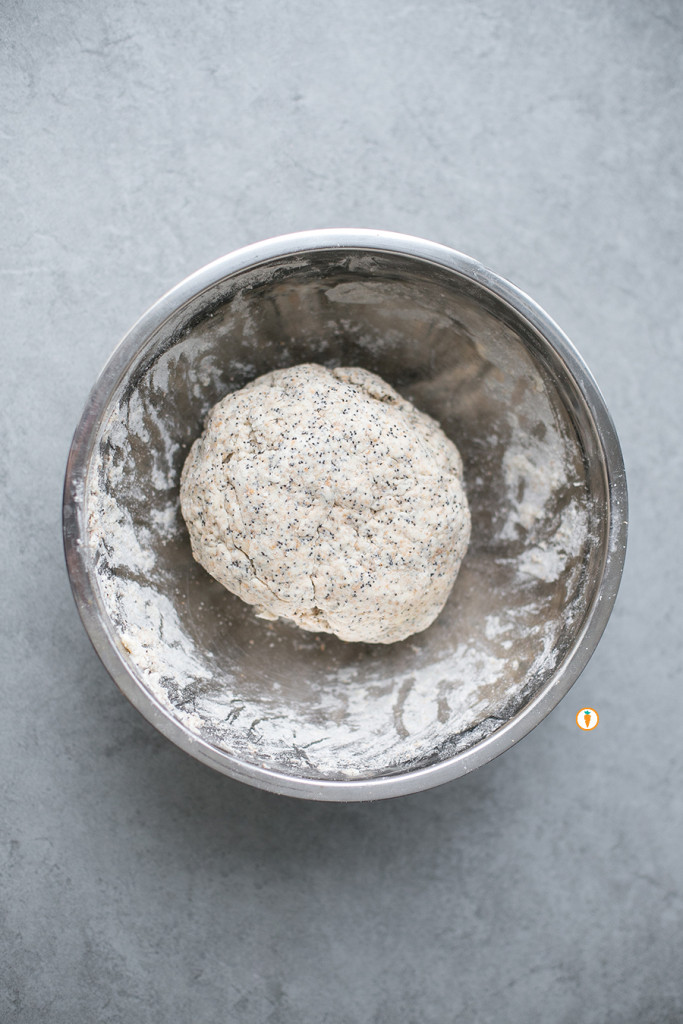
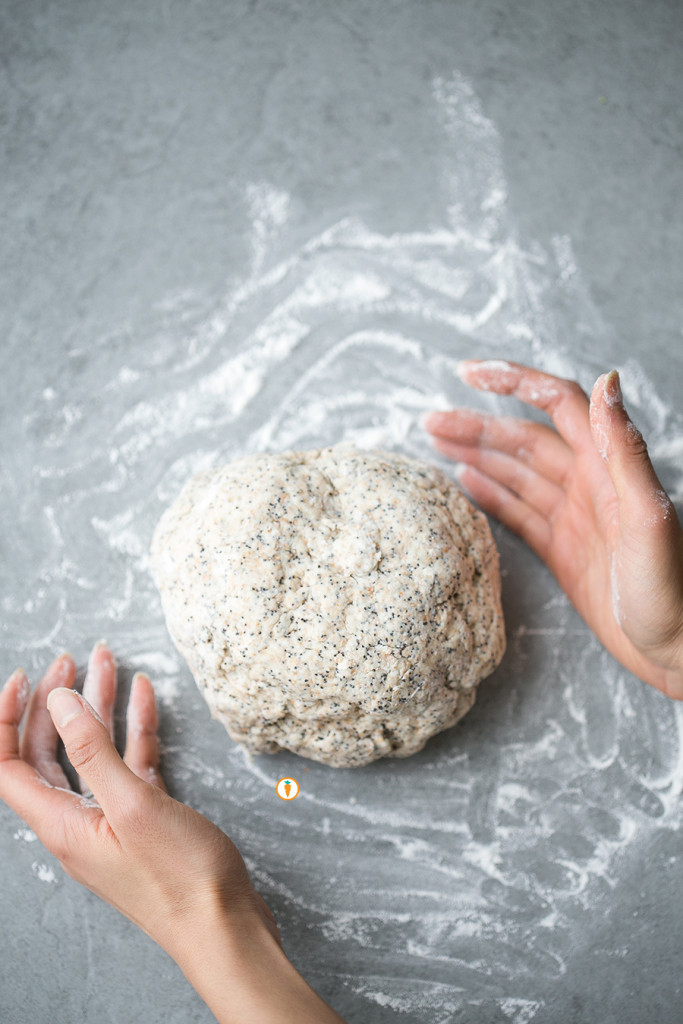
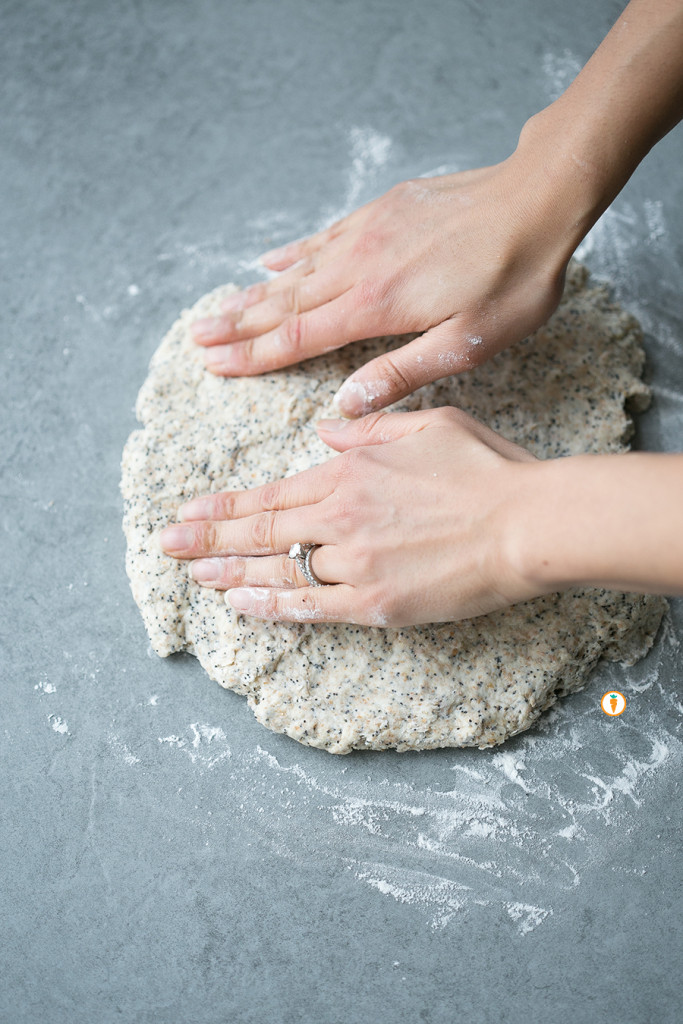
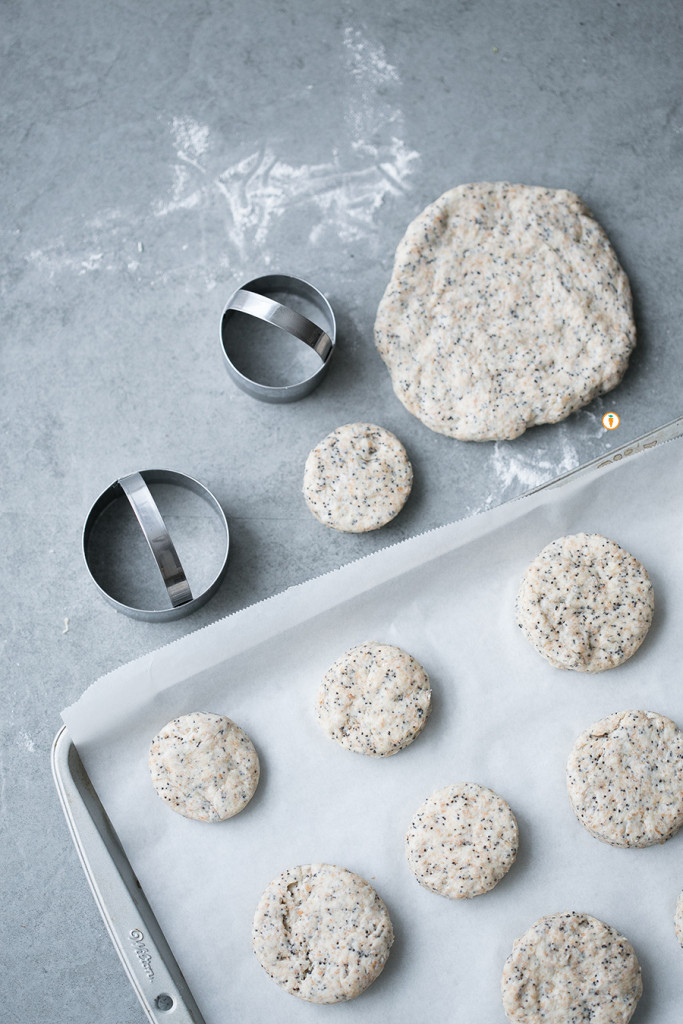
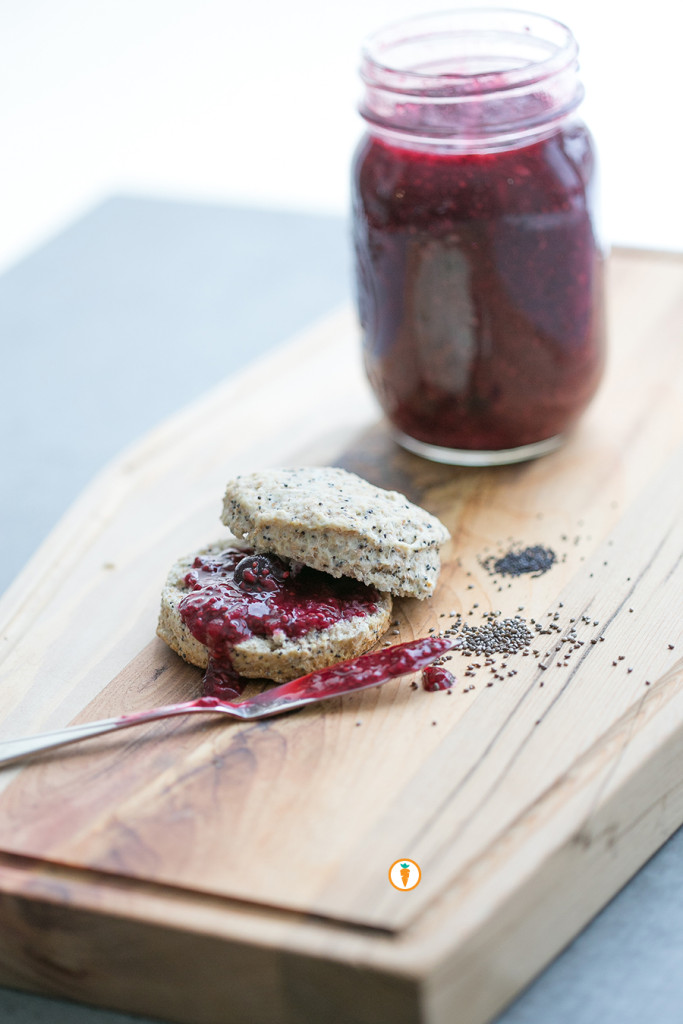
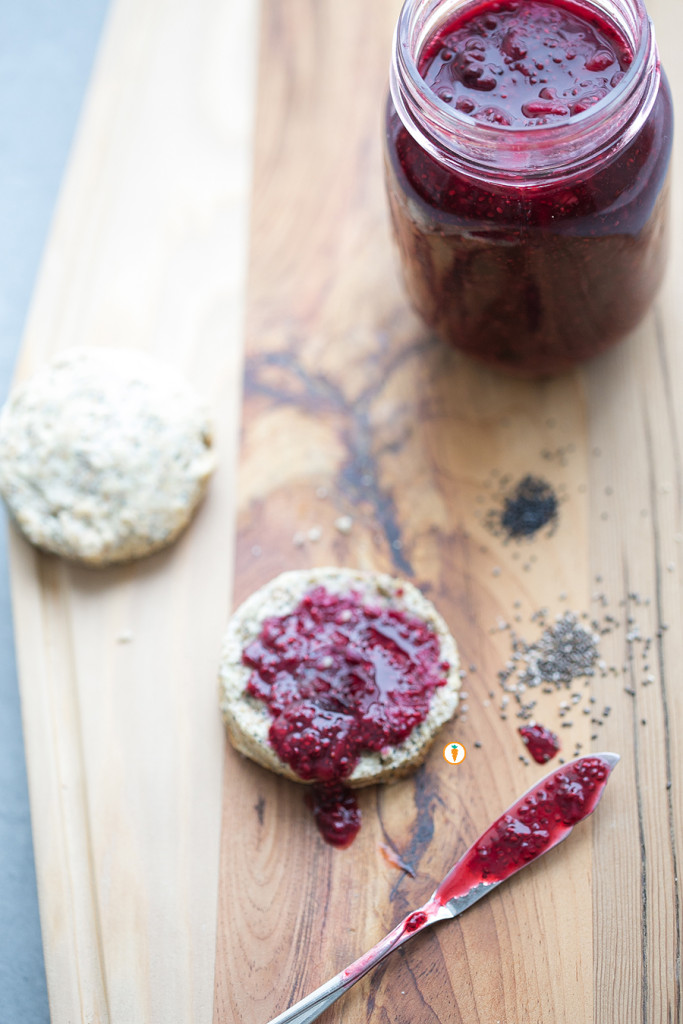
These biscuits are on the slightly sweet side, but still pair well with soup. I think they make a great snack for a girls afternoon or act as a lovely addition to a large green salad. You’ll see below, I paired it with my 5 Ingredient Berry Sauce which ended up being the perfect marriage.
Okay, recipe taymeee.
- 1½ cups whole wheat flour
- 1 cup all-purpose flour
- ¼ cup white sugar
- ¼ cup poppy seeds
- 1 tbsp baking powder
- ½ tsp baking soda
- ½ tsp salt
- ⅓ cup cold butter, cut into 1 inch chunks
- 1 cup buttermilk
- Line a large baking sheet (or two) with parchment paper and preheat oven to 425.
- In a large bowl stir together dry ingredients until well combined.
- Add in butter. Using a pastry blender or two forks cut the butter into the dry ingredients. Eventually, you'll have a texture that resemble coarse crumbs.
- Add buttermilk. Stir the mixture to moisten and create a sticky dough.
- Drop a handful of flour onto a clean surface and knead the dough about 10 times.
- Roll out the dough or using your hands pat it into a ½" thick round.
- Using a 2" biscuit cutter cut out as many rounds as you can. Place on a baking sheet. Gently form scraps into a ball, flatten and cut out more biscuit rounds. Repeat if needed.
- Bake biscuits for 12 - 15 minutes. Biscuits shouldn't be too brown! Remove from baking sheet and onto a cooling wrack.
- Best when served warm.
Food photography done by the talented Ceone Dyck. To learn more about Ceone click here or follow her on Facebook.
Don’t forget to follow Carrots and Cake on Instagram to see tiny square snap shots of my life.
– With Love, Carrots and Cake,

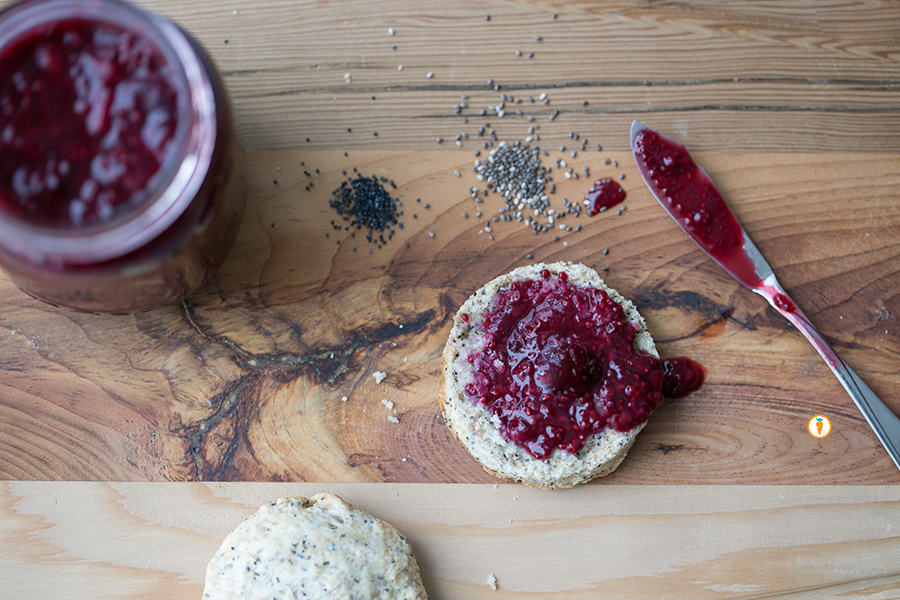 I remember the first time I made a berry sauce. It was for a brunch I was hosting and waffles were on the menu. It was some random recipe that Mr. Google found for me. It called for 1 cup of juice and 1 cup of sugar for only two cups of berries. Jesse whiz, that is A LOT of sugar. What’s a Dietitian/Food Nerd to do?
Develop her own recipe!
I prepare this berry sauce quite regularly for our meal-prep line up. It’s extremely low maintenance and the recipe is pretty darn easy to memorize. There are so many uses for this sauce, here’s what I’ve tried so far:
- Great in smoothies
- Lovely on top of plain yogurt
- Fabulous over pancakes or waffles
- Yummy on warm or cold oats
- Genius as a jam on toast or biscuits
The recipe uses a super cool ingredient that might be new to you. It’s chia seeds! You can find these little guys at any bulk store and they can also be spotted in the “health food” aisle of many large-chain stores. Chia seeds harness a lot of nutrition, offering up some omega-3 power, fibre, calcium and a wee-bit of protein too. Chia seeds are crucial for this recipe as they suck up (literally) moisture from the concoction, leaving you with a nice saucy texture. I promise you’ll love it.
Recipe taymeee.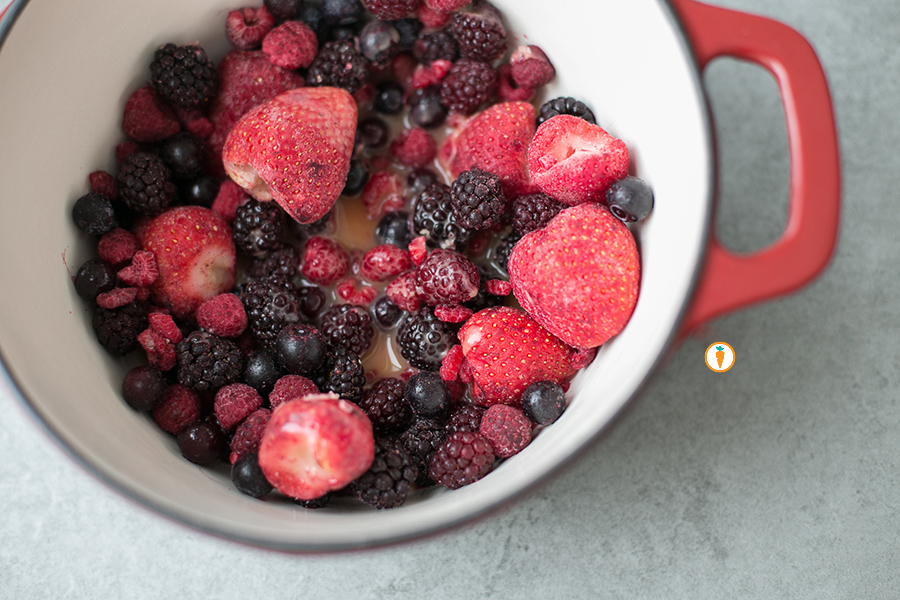
- 3 cups frozen berries, mixed variety
- ½ cup 100% orange juice or water
- 2 tbsp maple sryup
- 1 tsp vanilla
- 2 tbsp chia seed
- Place frozen berries into a medium sized pot. Add in orange juice or water.
- Turn heat to medium and bring mixture to a gentle simmer. When this happens, using a potato masher muddle the berries to a desired consistency. I prefer to leave mine a little chunky, but to each their own!
- Next, add in maple syrup and vanilla. Stir to combine.
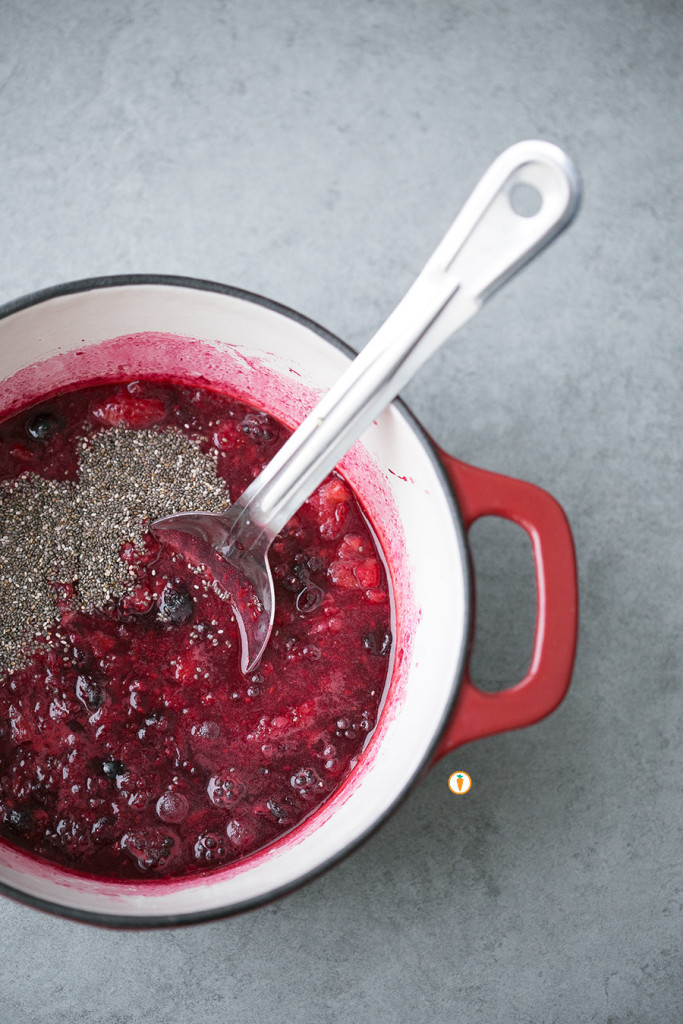
- Remove pot from heat and add in chia seeds.
- Stir and wait about 20 minutes. The mixture will begin to thicken.
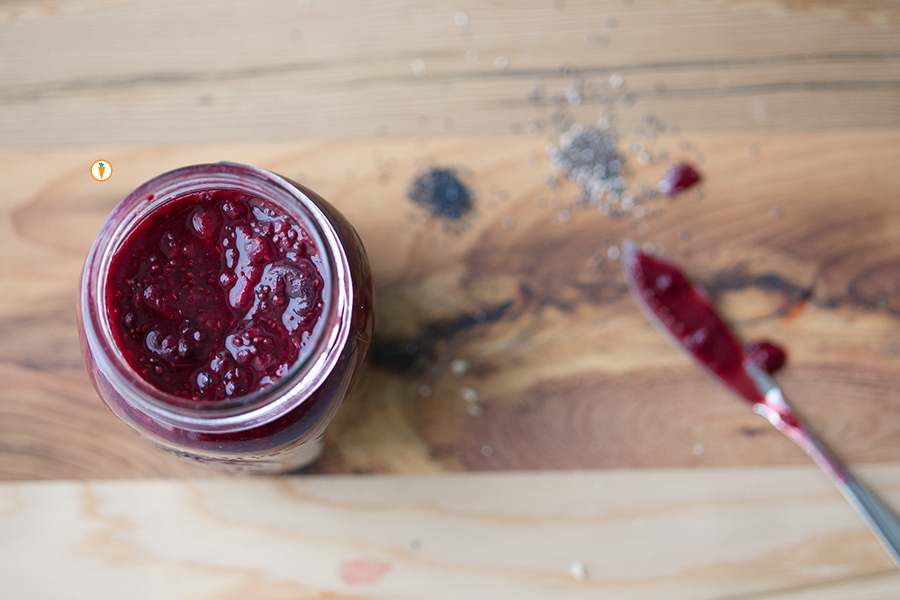
- Store in a mason jar or tupperware for one week, refrigerated.
Food photography done by the talented Ceone Dyck. To learn more about Ceone click here or follow her on Facebook.
Don’t forget to follow Carrots and Cake on Instagram to see tiny square snap shots of my life.
– With Love, Carrots and Cake,

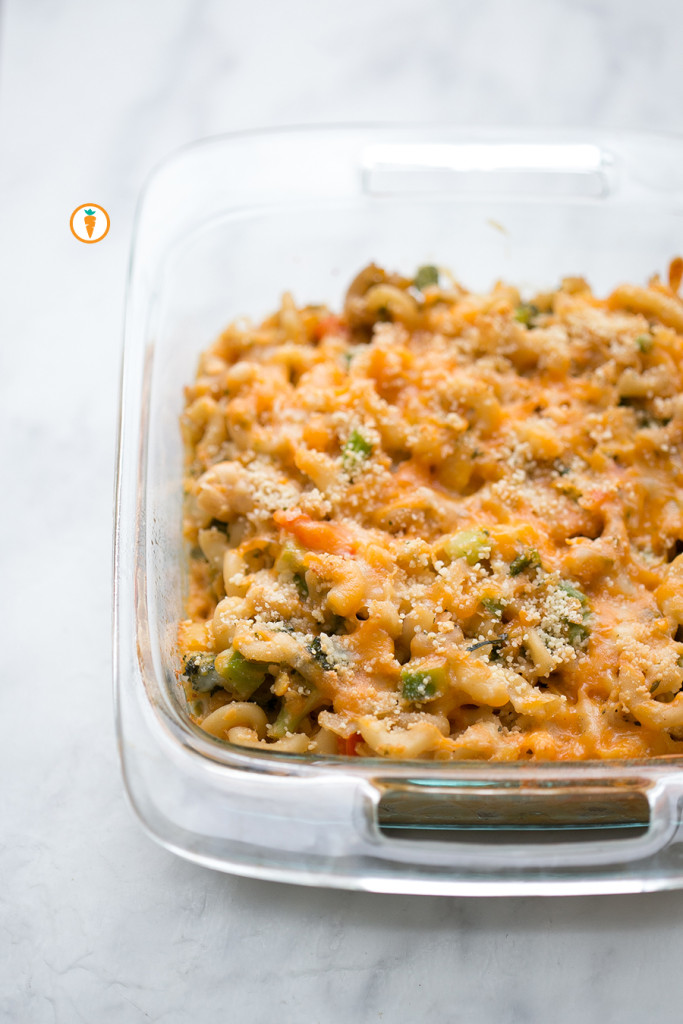
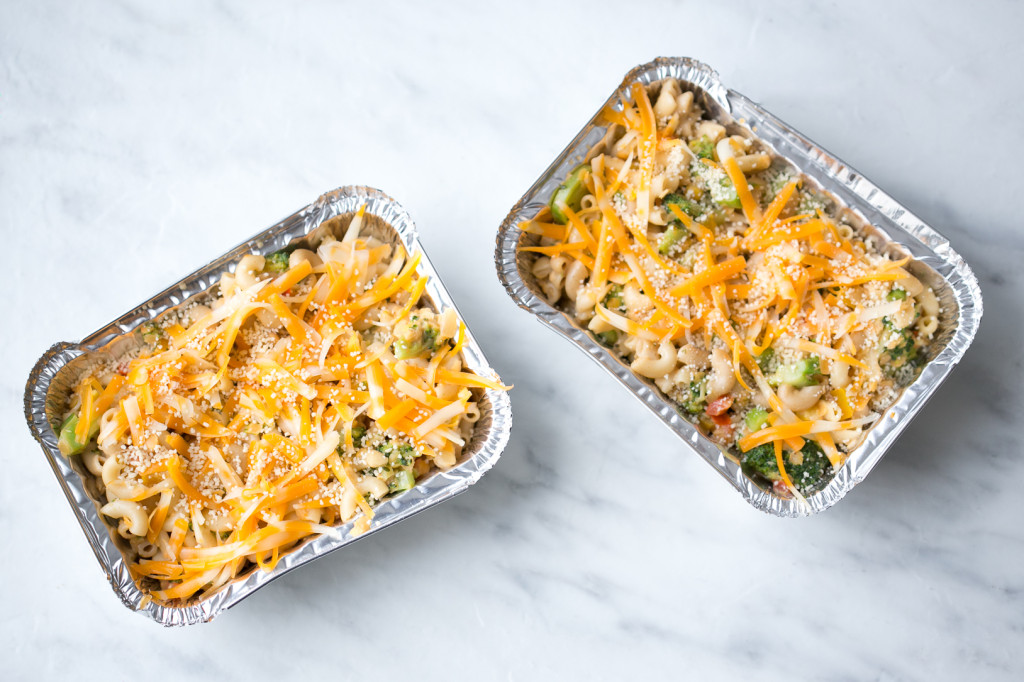 Don’t get upset! I know what you’re thinking “why did this Dietitian take my favorite comfort food and add veggies and then butcher it with lentils?”! I realize fully that mac and cheese is all things comforting and nostalgic for many of us. Having said that, most of use could do with a bit more veggies in our life and in honour of The International Year of the Pulse, it only made sense.
The truth is, I love a good mac and cheese. You know, the kind you get at restaurants with the crispy topping. Oh, and when it has bacon, even better. Unfortunately, on almost all occasions, these variations of mac and cheese left me feeling like I had just eaten a treat. So, I wanted to create a wholesome recipe that I could enjoy and feel good about eating throughout the week. You feel me?
I remember the first time I made this recipe. My husband scratched his head and said, “babe, there is something more gritty in the texture”. I smiled and told him it was the lentils. He shrugged, grabbed a second serving and called it great. What a keeper. So yes, you should expect a slight change in the texture you’re used to, but the taste shouldn’t be all too different.
If you need to take baby steps. Maybe try the recipe with just onion and lentils. Or, just veggies. It’s your body, you’re the boss.
I tripple-tried this recipe before deciding to have it photographed and placed on the blog. But, it fits. It truly does. Here’s what I love about this version of mac n’ cheese:
- It uses 2% Evaporated Milk to give it the creaminess you want. It’s made by removing water from fresh milk and then heating it. Heating the milk gives it the creamy, slightly cooked taste and darker colour. It’s a source of protein, calcium and Vitamin D!
- It includes approximately 3 cups of veggies which mean you could really add more, or less. One time I added cauliflower! Another time I opted to use mushrooms.
- The lentils help to increase the protein and fibre content of the entire recipe, making it a one-pot-meal kinda deal.
- You can spice it up as you wish. I keep it simple but you could also add some basil or parsley if you fancy.
- Lastly, it’s freezer friendly and great to pull out on those day’s you might be extra crazy busy and don’t want to compromise on your nutrition. Simply place it in the oven and bake until everything is heated through and your cheese is bubbly.
I drew inspiration for this recipe from The Lean Green Bean and the Eat Shrink and Be Merry gals. Check out their versions if you wish.
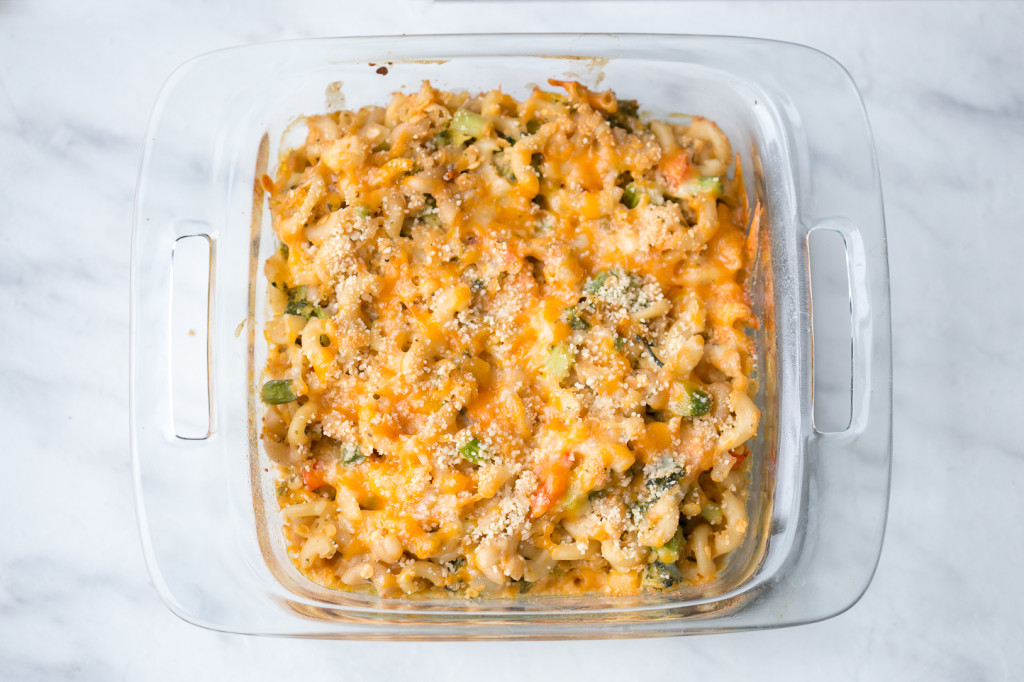
UP CLOSE AND PERSONAL.
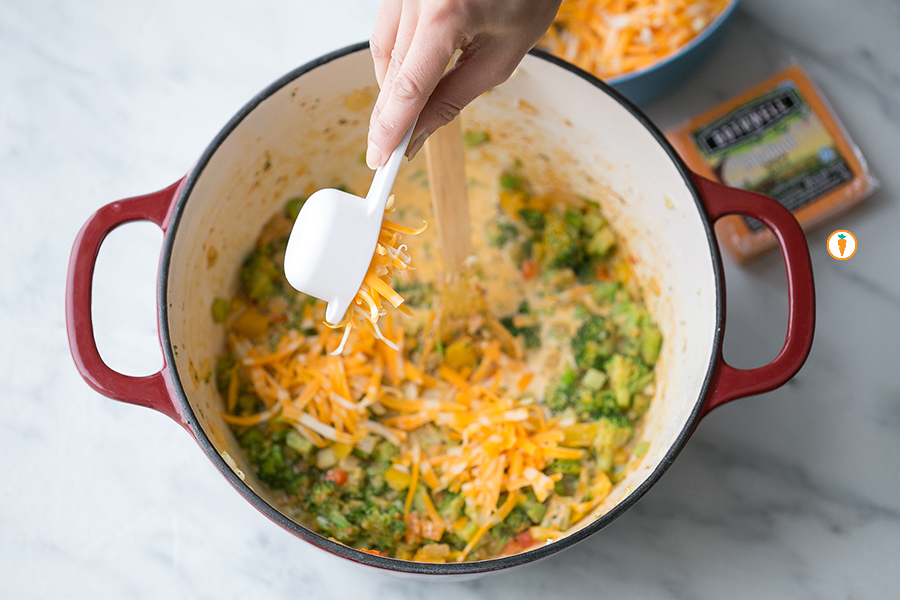
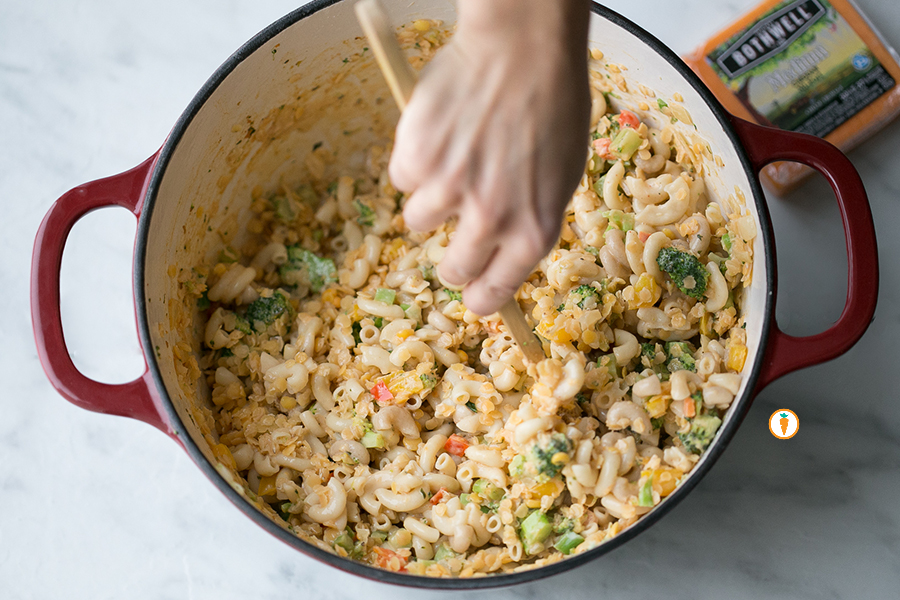
Okay, recipe taymeeee.
- 1 cup elbow pasta
- ¾ cup red lentils, uncooked
- 2 tbsp canola oil or butter
- 1 onion, diced
- 1 red pepper, diced
- 1 cup broccoli, chopped into small florets
- 1 cup spinach, thinly chopped
- 3 cloves garlic, minced
- 1 tsp paprika
- ½ tsp cayenne
- 1 tsp black pepper
- 2 tbsp all purpose flour
- 1 can (370mL) Evaporated Milk (I used 2% MF)
- 1 cup cheddar cheese
- Preheat oven to 350 degrees.
- Cook elbow pasta according to package directions, until al dente. Drain and set aside.
- Cook red lentils according to package directions. Once lentils are cooked through, set aside.
- In a separate large pot, heat butter or canola oil. Add in onion and cook until translucent.
- Once onion is cooked through, add in remaining vegetables, garlic and spices. Saute for 10 - 15 minutes until vegetables are softened. I prefer to add my spinach last as it requires very little heat.
- Sprinkle vegetables with flour, ensuring the mixture is well coated.
- Add evaporated milk and ¾ cup of cheese, leaving some cheese for the last step.
- Add in cooked pasta and lentils to the vegetable mixture and combine thoroughly.
- Place mixture in a 9 x 13 dish, or two 8 x 8 dishes. Top with remaining cheese.
- Bake for 20 - 25 minutes until cheese is bubbly.
Food photography done by the talented Ceone Dyck. To learn more about Ceone click here or follow her on Facebook.
Don’t forget to follow Carrots and Cake on Instagram to see tiny square snap shots of my life.
– With Love, Carrots and Cake,

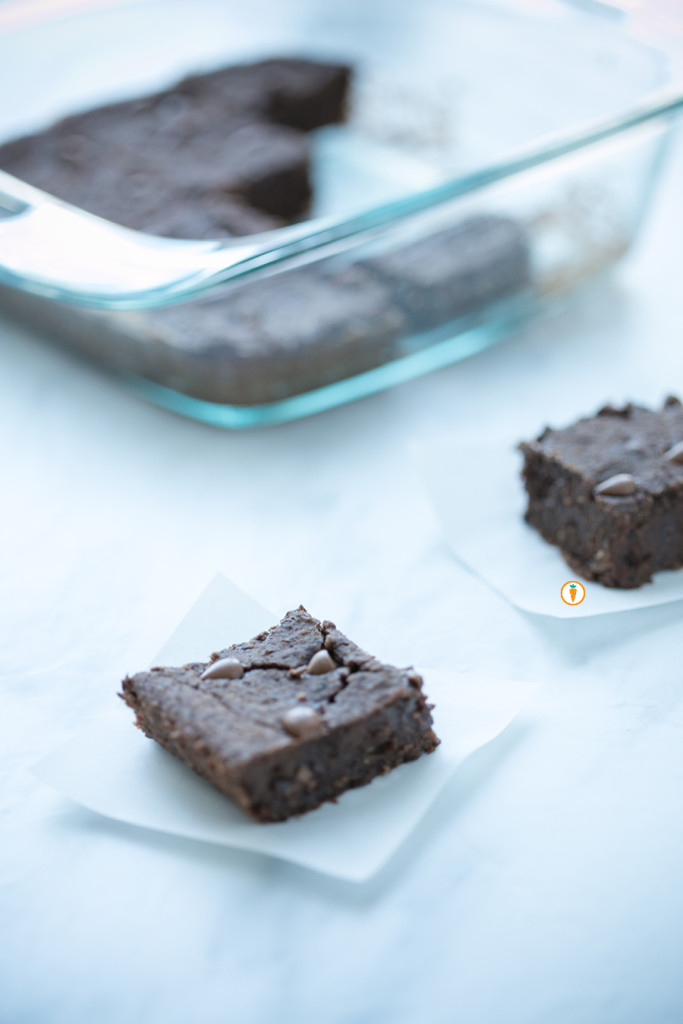
Seriously, yummy.
Earlier this week we talked to you about how excited we are that 2016 is the International Year of the Pulse. Hip hip hooray! In today’s recipe post we’re sharing an exciting brownie recipe that uses black beans. Yes, you read that right: BLACK BEANS. Please, don’t be scared – the results are amazing and dddddelish.
If you’re also making it a goal to experiment with new grains you’ll note that this recipe is actually wheat free. Instead, it uses oats. The original inspiration came from a fellow food blogger who we love, Chocolate Covered Katie. Our contributor Ceone had also made variations of the recipe in the past, so we wanted to share-share (what do they say? Sharing is caring). We made a few adaptations such as using applesauce to reduce the fat content and also decided to finely process the oats a bit more. The result is a brownie that resembles fudge but is still soft, a little gooey and chocolatey. All good things people. All good things.
From a nutrition standpoint, what I love about this dessert option is that it offers my clients an opportunity to still practice balance. In comparison to commercial or boxed brownies, this brownie is fairly low in sugar, offers up some fibre and protein which in turn will help you feel full for longer (that’s because fibre and protein are satiating). It’s totally the type of treat (or every day food) that really can be good for you.
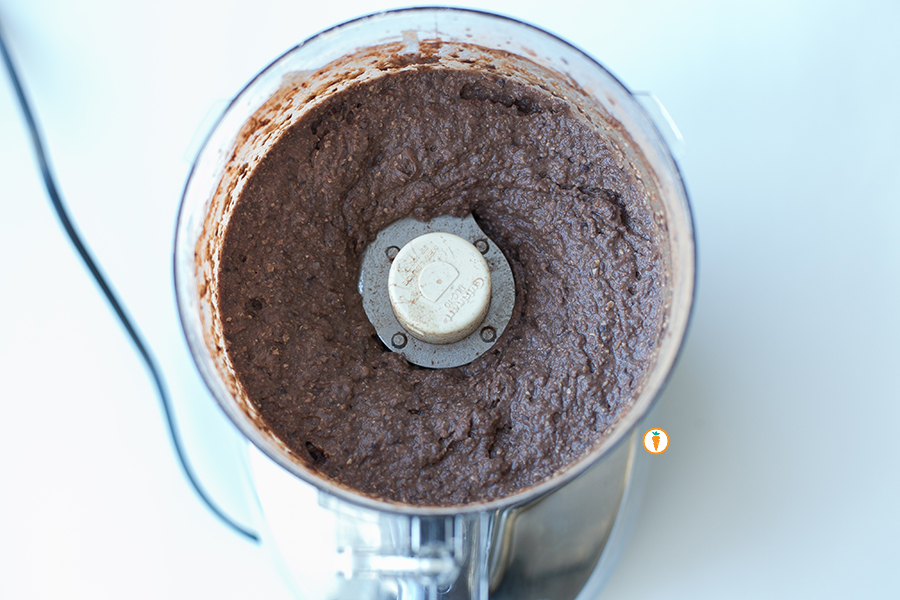
All mixed up.
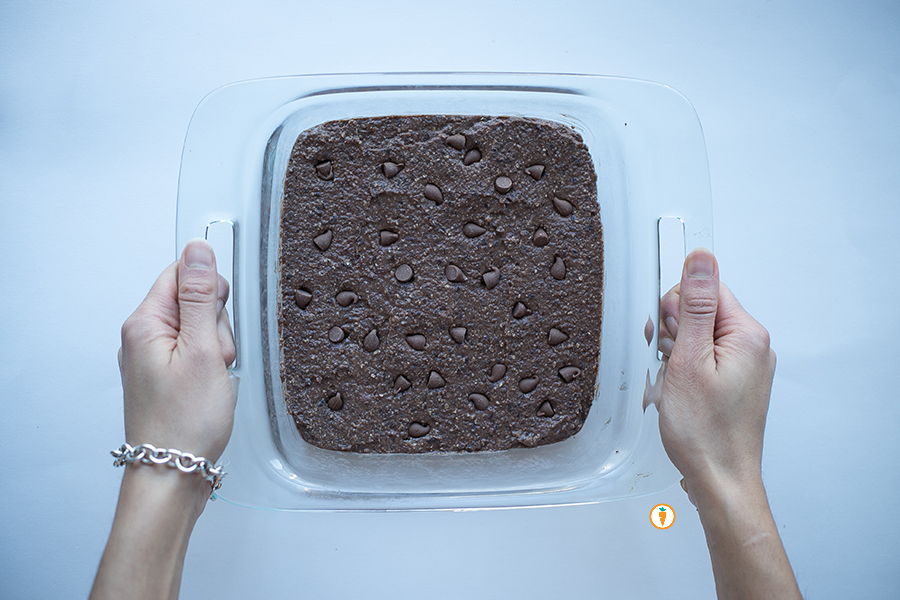
Before it goes into the oven.
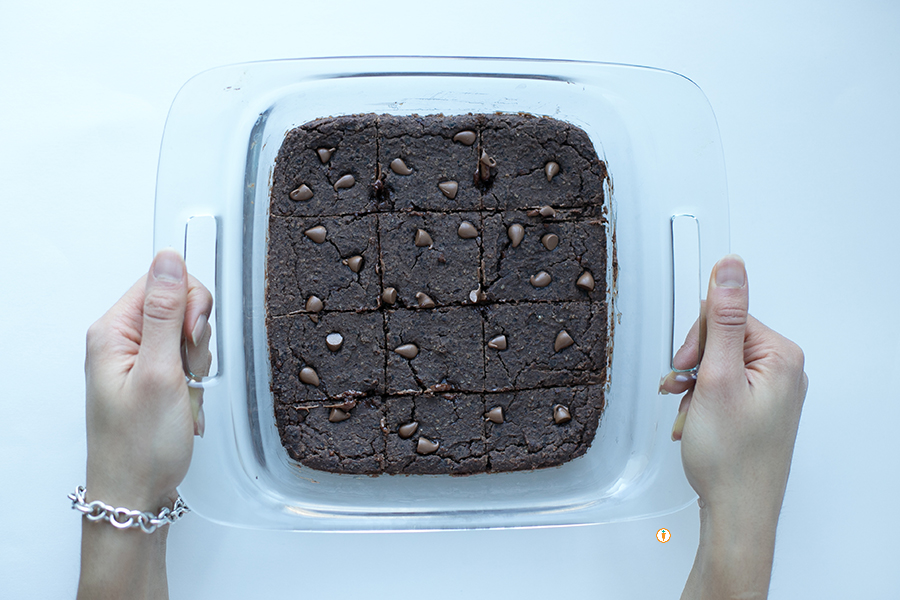
After it’s been baked.
Okay, okay. Enough with the chatter. Recipe below:
- 1½ cups black beans, drained and rinsed
- 2 tbsp cocoa powder
- ½ cup quick oats or rolled oats
- ¼ tsp salt
- ⅓ cup maple syrup
- ¼ cup unsweetened applesauce
- 1 tbsp canola oil
- 2 tsp vanilla extract
- ½ tsp baking powder
- ½ cup chocolate chips
- Preheat oven to 350 F.
- Place oats into the bowl of a food processor and pulse until it resembles coarse flour.
- Add remaining ingredients except chocolate chips into a food processor and blend until completely smooth.
- Fold the chocolate chips into the batter.
- Place mixture into a greased 8×8 pan.
- Optional: sprinkle extra chocolate chips over the top.
- Cook the black bean brownies 20 minutes. Allow it to cool and set at least 10 minutes before trying to cutting into it. If they still look a bit undercooked, you can place them in the fridge overnight and they will magically firm up! Makes 12 brownies
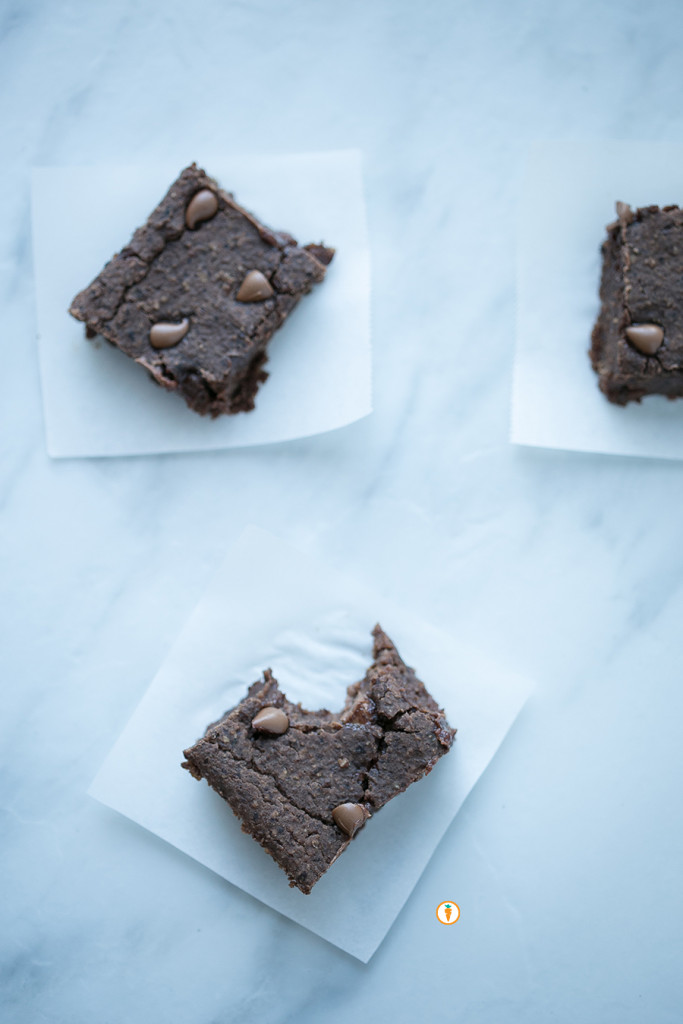
These photos were taken by Ceone Dyck, 4th Year Human Nutritional Sciences student. To learn more about Ceone click here or follow her on Facebook.
– With Love, Carrots and Cake,

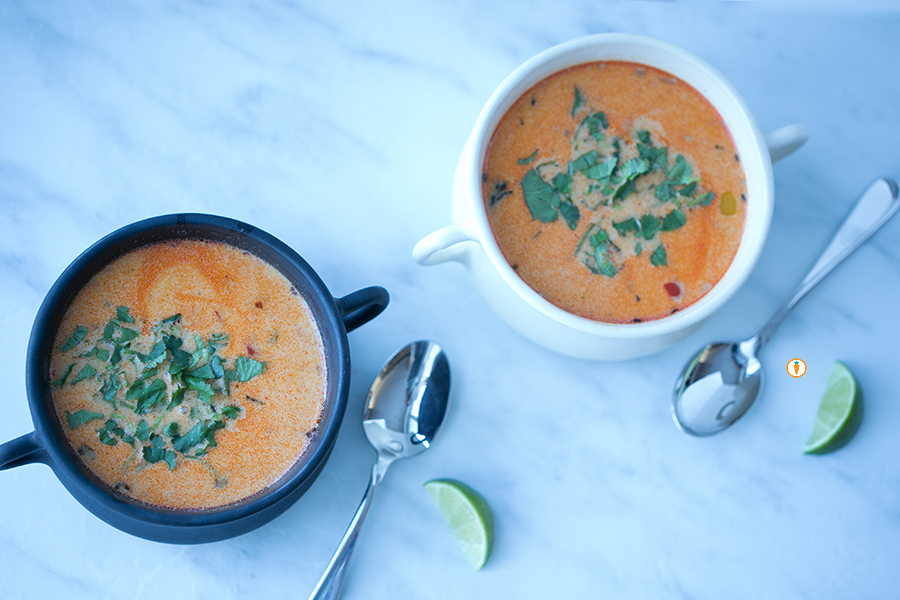 Remember a few posts ago I talked to you about living in Winterpeg, Manisnowba (Winnipeg, Manitoba). Well, the past two weeks have been cold. Like, hella cold. What’s a girl to do? Make curry! Curries are enjoyed all over the world and although they may appear complicated, they don’t have to be! Plus, during these winter months I find a bowl of curry just heats from the inside out.
I love many variations of curry but this winter I find myself cooking quite a bit of Thai inspired dishes (ahem, husband, please fly me to Bangkok). I love the richness of coconut milk, the flexibility in produce that I can use and the aroma it leaves in my home.
For this recipe my veggies included:
- Sweet potato
- Red Bell Pepper
- Yellow Bell Pepper
As far as fat goes, I chose to use canola oil. As many of you might gather, it’s one of my staple liquid fats around the house. But that doesn’t mean you have to follow my suite. Other fat options include:
- coconut oil
- grapeseed oil
- olive oil
- avocado oil
- camelina oil
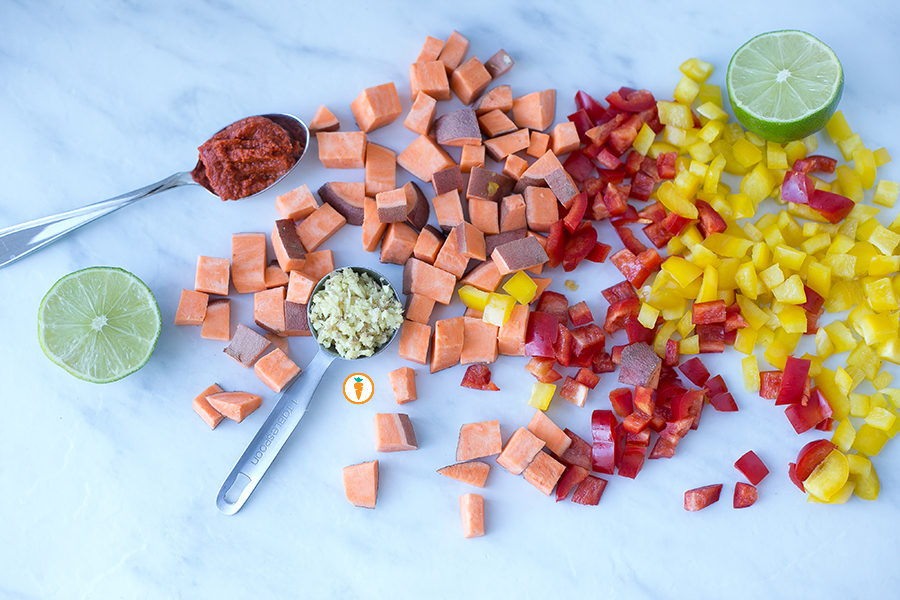
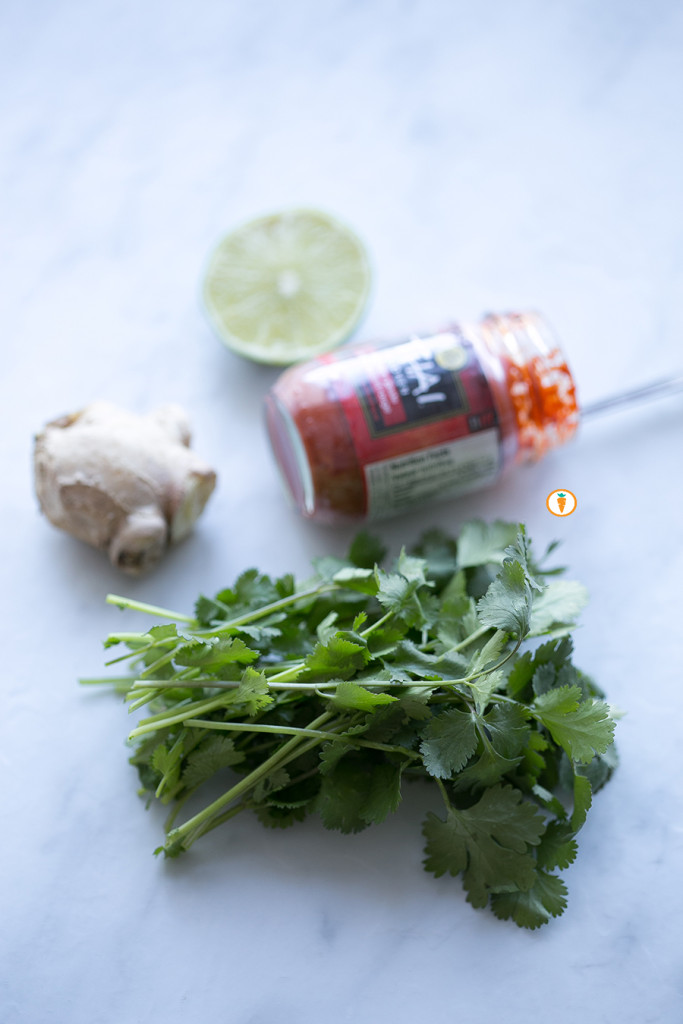
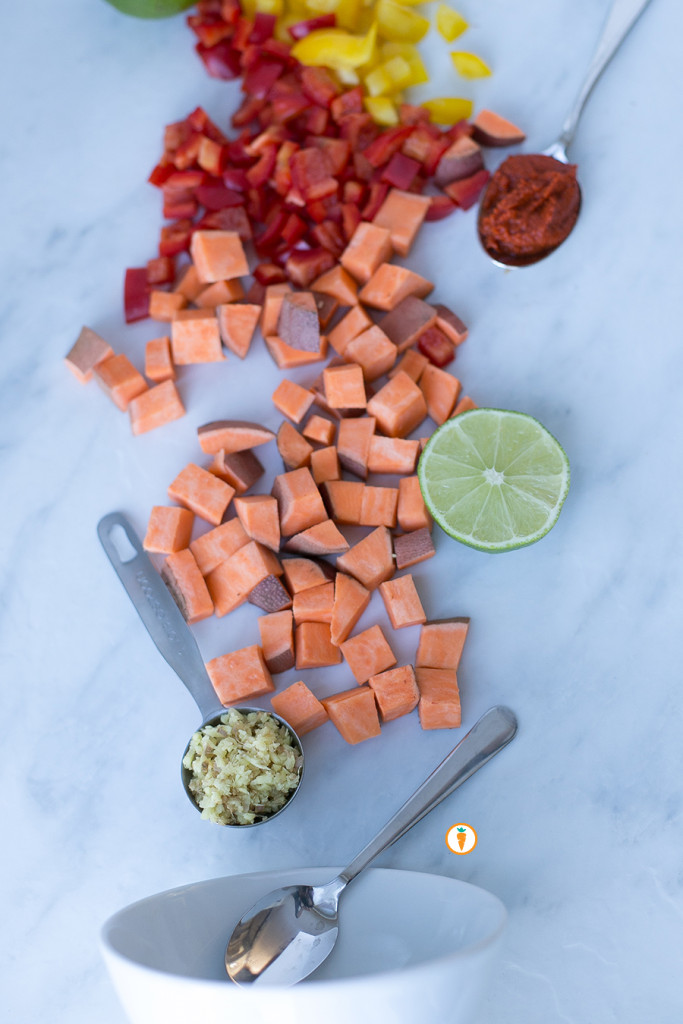
You can certainly try your hand at making your own curry paste – that’s something I haven’t ventured into just yet. Or, you can purchase a ready-made paste such this product by Thai Kitchen. Now, if you fancy other veggies or proteins, the options are endless:
- Onion
- Bamboo shoots
- Snow peas
- Mushrooms
- 2 chicken breasts, cubed
- Edamame beans
- etc.
Once you’ve tried this recipe. Try it again and get creative with all types of ingredients and spices.

Easy as ONE, TWO, THREE.
Okay, okay. Rant over. Recipe below.
- 2 tbsp canola oil
- 1 tbsp ginger, minced
- 1 tbsp cilantro stalk, minced
- 2 tbsp Thai red curry paste
- 1 ½ cup cubed sweet potato (leave the skin on, fibre! This is about 300 grams)
- ½ red bell pepper, diced
- ½ yellow bell pepper, diced
- 800ml low sodium vegetable broth
- Pinch of salt, black pepper and red chilli flakes (all optional)
- 1 can coconut milk (14oz or approx. 400ml)
- 1 cup tofu, cubed into 1” pieces (medium-firm or firm)
- ½ lime
- Cilantro, to garnish
- In a medium sized pot heat canola oil, ginger, cilantro stalk and red curry paste. Heat over low-medium temperature just until the ginger and cilantro stalks begin to sizzle.
- Add in cubed sweet potato, red bell pepper and yellow bell pepper. Give the mixture a whirl ensuring the paste has smothered all the veggies. Cook for 5 – 6 minutes on medium heat ensuring you’re stirring the contents every minute or so.
- Pour in vegetable broth. Add in your desired pinch salt, black pepper and red chilli flakes.
- Once the vegetable broth has come to a boil, allow the sweet potato to be cooked through until they are soft. About 12 minutes.
- Once potatoes have been cooked, turn the heat down to low-medium and pour in coconut milk. Allow the mixture to heat through.
- Using a potato masher, mash some of the mixture to create a thick curry. Or if you prefer, feel free to blend a portion of the curry using an immersion blender or any other blender you may have.
- Gently add in tofu cubes, juice of ½ lime and cilantro.
- Serve.
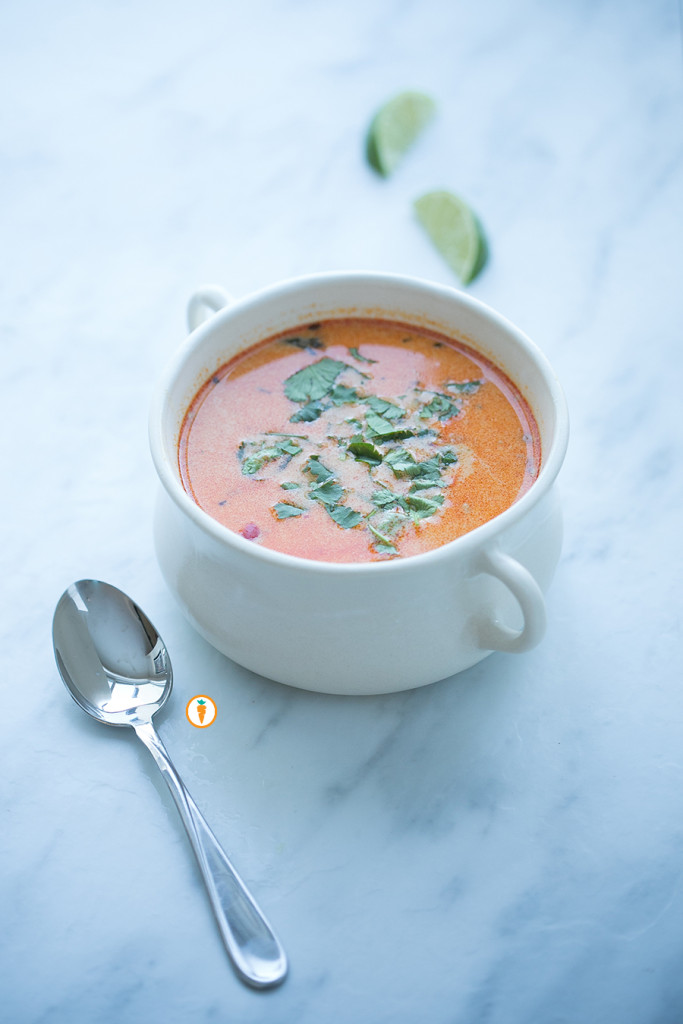
Food photography done by the talented Ceone Dyck. To learn more about Ceone click here or follow her on Facebook.
Don’t forget to follow Carrots and Cake on Instagram to see tiny square snap shots of my life.
– With Love, Carrots and Cake,

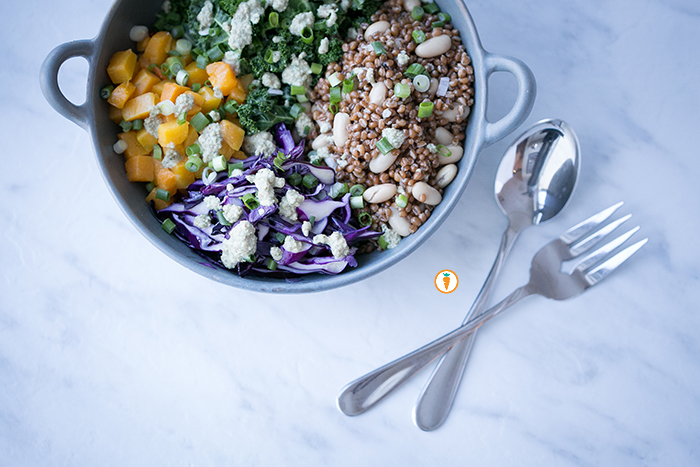
Who knew winter veggies could be so colourful?
Earlier this week on the blog we shared some tips on how keep things “fresh” when it comes to salads. If you missed that post, click here. This time around we’ve enlisted other veggie varieties to create a salad.
This time around I opted to roast butternut squash for a nutty flavour that just-so-happens to be pretty to look at. Butternut squash is particularly rich in beta-carotene which is what gives the flesh a bright orange colour. In our body beta-carotene is tactfully converted to vitamin A. This under-rated nutrient imparts anti-cancer benefits, helps our immune system, acts as an anti-oxidant and helps to fight signs of aging (yes please!).
Side note: I actually use frozen pre-chopped butternut squash. Frozen produce is often priced well and the nutrient content is just the same. With our busy schedules I often don’t have the time (or strength) to cut through a squash. Now that’s a convenience food I’m down for.
For the starch component I opted to use wheat berries. New to this grain? Actually, you’re not! Wheat berries are intact WHOLE-wheat kernels! That’s what your all-purpose and whole-wheat flour are milled from. Once cooked (basically you boil the crap out of them) they have a mild nutty flavour that most of us can enjoy. This whole grain is great in a salad because it has a chewy texture that holds it’s shape (aka it won’t get soggy on you). Because wheat berries go through minimal processing they retain a lot of vitamins, minerals and antioxidants making it an A+ choice for your salad.
Side note: I got my hands on these beautiful wheat berries when I was at Canola Harvest Camp visiting a grain elevator. I made friends with a fellow farmer and she hooked me up with a stash. Score!
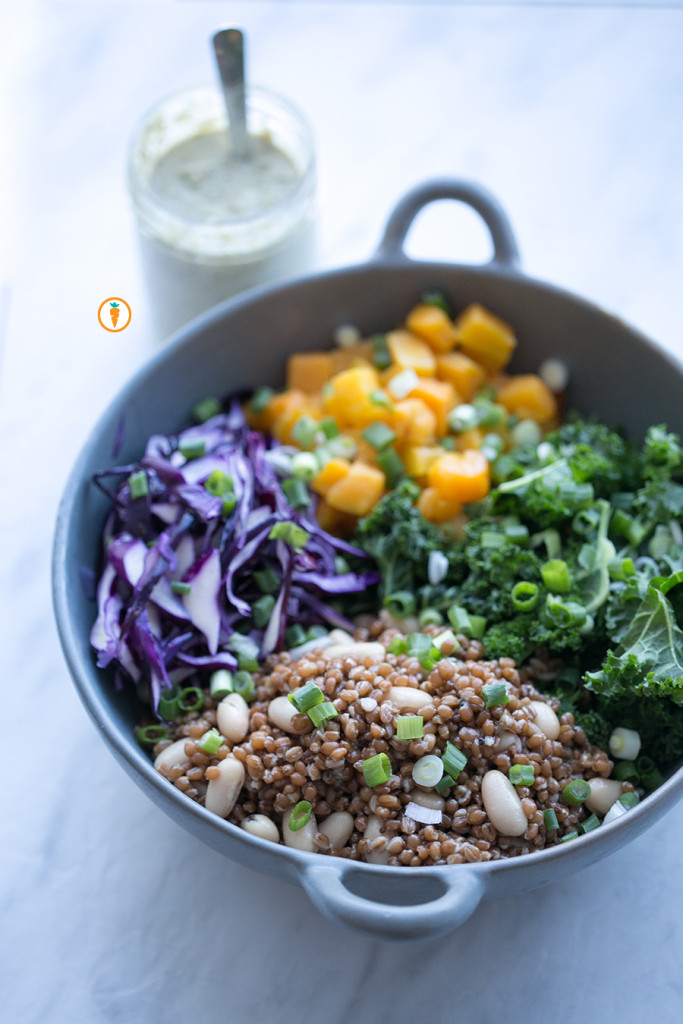
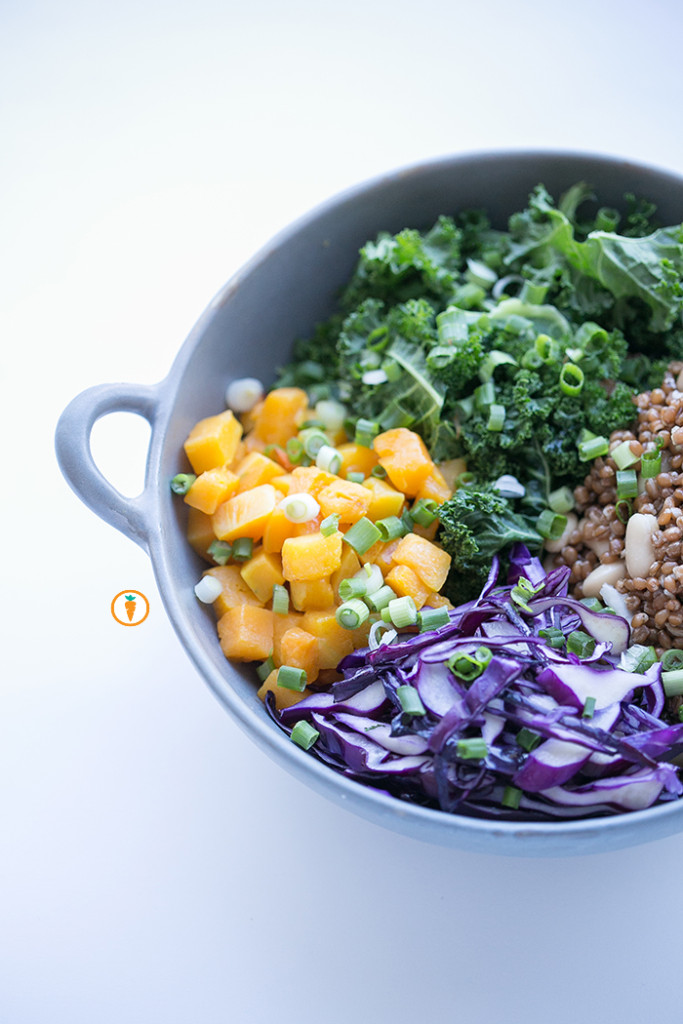
Now in the last post we talked about how you should dress your salad. Here, I’m going to get you out of your comfort zone to make a creamy salad dressing using seeds. Yeah! Pumpkin seeds! The inspiration for this dressing came from a plant based blog My New Roots. The final product is a really interesting one – the dressing has a grittiness to it and tastes lovely on the bed of veggies. It won’t drizzle like a typical dressing so don’t be alarmed.
Okay, okay. Enough with the nutrition rant. Look below to learn more about how I assembled the salad:
- ½ cup wheat berries
- Butternut squash, cubed (use as much as you would like)
- Kale
- Red cabbage, shredded thinly
- White kidney beans or cannellini
- Green onion, chopped
- 1 tsp olive oil
- ½ cup pumpkin seeds
- 1 clove garlic
- 1 - 2 tbsp maple syrup
- 2 tbsp olive oil
- 1 tbsp white wine vinegar
- Juice of half a lemon
- ¾ water
- Pinch of salt and black pepper
- Rinse wheat berries under water to ensure they are clean.
- Bring 1¼ cup water to a boil on the stove. Add rinsed wheat berries to the boiling water and stir. Once water starts to boil again, turn the heat to low, cover, and simmer for 45 minutes to 1 hour. You know the wheat berries are done when they are soft.You'll have enough wheat berries for 2 - 3 servings.
- While your wheat berries are cooking toss your butternut squash with olive oil and roast in the oven for 20 minutes at 350 degrees celsius or until they are cooked through.
- Massage 1 tsp of olive oil into your kale. This helps to soften the kale so it's not so tough.
- Once your wheat berries and squash are ready, assemble the remaining salad ingredients into a salad bowl (shredded cabbage, white kidney beans, kale and green onion). Add as much or as little of each ingredient as you wish (yup, you decide what and how much you want).
- For the dressing: toast pumpkin seeds in a non-stick pan over low heat for 10 - 12 minutes until they become fragrant. In a food processor blend: cooled pumpkin seeds, garlic, maple syrup, olive oil, vinegar, lemon juice and water. Season as desired with salt and black pepper.
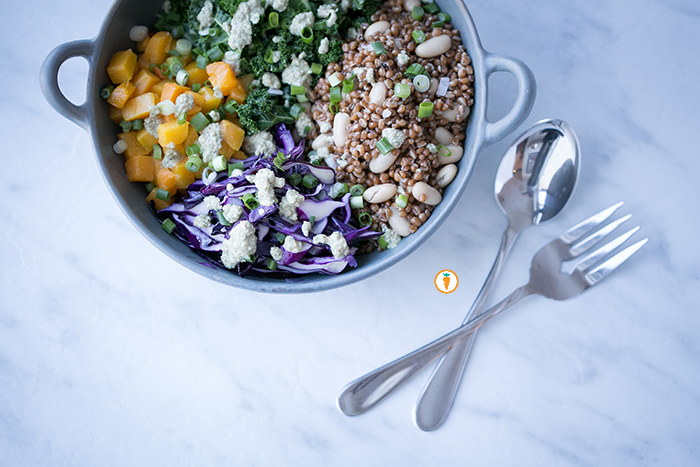
This recipe was created with the help of Christy Lai, 4th Year Human Nutritional Sciences student. Follow Christy on Instagram, trust me, you’ll want to. Food photography done by the talented Ceone Dyck. To learn more about Ceone click here or follow her on Facebook.
– With Love, Carrots and Cake,

